Syndesmosis injury: Fibulo-tibial positioning screw
1. Injuries to the syndesmosis
In twisting injuries of the ankle which result in a high fibular fracture (Lauge-Hansen pronation external rotation injuries) there is a disruption of the syndesmosis. It may also be injured in some transsyndesmotic fractures.
If the syndesmosis is disrupted, the fibula needs to be held in the correct position in relation to the tibia whilst the ligaments heal.
There are differences of opinions between surgeons as to:
- whether and in which circumstances one or two screws should be used
- whether the syndesmosis positioning screw(s) should penetrate one or both cortices of the tibia
- whether and when the screw(s) should be removed
- whether the screw(s) are better placed through or adjacent to a plate on the fibula
Comment to high fibular fractures
The fracture of the proximal fibula is only indirectly reduced and not directly fixed. This fracture type is the most unstable type, always resulting in an instability of the syndesmotic complex. Restoration of length, axis and rotation of the fibula are of primary concern. Accompanying fractures are fixed thereafter.
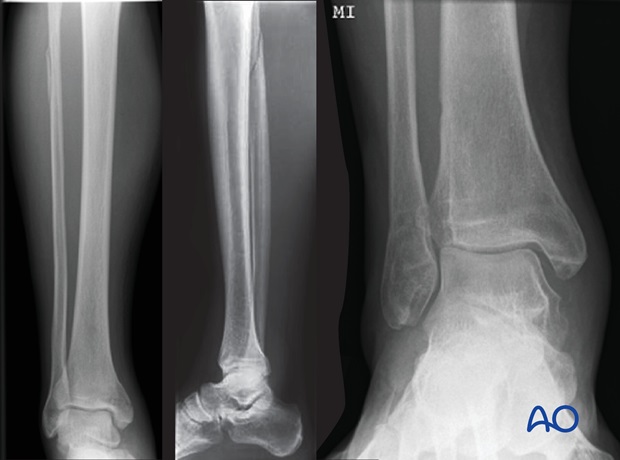
The instability of the ankle joint is treated with two positioning screws after exploring the syndesmotic complex and achieving perfect reduction of the distal tibiofibular joint.
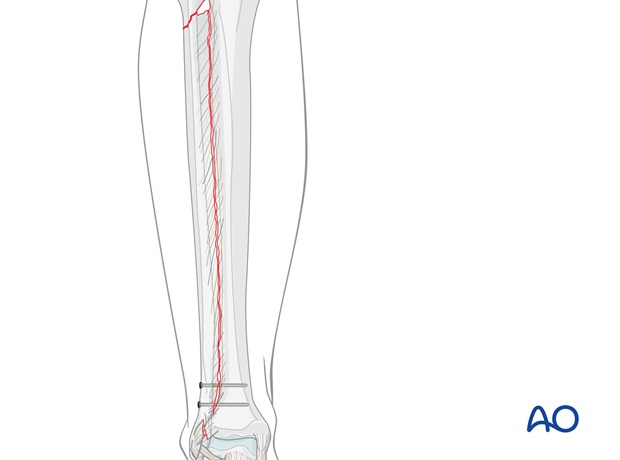
2. Assessment of the syndesmotic complex
After stabilization of all fractures as appropriate, the stability and reduction of the syndesmotic complex must be assessed.
Use a small bone hook to pull the fibula laterally to examine the syndesmotic complex. Remove any bony fragments from the distal tibiofibular joint.
Test for antero-posterior translation of the fibula by pushing and pulling the fibula with the fingers, or a bone hook.
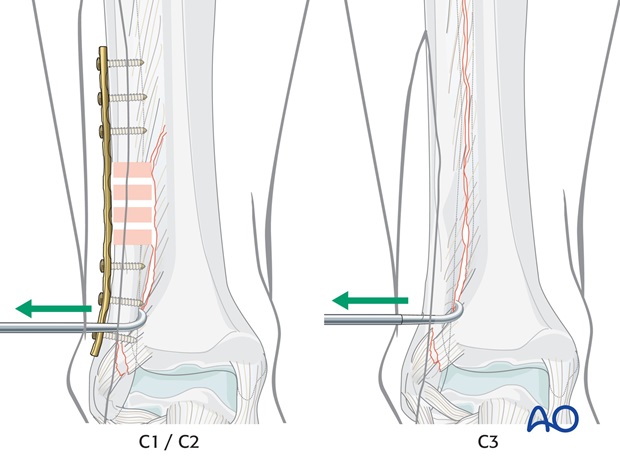
3. Reduction
Restoring length, axis and rotation of the fibula
If the fibula is displaced, make sure it is properly reduced.
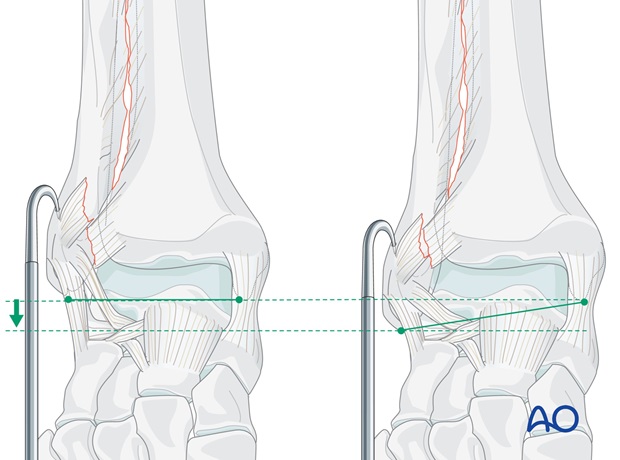
Use a small bone hook to pull the lateral malleolus distally if necessary, until perfect congruence of the distal tibiofibular joint is achieved.
Check rotation, length and antero-posterior translation of the fibula, by intraoperative radiology and/or direct visual inspection of the syndesmosis. Fix the reduction with a K-wire, if necessary.
Preliminary fixation with a K-wire
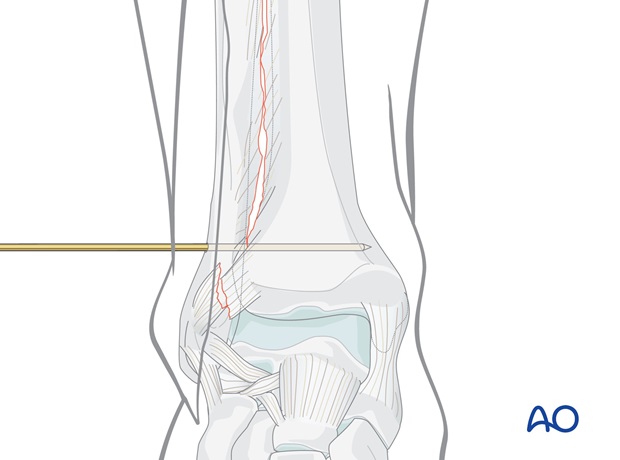
Fix the reduction with a 2.0 mm K-wire, inserted from the lateral side, distal to the planned distal screw and 1-2 cm above the joint line. The position of the ankle joint during this maneuver should be in neutral.
Confirm reduction under image intensification in both planes. Reduction must be anatomical. Compare with the uninjured ankle.
Pitfall
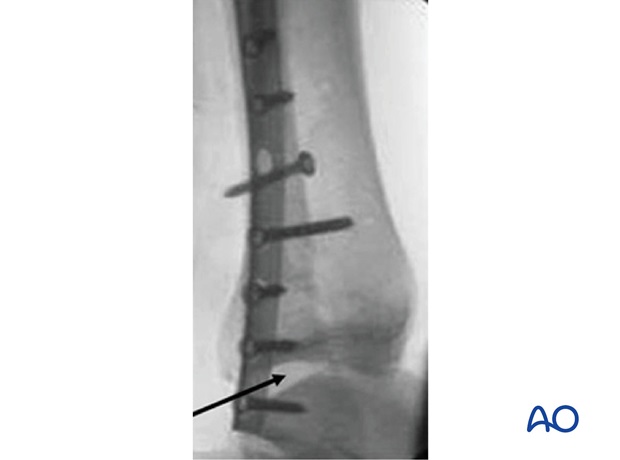
If reduction in the anterior-posterior direction is not anatomical, the congruity of the tibio-talar joint in the lateral view is not perfect, ie, the joint lines are not perfectly aligned.
4. Fixation of the syndesmotic complex
Drilling
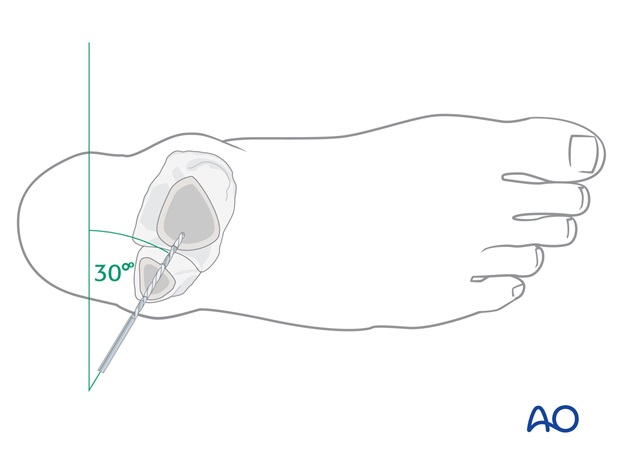
Drill a 2.5 mm hole through the fibula and the lateral cortex of the tibia, just proximal to the inferior tibiofibular joint, 30 degrees from posterior to anterior, parallel to the tibial plafond, with the ankle joint in neutral position.
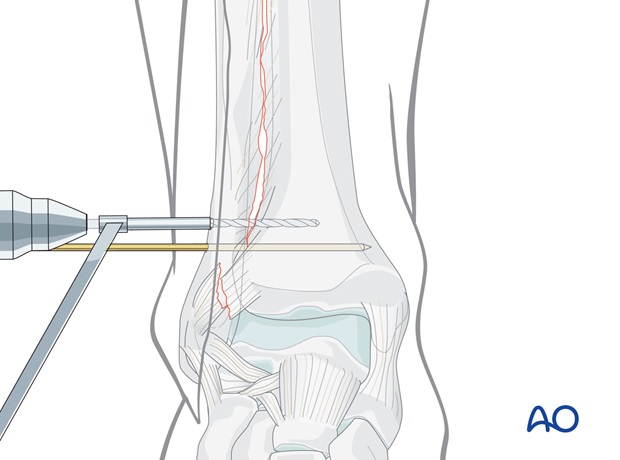
If the fibular fracture was treated with a plate at this level, the screw may be placed through a hole in the plate.
Screw insertion
Use a depth gauge to determine the length of the screw.
As this screw is not intended to act as a compressive lag screw, the thread must be tapped in both fibula and tibia.
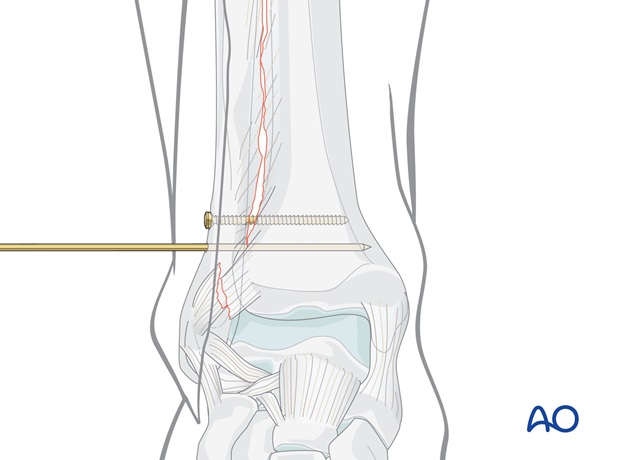
Tap the thread and insert a 3.5 mm or 4.5 mm cortex screw.
The foot position during positioning screw placement should be in neutral.
Check position and reduction under image intensification and compare with corresponding images of the uninjured ankle.
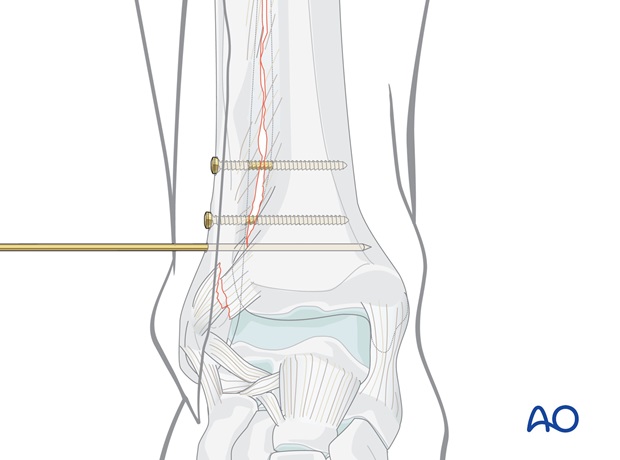
Some surgeons prefer two small fragment screws as syndesmotic screws, especially in high fibular fractures, such as the Maisonneuve injury.
Prepare and insert the second positioning screw as described above, parallel to, and 1.5–2 cm proximal to, the first screw.
Once satisfactory reduction and hold with screws has been confirmed, the K-wire is removed.
Note
Intraoperative x-rays or image intensification are advised, to confirm the position of the screw and the distal tibiofibular joint.
Following plating of a multifragmentary fracture, or when a high fibular fracture has not been fixed, postoperative CT or MRI, to assess the rotation of the fibula at the level of the syndesmosis of both ankles, is strongly advised.
5. Pitfall
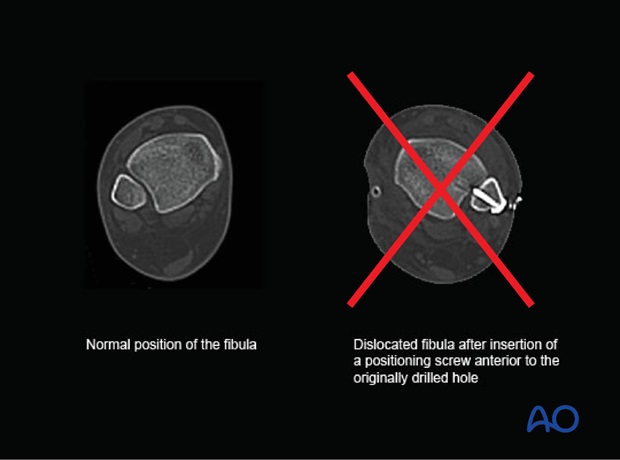
If the positioning screw does not follow the drill hole precisely, displacement of the fibula is possible. Carefully maintain the position of the fibula when inserting the screw.
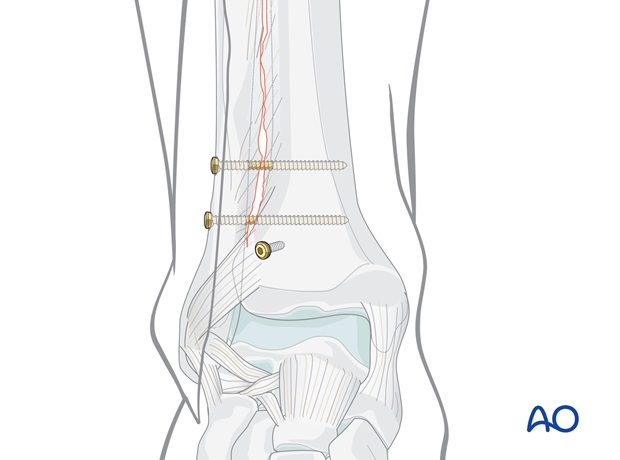
6. Fixation of anterior syndesmotic injury
Avulsion from the anterior tibial tubercle (Tillaux-Chaput)
Reduce the fragment with a small dental hook and preliminarily fix it with a 1.0 mm K-wire.
Drill a hole with a 2.5 mm drill bit and protection sleeve, as perpendicularly as possible to the fracture line, without drilling the far cortex.
Measure the depth. Tap the fragment only with the 4.0 mm tap and protection sleeve. Insert the chosen 4.0 mm cancellous screw with a washer.
Note
If the fragment is too small for 4.0 mm screw fixation, use a 2.0 mm cortex screw or suture the fragment to the periosteum of the anterior tibia.
Avulsion from the fibula (Le Fort lesion or Wagstaff fragment)
Usually, the fragment is very small. In this case suture it to the fibular periosteum. If the fragment is large enough, lag screw fixation can be used.
