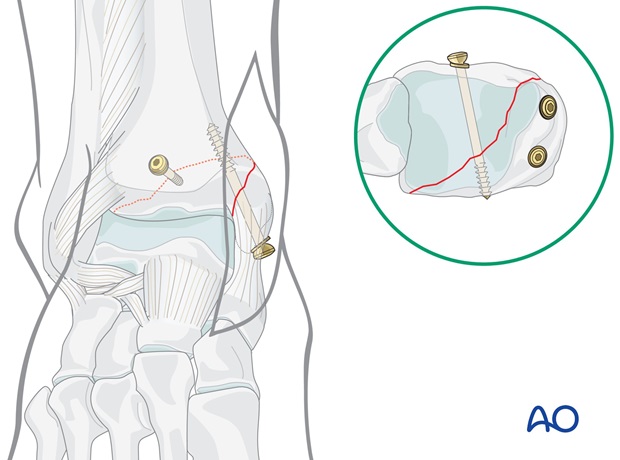
Posteromedial extension fracture: lag screw
1. Lag screw principles
The thread pulls the head of the screw and therefore, the malleolar fragment towards the main body of the tibia.
The smooth shaft of the screw prevents any significant hold between itself and the surrounding bone.
The length of the screw chosen is based on the principle that all thread must lie proximal to the fracture plane. Be careful not to choose a screw that is too long, as its thread will come to lie in the more fatty cancellous bone of the metaphysis, rather than in the denser bone of the former epiphysis.
To prevent the screw head from sinking into the thin malleolar cortex, the use of a washer is recommended.
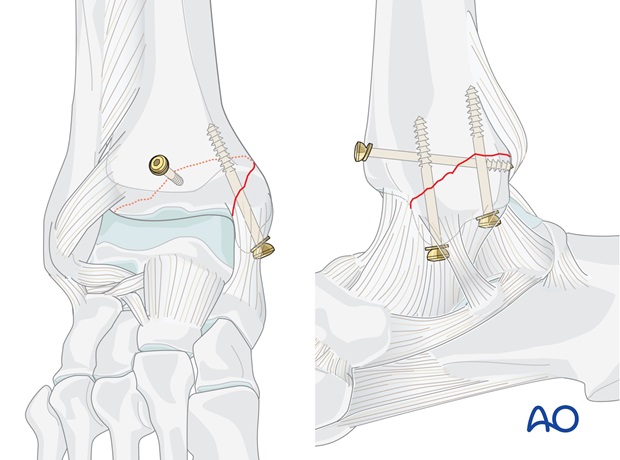
2. Reduction
Cleaning the fracture site
It is important to visualize and inspect the joint, searching for bone and cartilage fragments detached from the medial malleolus or from the talus.
Anatomical reduction
Reduce the fracture anatomically with the use of small pointed reduction forceps taking care with the soft tissues.
Do not strip the periosteum more than necessary.
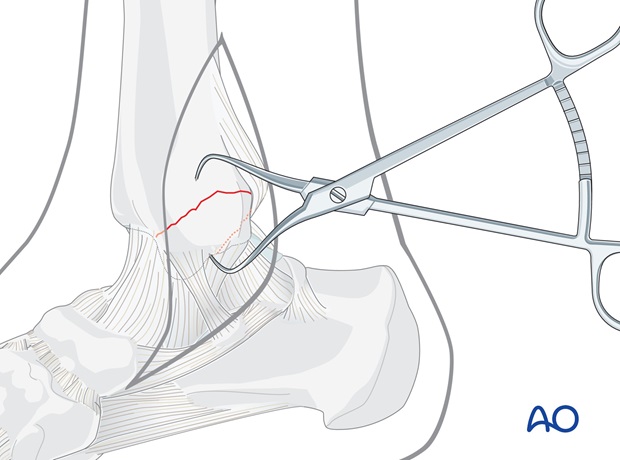
Preliminary fixation
Insert a 1.6 mm K-wire as perpendicularly as possible to the fracture plane.
As decided in preoperative planning, this K-wire should occupy the planned position of the posterior screw.
Check the reduction under image intensification.
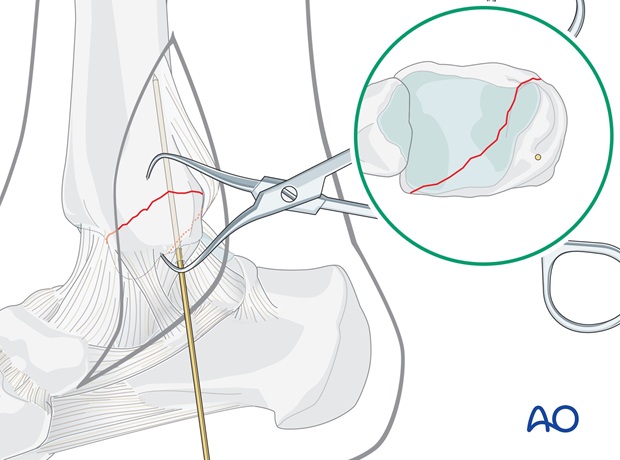
3. Fixation
First lag screw
Make a stab incision through the deltoid ligament. With the protection of the drill sleeve, drill a 2.5 mm hole as perpendicularly as possible to the fracture plane, parallel and anterior to the K-wire. Do not drill the lateral cortex of the tibia. Care must be taken to avoid penetration of the ankle joint.
Keeping the drill in place, check its position and the reduction under image intensification.
Measure the drill depth and tap the medial cortex only with the 4.0 mm cancellous bone tap, using the protection sleeve.
The chosen 4.0 mm cancellous bone screw should come to rest with its threads completely beyond the fracture line. The use of a washer is recommended, especially in osteoporotic bone. Insert the screw without excessive tightening.
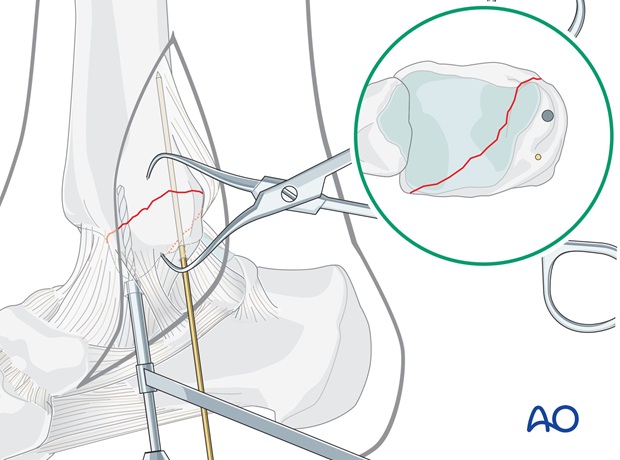
Replacing the K-wire
Remove the K-wire. Make a stab incision through the deltoid ligament and widen the wire track with a 2.5 mm drill and protection sleeve.
After measuring the length and tapping the drill hole in the medial malleolar fragment only, insert the second 4.0 mm cancellous bone screw.
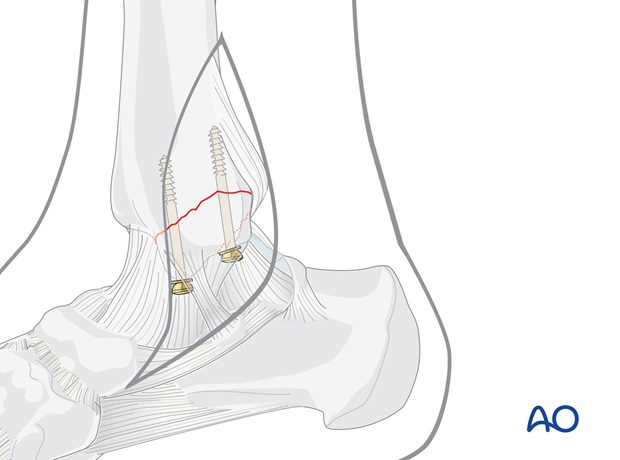
Anterior-posterior lag screw
Through a separate stab incision, taking care not to injure the tendons or neurovascular structures, the chosen 4.0 mm cancellous bone screw is inserted from anterior to posterior. It should come to rest with its threads completely beyond the fracture line. The use of a washer is recommended, especially in osteoporotic bone.
If the threads of the cancellous bone screw come to lie on both sides of the fracture line, it may be replaced by a cortex lag screw, finding purchase in the posterior tibial cortex.
