Medial, oblique or vertical fracture: lag screw
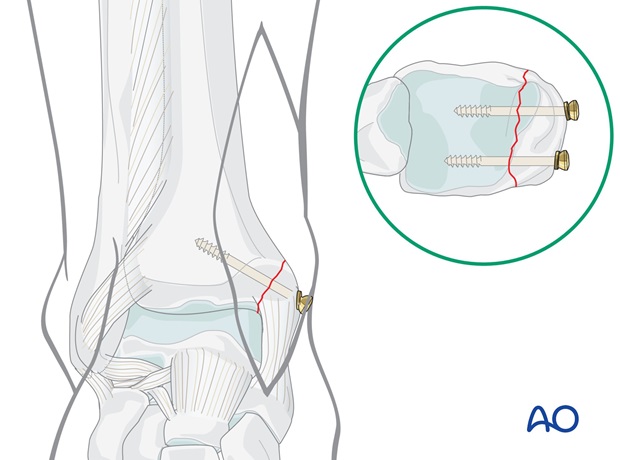
1. Lag screw principles
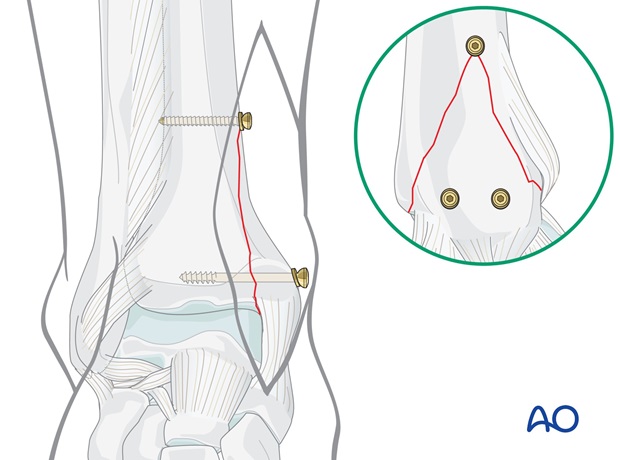
As the thread advances in the main body of the tibia, the head pushes the medial fragment towards the tibia.
The smooth shaft of the screw prevents any significant hold between the screw and the surrounding bone.
The length of the screw shaft must be chosen so that the threaded part of the screw lies fully beyond the fracture line and within the epiphyseal cancellous bone of the distal tibia.
To prevent the screw head from sinking into the thin cortex, the use of a washer is recommended.
In a vertical fracture, provided the fragment is large enough and the bone quality is good enough, two or even three lag screws on their own may be sufficient. If in doubt, a buttress plate may be more secure.
2. Reduction
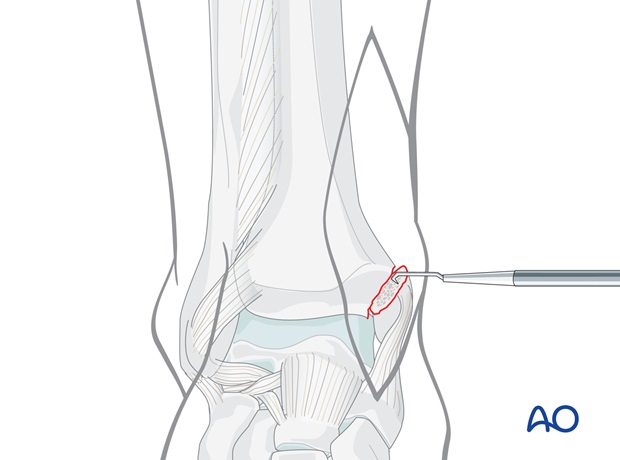
Cleaning of the fracture site
Remove any small, loose fragments which may prevent anatomic reduction and free the periosteum from the bone edges.
It is important to visualize and inspect the joint, searching for bone and cartilage fragments detached from the medial malleolus or from the talus, and any impaction of the articular surface at the margin of the fracture. If the articular surface has been impacted, this must carefully disimpacted before the medial fragment is reduced.
Anatomical reduction
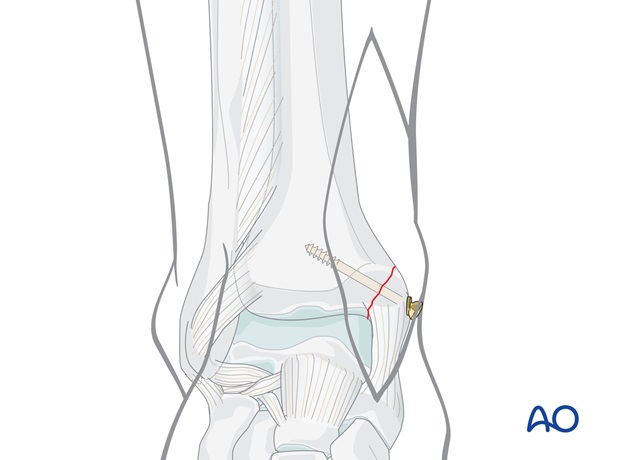
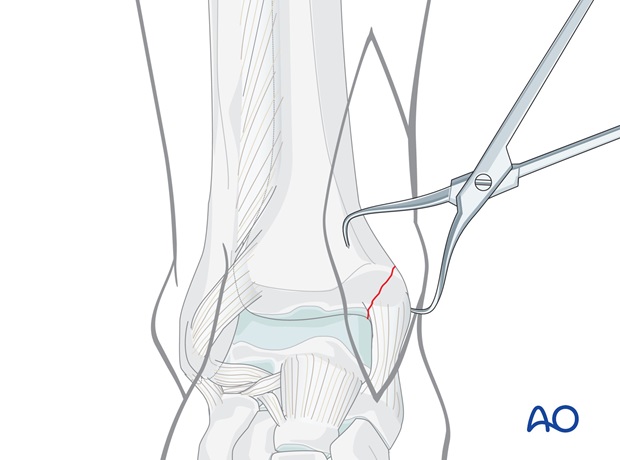
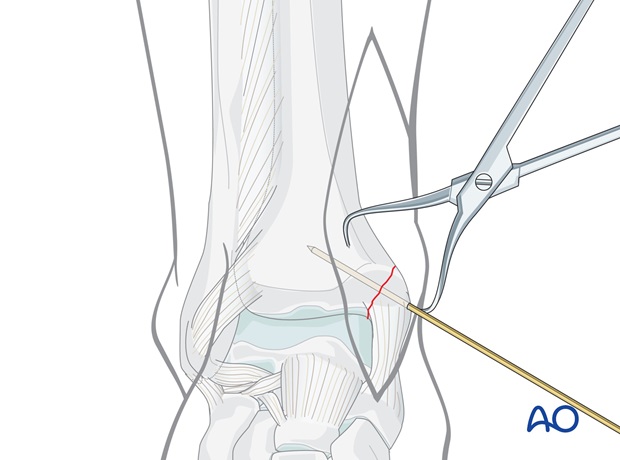
Reduce the fracture anatomically with the use of small pointed reduction forceps, taking care with the soft tissues.
Depending on fracture configuration and size of the fragment you may need to use large pointed reduction forceps through a lateral stab incision.
Do not strip the periosteum more than necessary.
In the presence of an impacted medial corner fragment, gently open the main vertical fracture plane by retraction of the medial malleolus medially (opening the book). The impacted “corner” fragment, usually identifiable by its articular cartilage, after irrigation if necessary, can then be seen.
Disimpact and carefully tease back the fragment into its anatomical position.
Then close the book by careful reduction of the medial malleolus.
Preliminary fixation
Insert a 1.6 mm K-wire as perpendicularly as possible to the fracture plane, about 1 cm proximal to the level of the horizontal tibiotalar joint line.
Check the reduction and position under image intensification.
3. Fixation
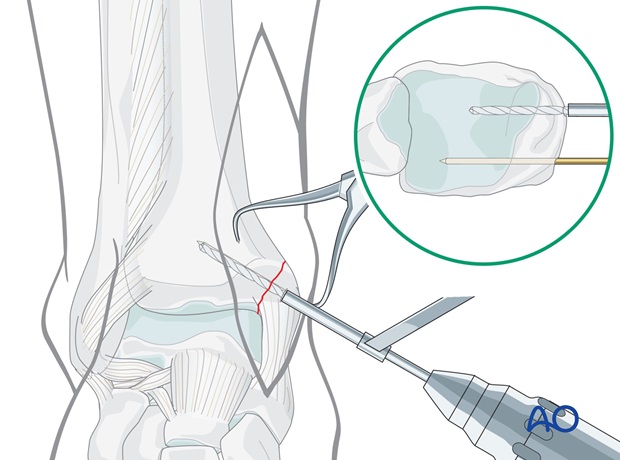
Drilling and tapping
With the protection of the drill sleeve, drill a 2.5 mm hole as perpendicularly as possible to the fracture plane, parallel and anterior to the K-wire. Do not drill the far cortex.
Care must be taken to avoid penetration of the ankle joint.
Measure the drill depth and tap the malleolar fragment only with the 4.0 mm cancellous bone tap, using the protection sleeve.
Insertion of the anterior screw
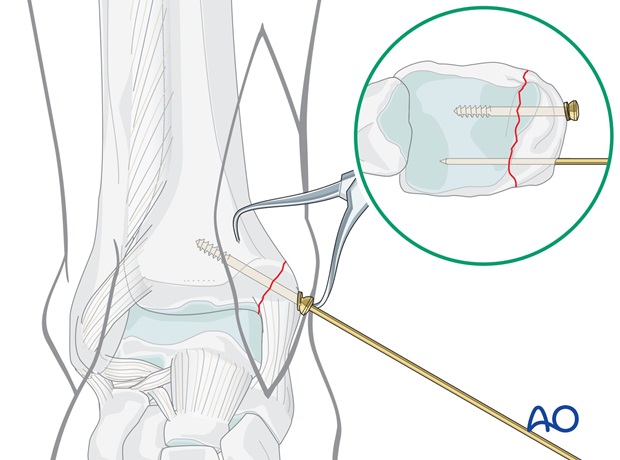
The chosen 4.0 mm cancellous bone screw to be inserted should come to rest with its threads completely beyond the fracture line.
The use of a washer is recommended, especially in osteoporotic bone.
Insert the screw without excessive tightening.
Insert posterior screw
Remove the K-wire and widen the K-wire track with a 2.5 mm drill and protection sleeve.
After measuring the length and tapping the malleolar fragment, insert the second chosen 4.0 mm cancellous bone screw.
The fracture will be suitably fixed with the two cancellous screws. The joint surface is now reconstructed.
Indication for a buttress screw
If the fracture line is vertical and has a proximal extension, or in the presence of a reduced medial "corner" fragment, the use of a third screw and washer at the apex of the fracture, acting as a buttress, may be helpful. In the elderly or noncompliant patient, it is often more secure to use a buttress plate.
Locate the apex of the fracture and drill a 2.5 mm hole through both cortices slightly proximal to this point. Place the hole close enough to the fracture line to enable overlapping of the distal fragment by the washer, thus creating a buttressing effect.
Using the protection sleeve, measure the depth and tap both cortices with the 3.5 mm tap.
Add 2 mm to the measured length to allow for the washer and insert the cortex screw with washer.
