Fibula, transverse fracture: cerclage compression wire
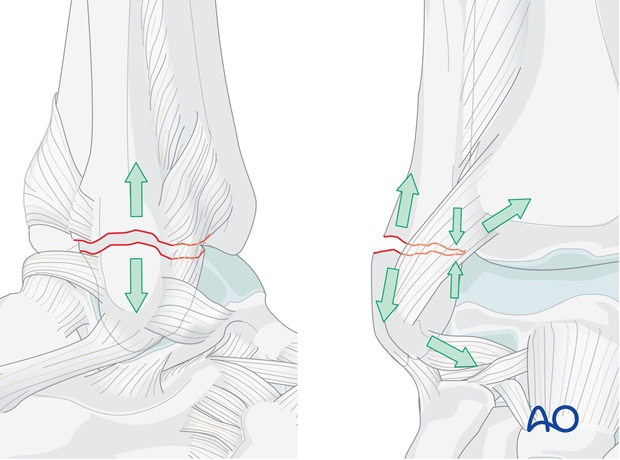
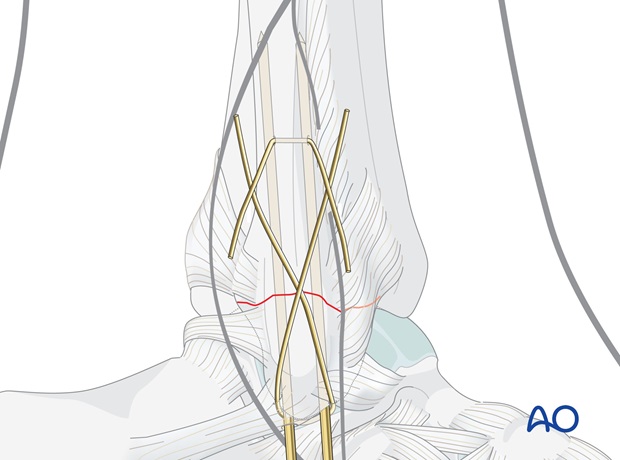
The figure-of-eight wire loop lies on the lateral surface of the lateral malleolus and acts as a cerclage compression wire when tightened.
Choose a wire of sufficient strength to withstand the tensile forces generated in the figure-of-eight loop (0.8 mm).
Note: “Cerclage compression wiring” was referred to as “Tension band wiring”. We now prefer the term “Cerclage compression wiring” because the tension band mechanism cannot be applied consistently to each component of the fracture fixation. An explanation of the limits of the Tension band mechanism/principle can be found here.
1. Reduction
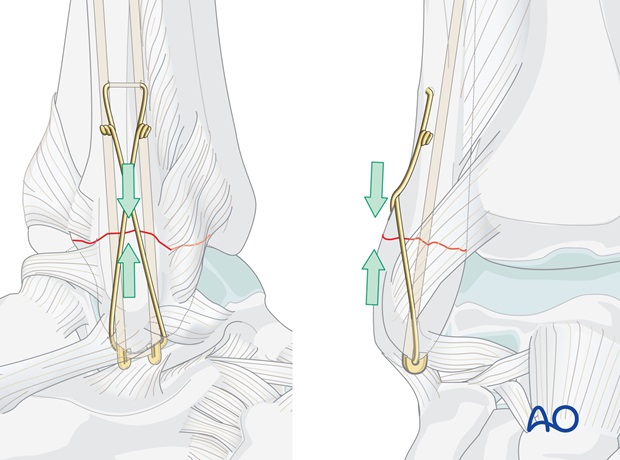
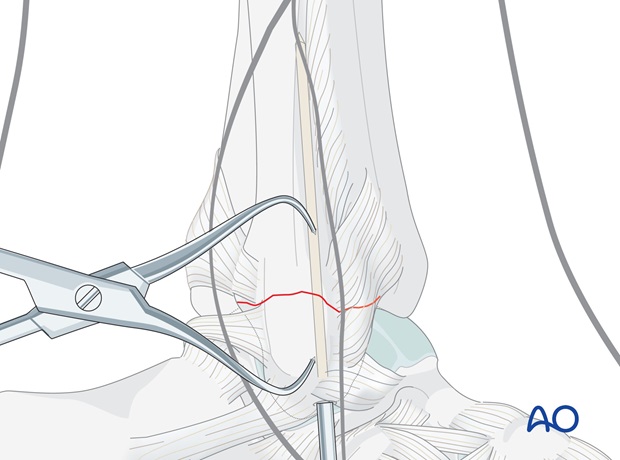
Reduction with small pointed reduction forceps
Reduce the fracture with small pointed reduction forceps.
Preliminary stabilization
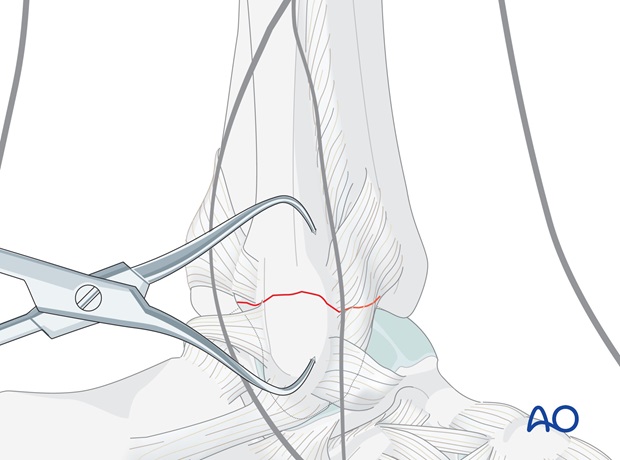
Drill a 1.6 mm K-wire parallel to the fibular axis into the anterior portion of the tip of the lateral malleolus using a 2.0 mm drill sleeve.
Insert the K-wire until its point reaches a minimum of 2.0 cm proximal to the antero-posterior drill hole for the wire.
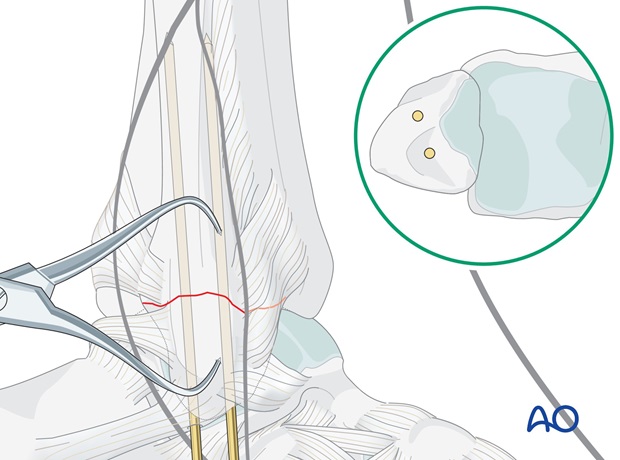
Insert a second K-wire
A second 1.6 mm K-wire is inserted parallel to the first one into the posterior portion of the tip of the lateral malleolus.
These two parallel K-wires stabilize the fracture against rotation and will anchor the figure-of-eight wire distally.
Check the reduction under image intensification.
2. Fixation
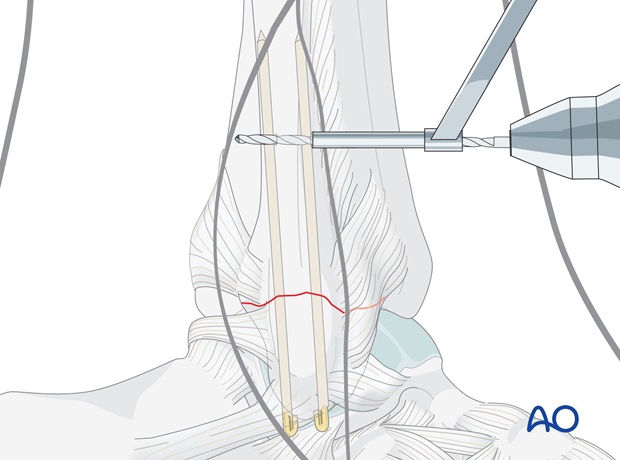
Drilling
Drill an antero-posterior hole with the 2.0 mm drill bit and protection sleeve, transverse to the long fibular axis, approximately 3 cm proximal to the fracture.
Keep soft-tissue dissection to a minimum.
Pearl
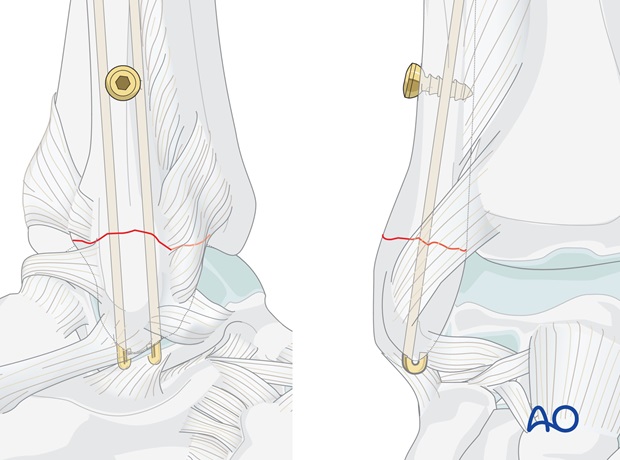
In osteoporotic bone, to avoid cutting out of the wire from the drill hole, a bicortical screw may be used as an alternative means of anchoring the proximal end of the wire.
Wire preparation and insertion
Prepare the 0.8 mm wire by making a loop approximately one third along its length.
Insert the shorter segment of the wire through this drill hole.
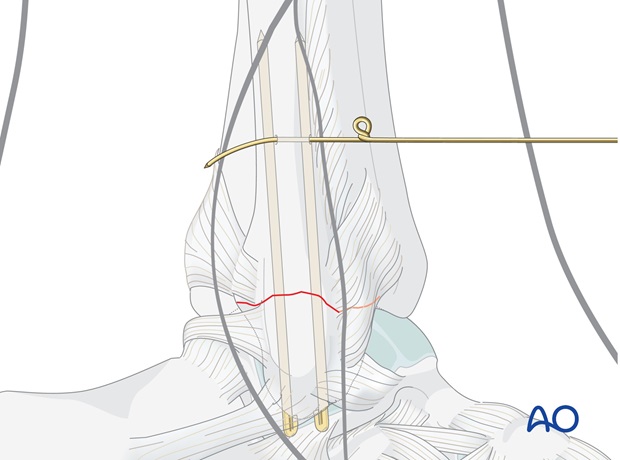
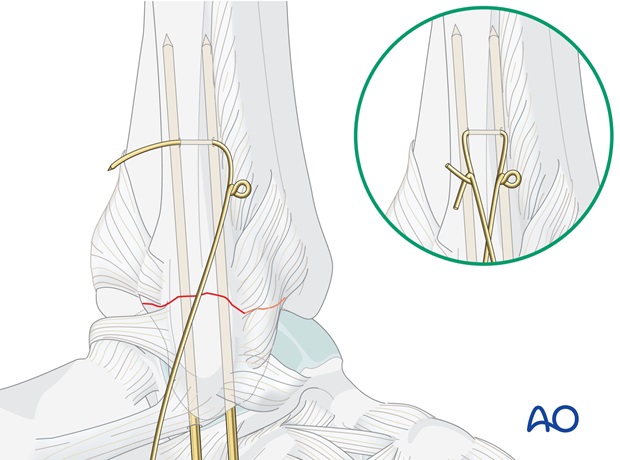
Figure-of-eight configuration
The small pointed reduction forceps can now be removed.
Pass the long segment of the wire (bearing the loop) in a figure-of-eight configuration around the protruding ends of the K-wires.
Twist the free ends of the wire firmly together.
Pearl
Some surgeons prefer to use two pieces of wire, twisting the ends together to create the figure of eight loop with a twist on each side.
Tightening the wire
The wire twist is loosely prepared ensuring that each end of the wire spirals equally, forming a double helix – avoid twisting one wire around the other (straight) wire.
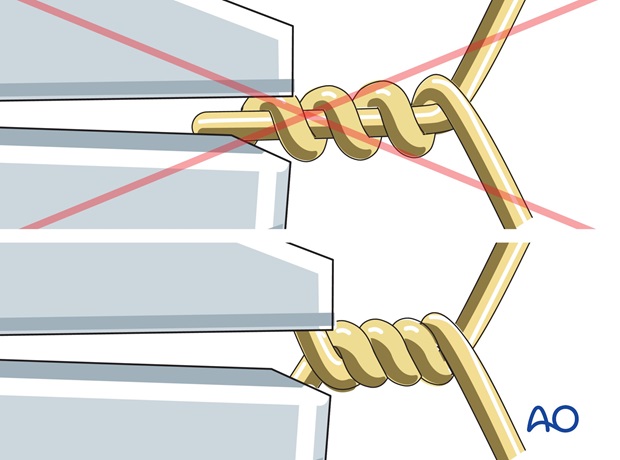
The wire is tensioned by pulling on the twists.
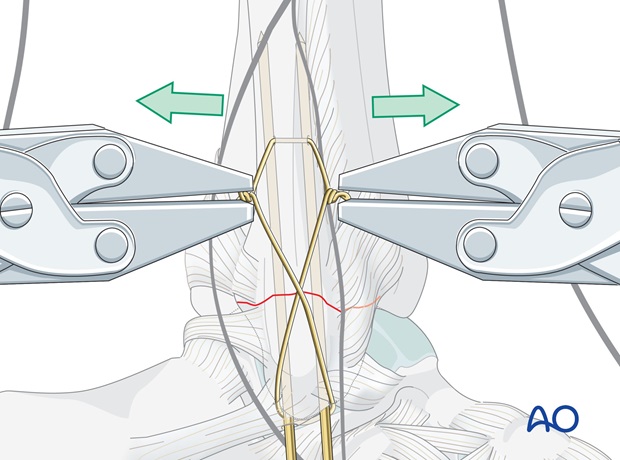
The slack is then taken up by further twisting. Repeat this until the desired tension is achieved. Both loops must be tightened at the same time and in the same direction, to achieve equal tension on both arms of the wire.
Note
In osteopenic bone care must be taken to avoid excessive tensioning.
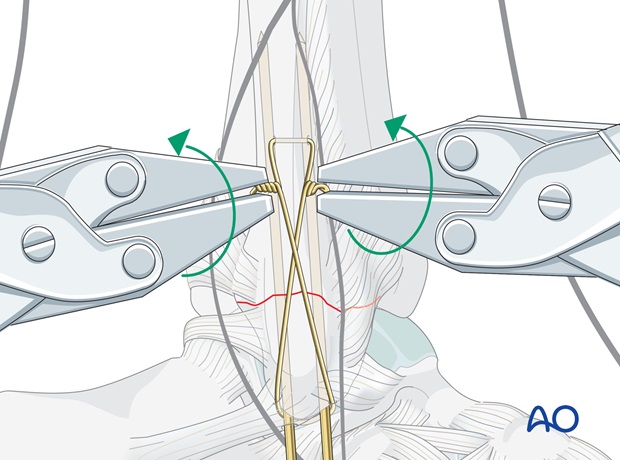
Prevent later soft-tissue irritation
Trim the twists and turn the ends towards the fibula in order not to irritate the soft-tissues later.
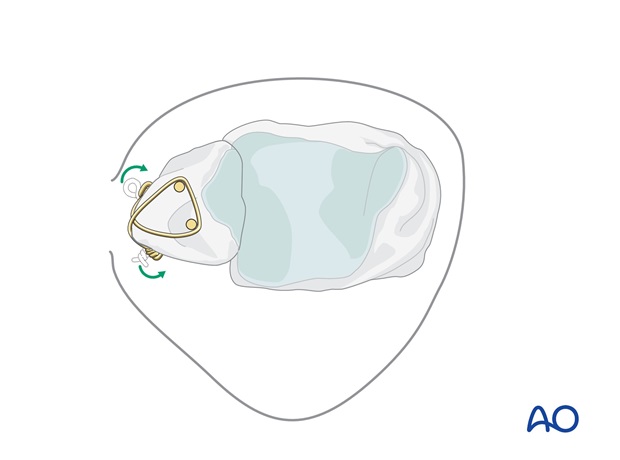
Sinking the K-wires
Cut the 2 K-wires obliquely approximately 1 cm from their insertion points and, with the help of a bending iron and forceps, bend through 180 degrees.
The K-wires are then driven home, sinking their curved ends into the bone in order to prevent backing out and skin injury.
Take final x-rays in both planes to check results.

