Fibula, oblique B fracture: lag screw and neutralization plate
1. Principles
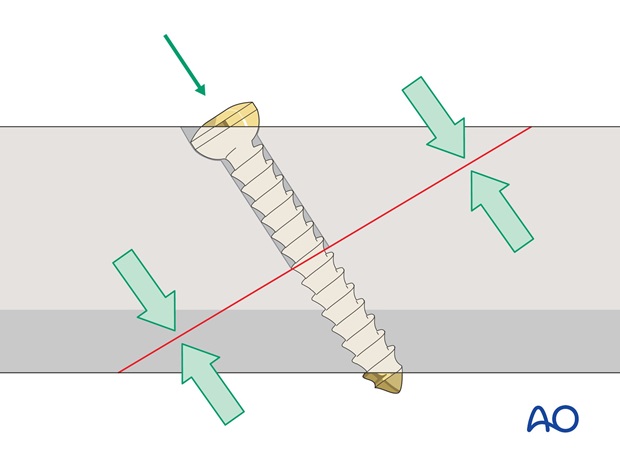
Lag screw principles for cortical bone
The threads only engage in the bone on the far side of the fracture. The hole on the near side of the fracture, the 'gliding hole', is larger so that the portion of the thread in the gliding hole does not purchase in the surrounding bone.
As the screw is tightened, the thread pulls the opposite bone fragment towards the head of the screw, which compresses the near fragment against the opposite fragment.
Insert the lag screw as perpendicularly to the fracture plane as possible.
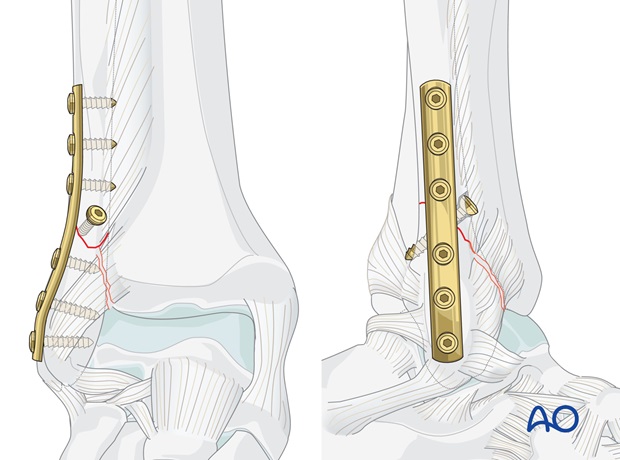
Neutralization plate
As a lag screw osteosynthesis alone is not able to bear weight and sufficiently resist shearing forces, a neutralization plate should be added to allow early mobilization.
Teaching videos
AO teaching video: Type B Malleolar Fracture 44-B (2004)
AO teaching video: Malleolar-Fracture Type B (1988)
2. Preliminary reduction
Preparation of the fracture site
Do not strip the periosteum more than necessary.
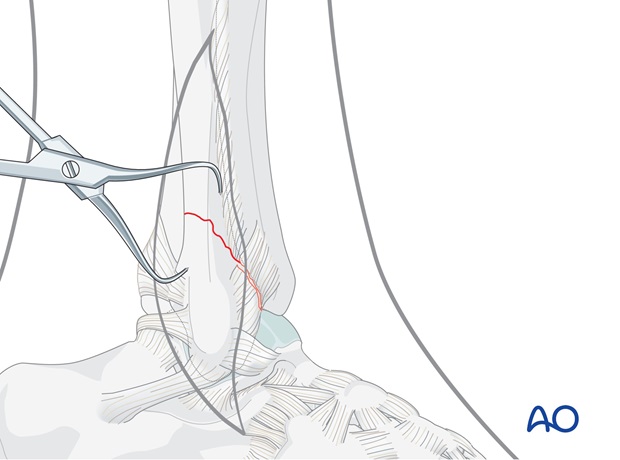
Reduction with small pointed reduction forceps
Reduce and temporarily hold the fracture with small pointed reduction forceps, taking care that the forceps do not interfere with the planned lag screw.
3. Lag screw insertion
Drilling
Drill a 3.5 mm gliding hole for the lag screw into the anterior cortex of the proximal fragment. The hole should be drilled as perpendicular to the fracture plane as possible.
Insert the 2.5 mm drill sleeve into the gliding hole, then drill the far cortex with the 2.5 mm drill bit.
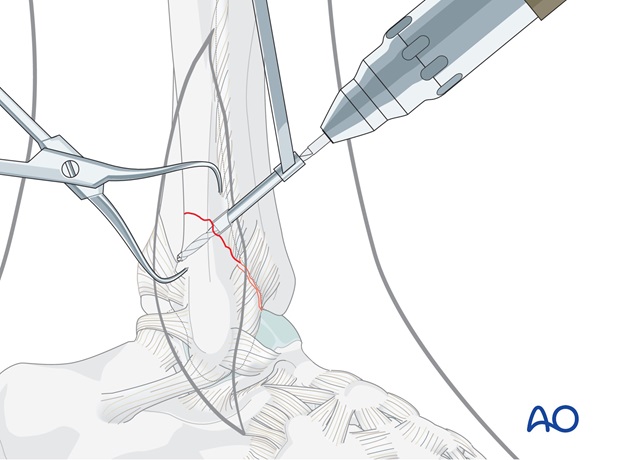
Countersinking
In order to prevent cortical stress and micro fractures, the cortex can be countersunk to increase the area of contact between the bone and the screw head.
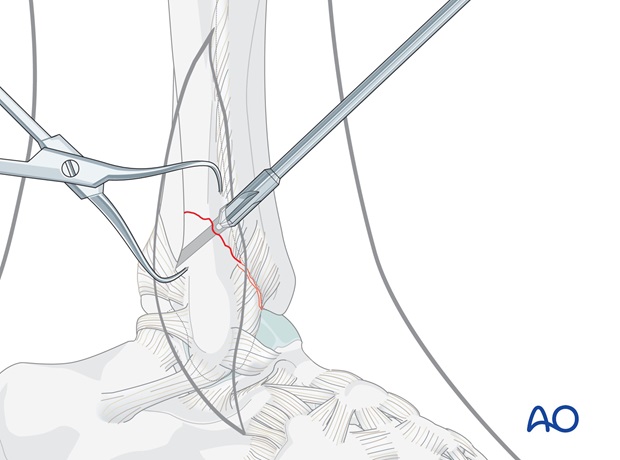
Measuring
Measure the depth of the hole with the hook of the depth gauge pointing distally.
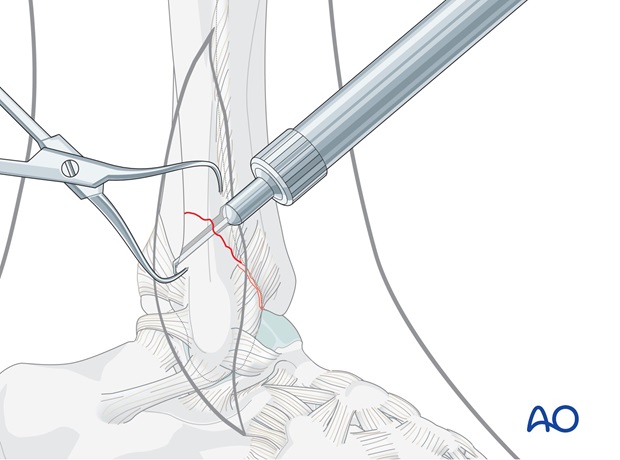
Tapping the far cortex
Tap the posterior cortex with the 3.5 mm cortical tap and protection sleeve.
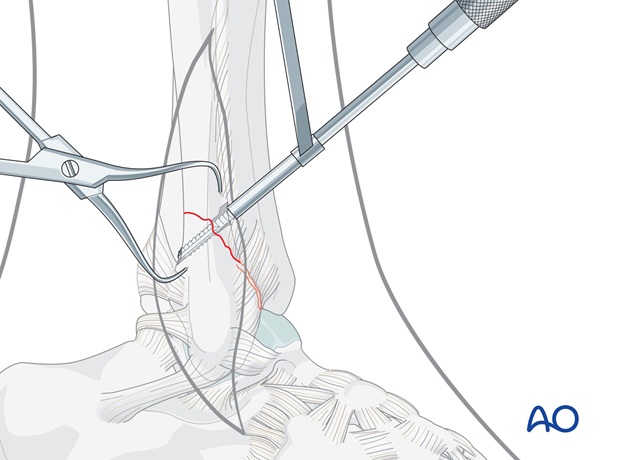
Insertion of the screw
Closely observe the compression effect on the fracture line while tightening the lag screw.
The reduction forceps should be removed just before the final tightening of the screw.
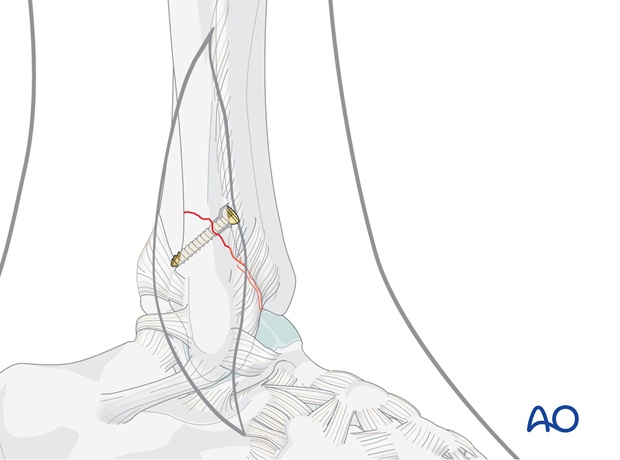
4. Plate preparation
Position of the plate
Ideally, use a six hole one-third tubular plate that can be positioned in such a way that 3 screws find a secure hold in the distal and three in the proximal fragments.
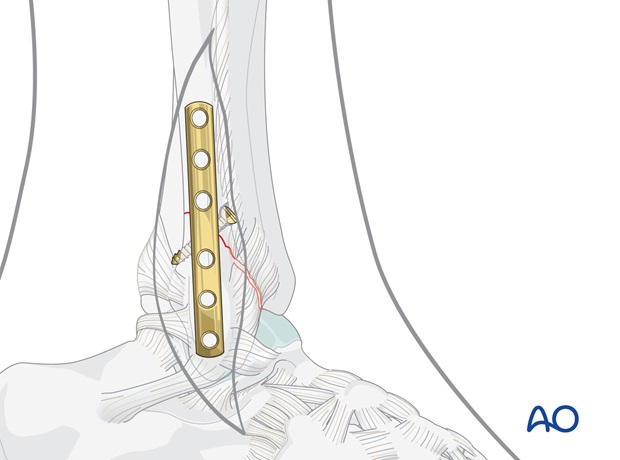
If the fracture configuration and the positioning of the lag screw make it impossible to position a six hole plate so that three screws can be securely positioned above and below the fracture, a longer plate may be selected.
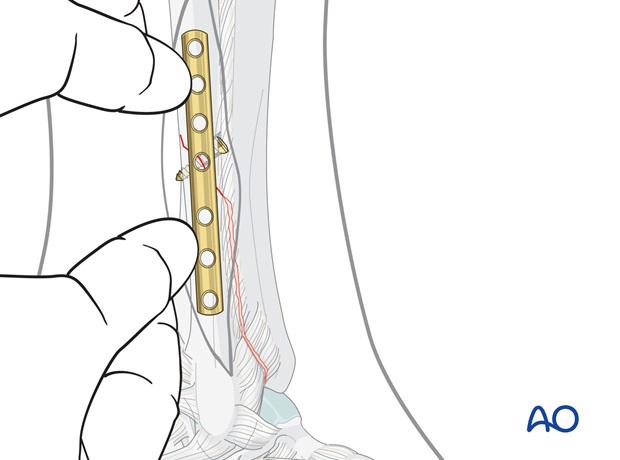
Contouring the plate
Before the plate is applied, it must be contoured with the help of an appropriate aluminum template.
In a distal fracture, where the plate needs to follow the shape of the lateral malleolus, it is contoured distally with a short, sharp bend.
The plate should now perfectly fit the bone contour throughout its entire length.
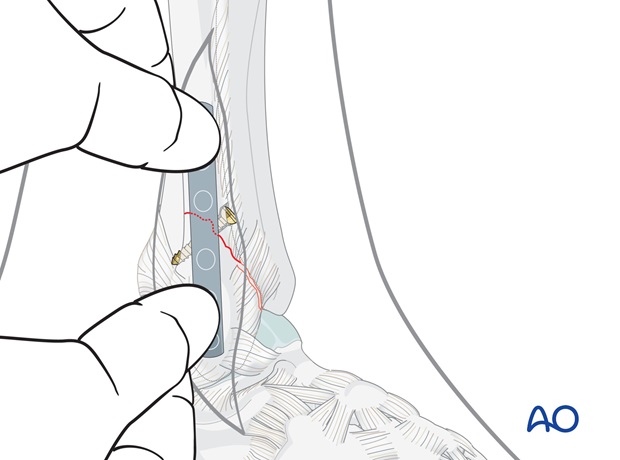
5. Plate application
Drilling for the first proximal screw
Position the plate firmly by hand and plan the position of the first proximal screw near the fracture.
Drill a 2.5 mm hole through both fibular cortices at the planned screw site.
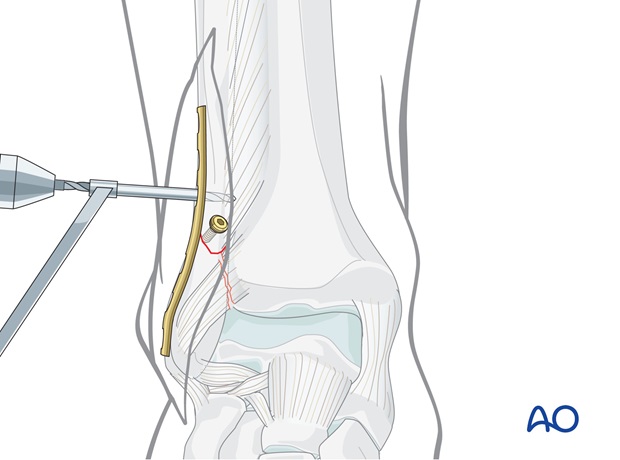
Screw insertion
After measuring the length of the drill hole through the plate, tap with the 3.5 mm cortical tap and protection sleeve and then insert the corresponding cortex screw.
The screw should just penetrate the opposite cortex but not come into contact with the tibia.
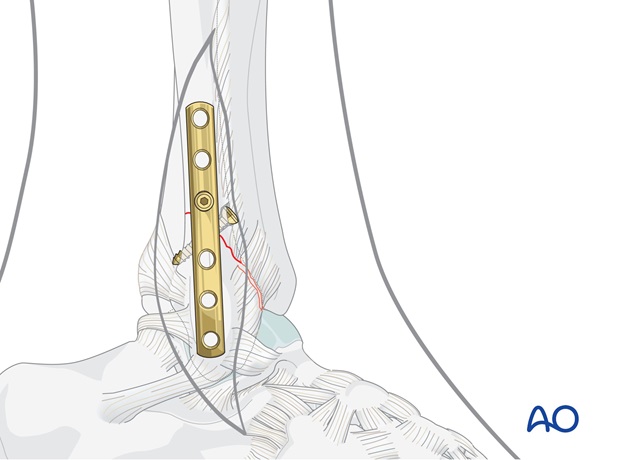
First distal screw
Next insert a screw into the first distal plate hole.
All malleolar screws are aimed towards the articular surface of the lateral malleolus. Ensure that their tips do not protrude into the joint by drilling very cautiously once the lateral fibular cortex is pierced. Alternatively, the drill can be angled slightly posteriorly, but this still requires great caution in advancing the drill. Measure the depth to the subchondral bone and select a 3.5 mm cortex screw approximately 2 mm shorter. Tap threads only into the near fibular cortex and then insert the screw.
Above the level of the ankle joint, the screws should obtain a good hold in both cortices.
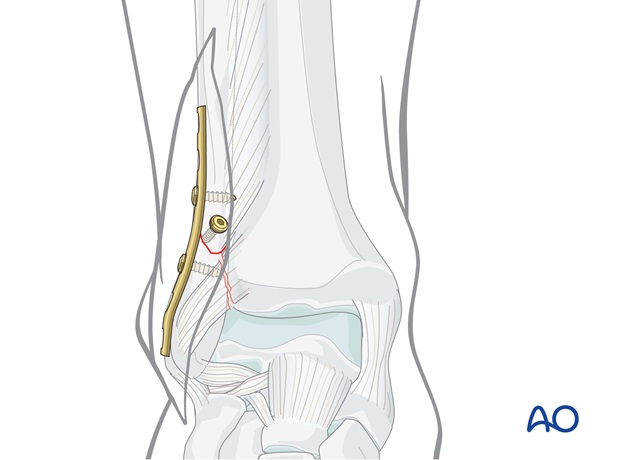
Insert remaining screws
Insert the remaining proximal screws as described above.
Insert the remaining distal screws slightly obliquely from distal to proximal. Again, choose the screws 2 mm shorter than measured and tap the threads only in the near cortical bone.
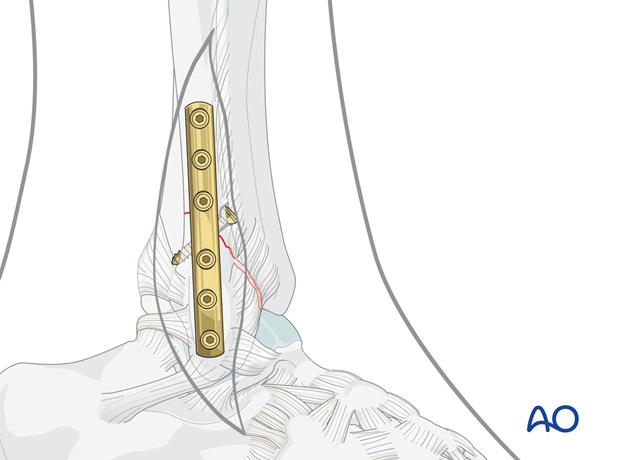
Note
- In osteopenic bone, fully threaded cancellous screws should be used in the malleolus.
- In some transsyndesmotic fractures, the fibular fracture line is more distal and can conflict with the third hole from the distal end of the plate. When this is the case, that hole has to be left empty and only the lower 2 plate holes can be used for the lateral malleolar screws.
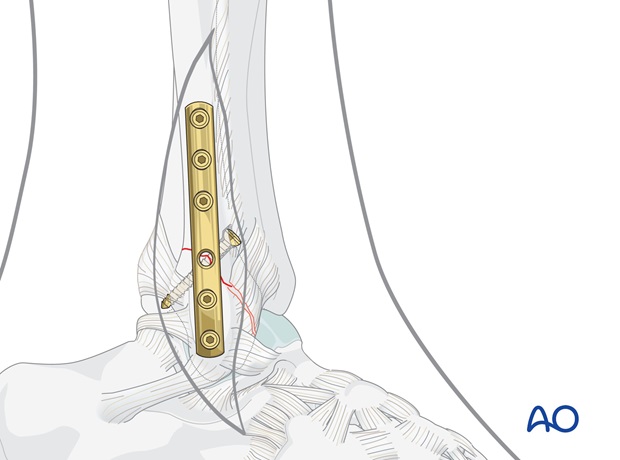
Gently tighten all screws.
The final fixation should be checked with image intensifier or x-rays before closing.
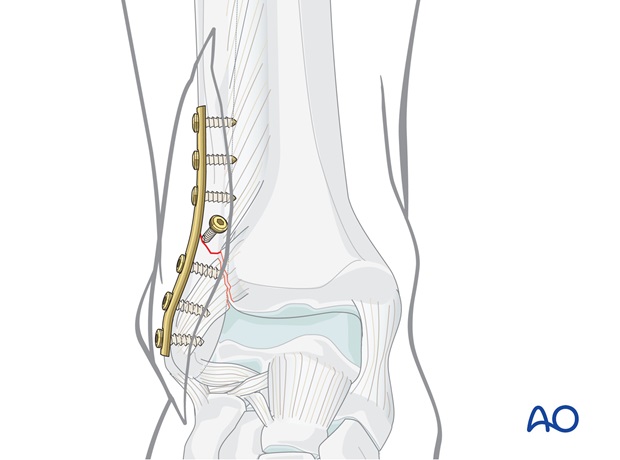
6. Fixation of anterior syndesmotic injury
Avulsion from the tibia (Tillaux-Chaput)
Anatomically reduce the fragment with a small dentist hook and preliminarily fix it with a 1.0 mm K-wire.
Drill a hole with a 2.5 mm drill bit and protection sleeve as perpendicular as possible to the fracture line without drilling the far cortex.
Measure the depth. Tap with the 4.0 mm tap and protection sleeve. Insert the 4.0 mm cancellous screw with a washer.
Note
If the fragment is too small for 4.0 mm screw fixation, use a 2.0 mm or a 2.7 mm cortical screw or suture the fragment to the periosteum of the anterior tibia.
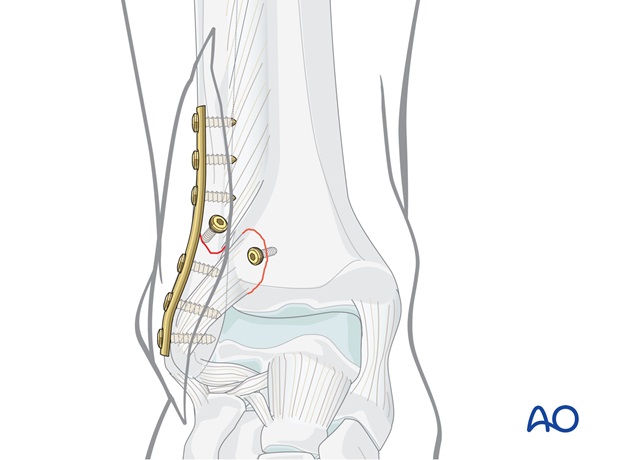
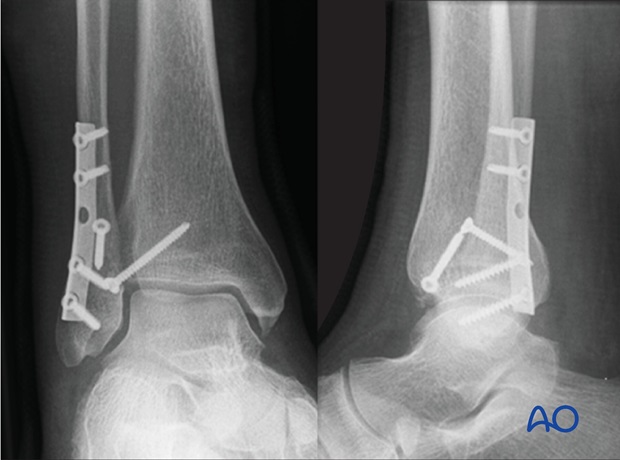
Avulsion from the fibula (Le Fort)
Usually, the fragment is very small. In this case, suture it to the fibular periosteum. If the fragment is large enough, small lag screw fixation can be used.
