Retrograde nailing
1. Principles
General considerations
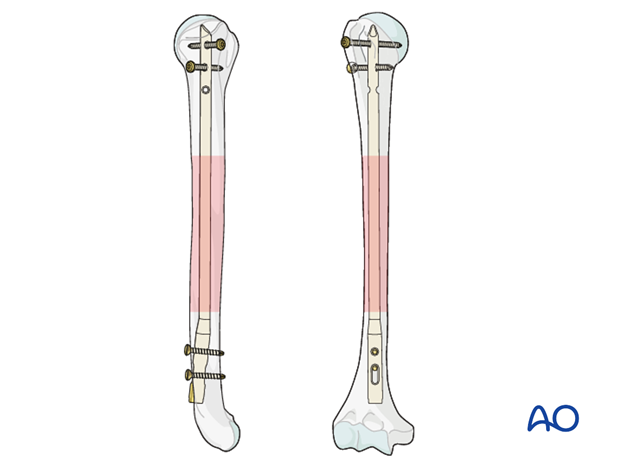
For nailing, the fracture must be situated between the humeral neck and 5 cm above the olecranon fossa. The fracture type is of no importance.
Retrograde nailing offers the possibility of axial compression. This is recommended in fracture distraction, and for transverse and short oblique fracture types.
There are many different nails on the market, including some which are designed specifically for retrograde nailing. All nails for retrograde nailing are bent nails. The main difference between them relates to their locking systems. Some nails allow compression at the fracture site.
Some details shown in this procedure may not be applicable with other nailing systems.
Note on illustrations
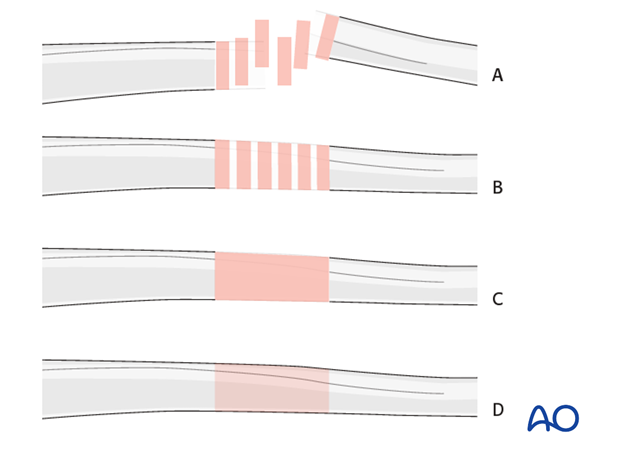
Throughout this treatment option illustrations of generic fracture patterns are shown, as four different types:
A) Unreduced fractureB) Reduced fracture
C) Fracture reduced and fixed provisionally
D) Fracture fixed definitively
Open fractures in the humeral shaft
Adequate surgical debridement is the crucial first step in the care of any open fracture.
Read more about the treatment of open fractures in the humeral shaft.
2. Patient preparation and approach
Patient preparation
The patient may be placed in either the prone or the lateral position.
Approach to the entry point
The entry poinnt is accessed trough a retrograde nailing approach.

3. Determining nail diameter and length
Use of preoperative x-rays
The preoperative x-rays of the humerus can be used to estimate the diameter and length of the foreseen nail. Doing so, reference markers should be used to determine the magnification.
Use of radiographic rulers
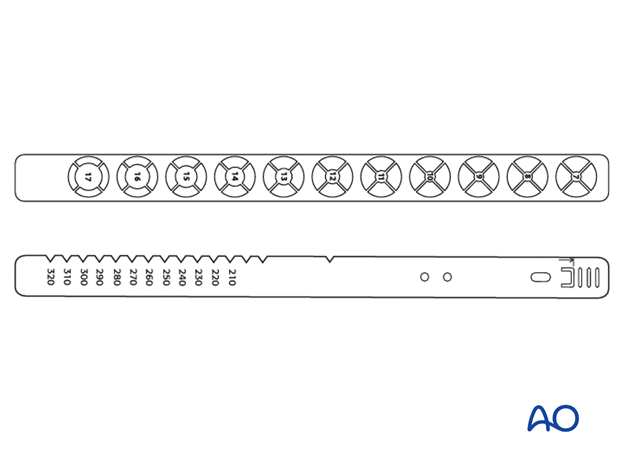
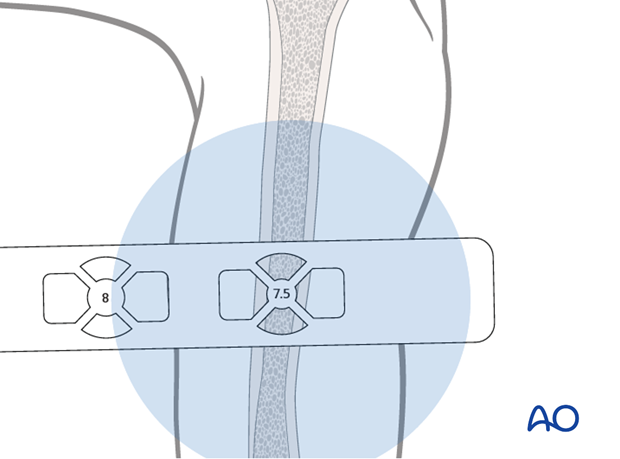
Use a radiographic ruler to determine the correct length of the nail and a medullary canal estimator for estimation of the diameter of the nail.
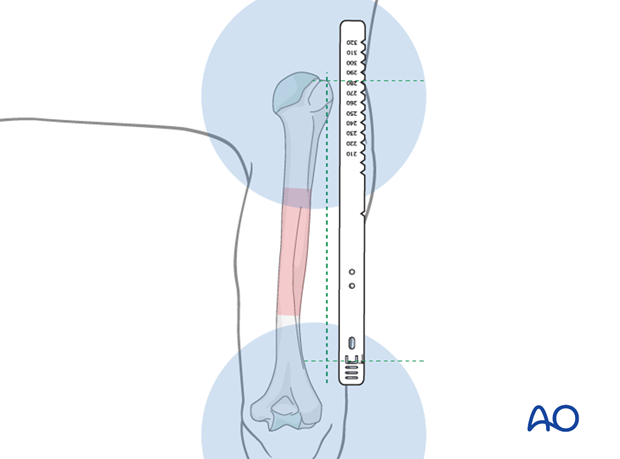
Provisionally reduce the humeral fracture.
Place the ruler parallel to the arm, with the top-of-nail mark at the level of the upper edge of the insertion site.
Take an AP image intensifier view of the proximal humerus together with the ruler, as above.
The humeral nail should be long enough to just enter into the humeral head. Determine this length with the aid of the ruler.
Visualize the medullary canal under image intensification in AP view and compare with the diameters of the marks on the ruler.
The correct size of the humeral nail corresponds to the diameter of the mark that fits completely into the medullary canal. If the isthmus is very narrow, consider reaming to allow the insertion of a larger diameter nail.
Look carefully at the distal humeral canal. It may be narrower than the rest.
4. Entry portal
A central triangle with a proximal apex is defined between the medial and the lateral supracondylar ridges and the olecranon fossa.
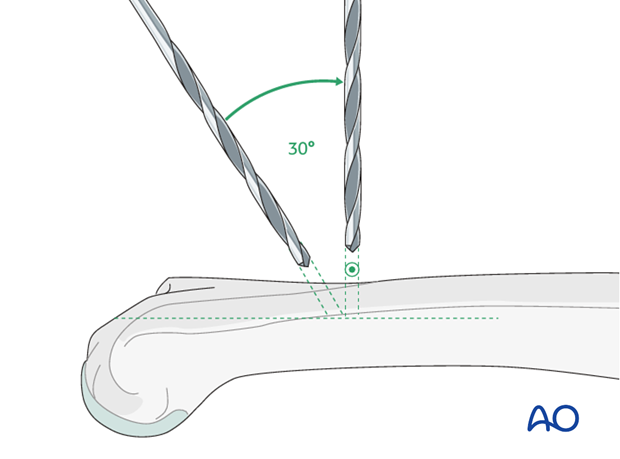
Three holes are drilled at the corners of this triangle, in the dorsal humeral cortex.
First use the 3.2 mm drill bit, then enlarge the 3 holes with the 4.5 mm drill bit.

During the drilling process, change the drill direction from its initial perpendicular orientation, through about 30° towards the long axis of the humerus.
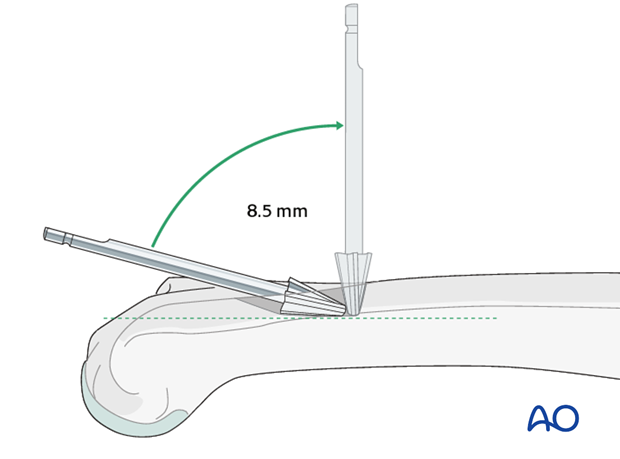
Join the 3 drill holes to form a single insertion portal by using the 8.5 mm burr.
Direct the burr almost in line with the long axis of the medullary canal.
Pearl: Take care to gently open the medullary cavity. Otherwise an iatrogenic fracture may easily occur.
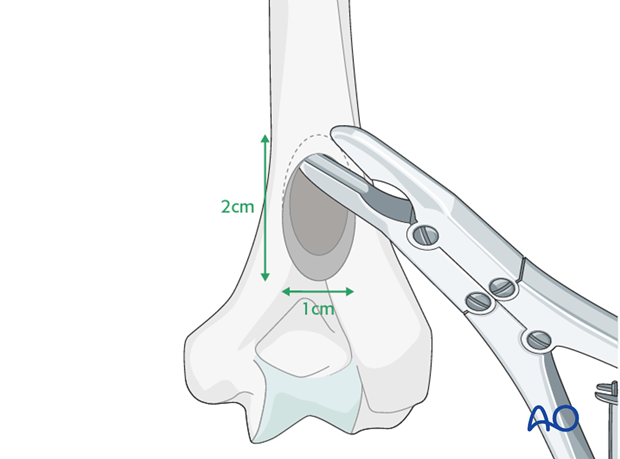
The goal of this procedure is to create a central supracondylar entry portal, 2 cm long and 1 cm wide, that will allow gentle insertion of the medullary nail obliquely to the bone surface. It may be necessary to enlarge the opening proximally, using a bone nibbler, to obtain adequate length.
5. Reaming
Indication
If the canal is very narrow rather than insert a narrow nail, reaming will allow for the insertion of a larger diameter (so stronger) nail. This may be particularly useful when nailing a nonunion.
Procedure
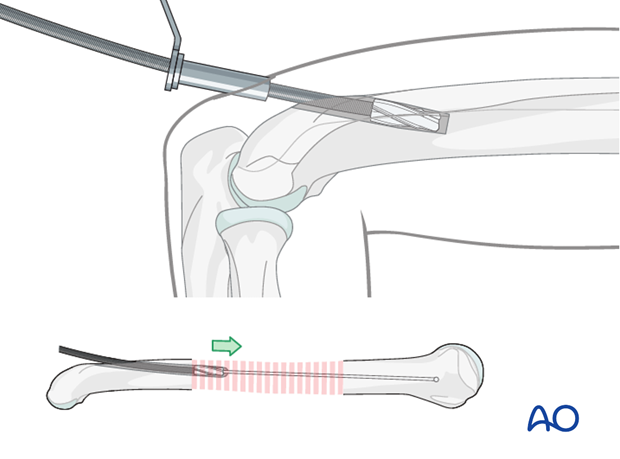
After the entry point has been created pass an olive tipped guide wire across the fracture site. With experience it is usually possible to feel the tip of the wire is in the cancellous bone, but this should be confirmed with image intensifier.

Ream up sequentially to an appropriate size for the desired nail. In segmental or multifragmentary fractures take care to avoid soft-tissue damage, particularly to the nerves and vessels, as the reamer is passed through the fracture zone.
Exchange the olive tipped wire to a straight guide wire, and then insert the nail over the guide wire. Alternatively, some nails may be introduced without a guide wire.
6. Nail insertion
Insertion handle
Mount the insertion handle/aiming guide on the nail base with the connection screw.
Ensure that the convexity of the nail curvature points away from the insertion handle.
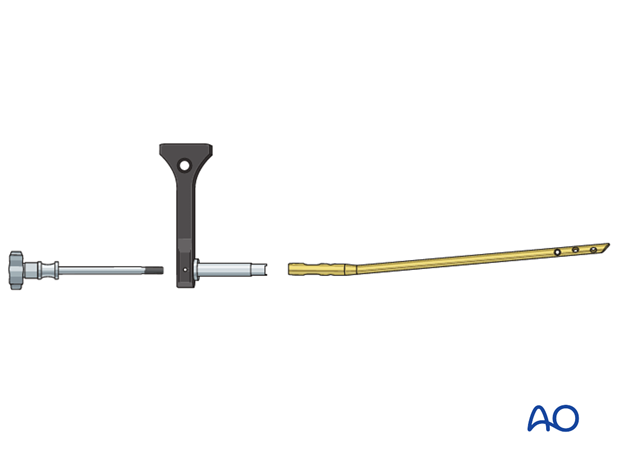
Gently insert the nail tip into the entry portal. If there is any resistance, consider enlarging the entry portal as there is a very real risk of iatrogenic supracondylar fracture when the nail flexes the distal fragment forwards during insertion.
Do not use a hammer, as this may increase the risk of fissure or fracture at the insertion site.
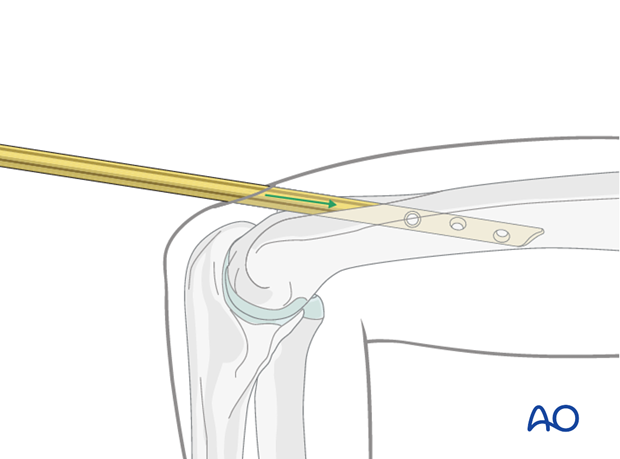
Advance the nail as far as the fracture site.
Reduction
Use the nail tip as a reduction aid.
After passing the fracture site, adjust humeral shaft alignment, rotation and length.
Confirm under image intensification in two different planes.
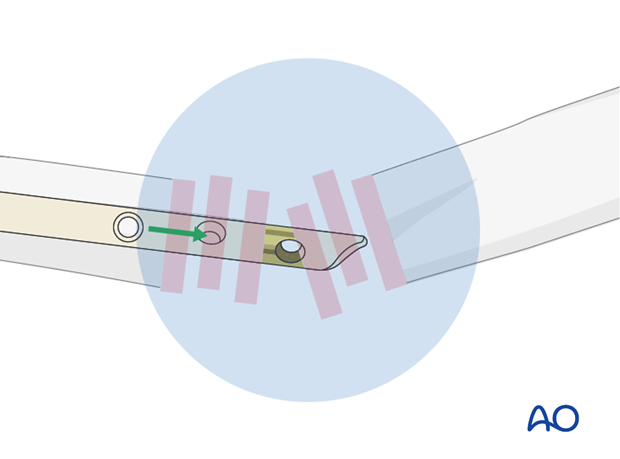
Gently advance the nail until it has reached the desired position.
Avoid fracture distraction.
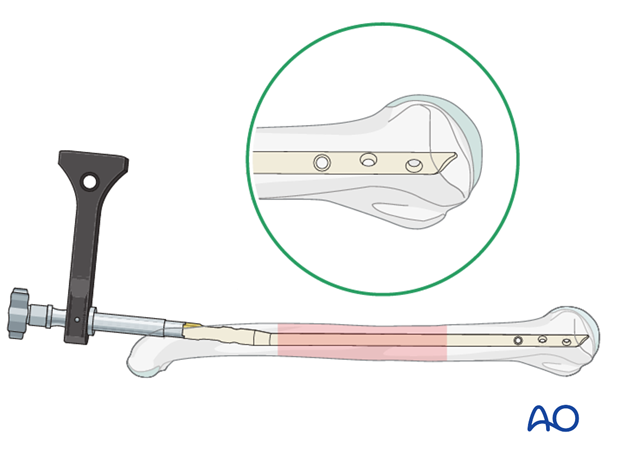
Ensure correct position
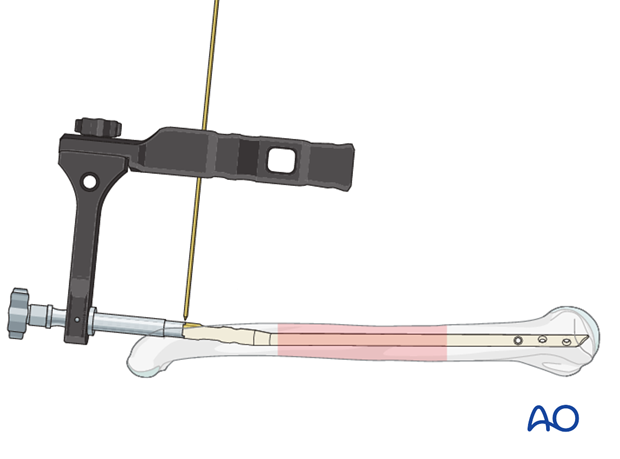
The nail should be inserted completely into the entry hole with its distal end located at the proximal margin of the entry portal.
Some nailing systems provide a hole in the aiming jig through which a K-wire may be passed to indicate the end of the nail.
Pitfall: If the head of the nail protrudes into the olecranon fossa it will obstruct the olecranon as the elbow extends fully.
7. Interlocking: General considerations
Interlocking
Static interlocking with two screws on each side of the fracture is recommended. When distal interlocking is performed first, rotation can be adjusted before proximal interlocking.
When axial compression is used, static interlocking at the distal end of the nail is performed as the last step.

8. Distal interlocking
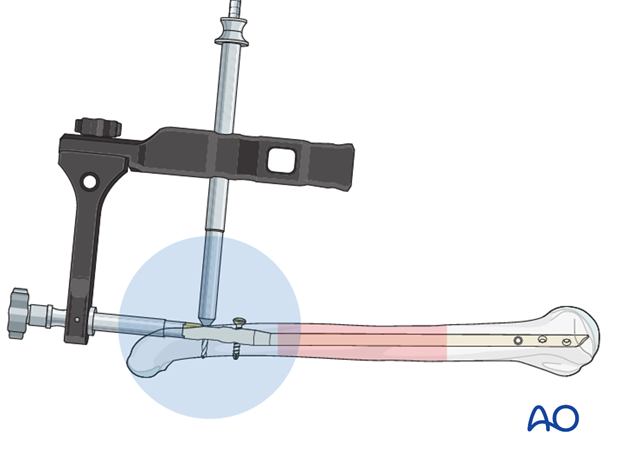
Perform a distal parallel double locking using both the static and compression holes. The aiming arm helps to ensure proper drilling and screw insertion.
Place the static locking screw first.
Place the sleeve system through the corresponding hole in the insertion handle/aiming guide, make a stab skin incision, and advance the sleeve system through this incision onto the humeral shaft. Sometimes the sleeve can be placed in the proximal edge of the larger skin incision made for the entry portal.
Drill a hole for the static interlocking screw.
Measure the depth of the hole. The screw tip should just protrude through the far cortex.
Insert the selected screw through the sleeve.

Insert the second interlocking screw in the same way using the compression hole.
9. Proximal interlocking
For proximal interlocking, the insertion of at least two interlocking screws is recommended. For better purchase, placement of the screws in the metaphysis, or diaphysis, is preferable.
Typically, a free hand drilling technique is used.
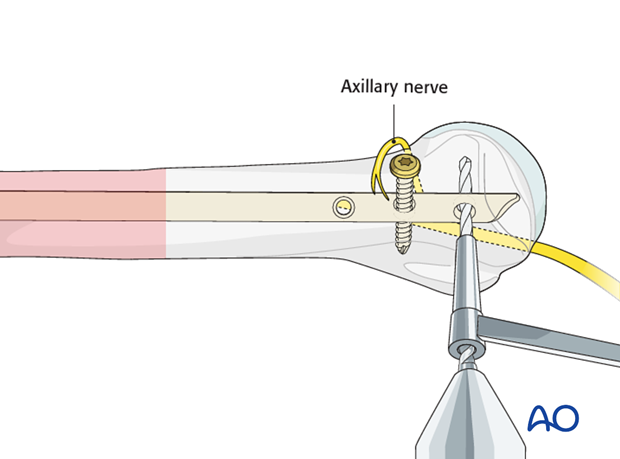
Take care not to damage the axillary nerve.
Position of the skin incision
Use the image intensifier and, by gentle rotatory movements of the arm, ensure that the selected interlocking hole appears as a perfect circle.
Make a sharp skin incision just over this circle.
Pearl: Moving the image intensifier and not the arm prevents iatrogenic rotational malalignment.
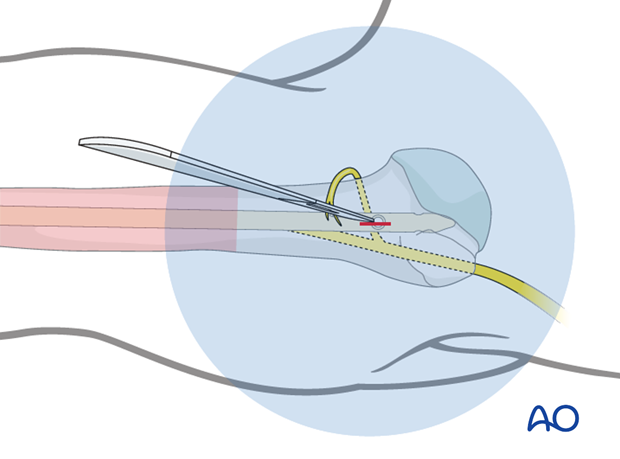
Soft-tissue dissection
Use a small clamp to prepare a track for insertion of the drill bit.
Blunt dissection of the soft tissues helps to protect the axillary nerve.
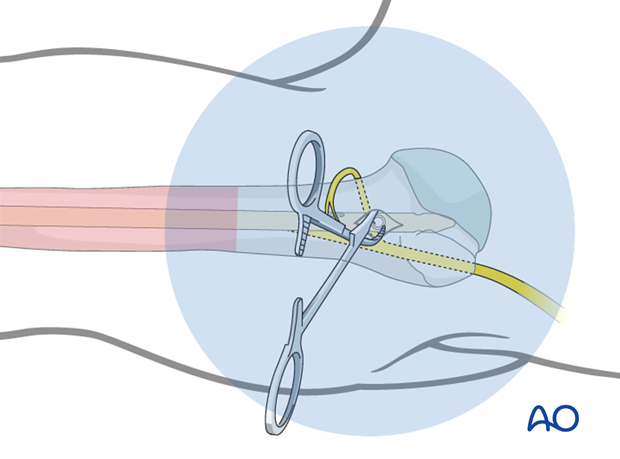
Drilling
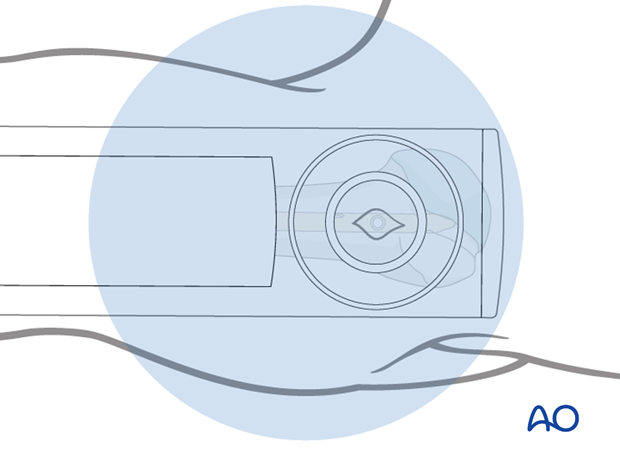
Perform the positioning of the drill tip, its fine adjustment, and the drilling procedure under image intensification.
Many surgeons prefer a radiolucent drill attachment if it is available.
Center the radiopaque circles of the radiolucent drill on the locking hole.
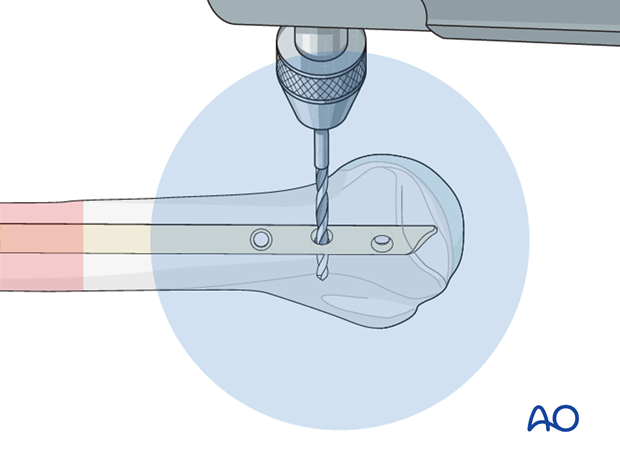
In the metaphysis drill a hole through the hole in the nail and both cortices. In the epiphysis monocortical fixation in the humeral head is mandatory to avoid penetration into the joint with the tip of the screw.
Measure the length of the required screw with a depth gauge.
Insertion of interlocking screw
Insert the interlocking screw and subsequently check for correct position and length under image intensification in two planes.
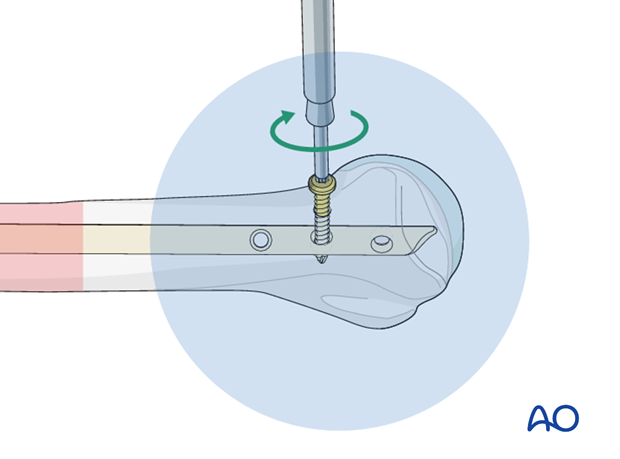
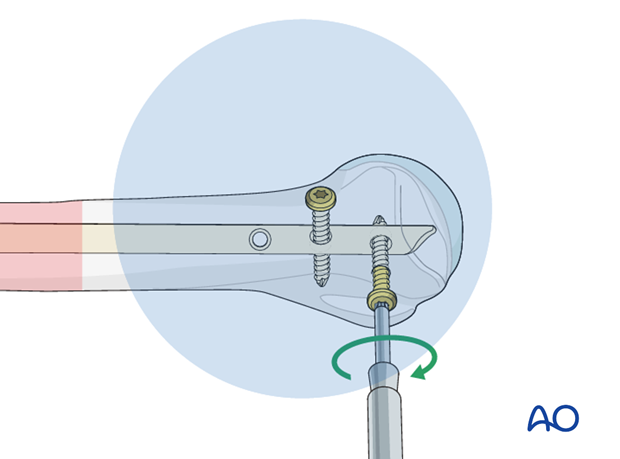
Further interlocking screws
Insert further interlocking screws as described above.
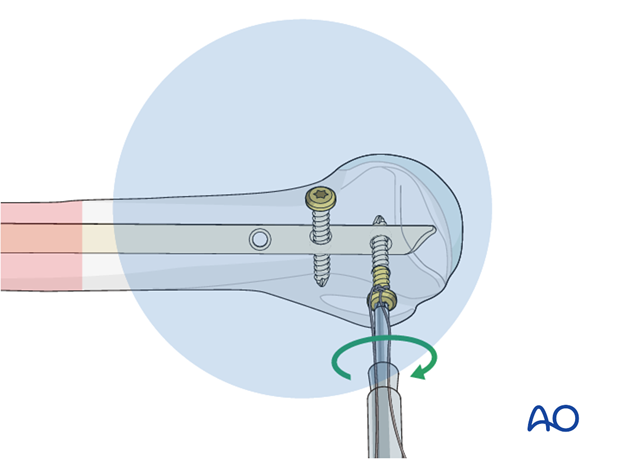
Pearl: absorbable suture around screw
To avoid losing the screw in the soft tissues during insertion and tightening, fasten an absorbable suture around the screw’s head beforehand.
Final remark
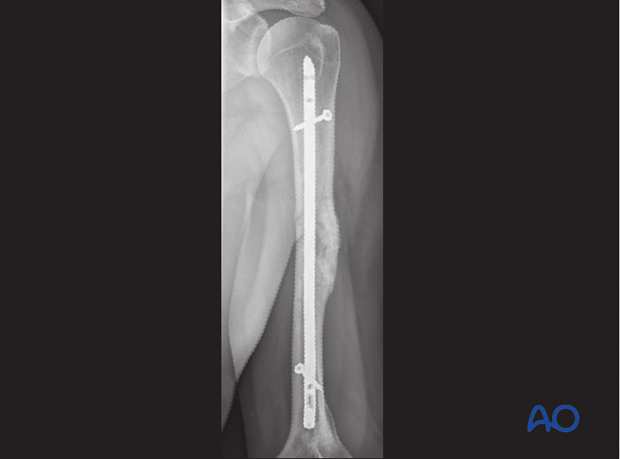
When interlocking is completed, check the definitive position of the implant under image intensification in two planes.
Take particular notice of the position of the proximal end of the nail and the location and length of all interlocking screws. Ensure the distal end of the nail does not obstruct the olecranon as the elbow extends fully.
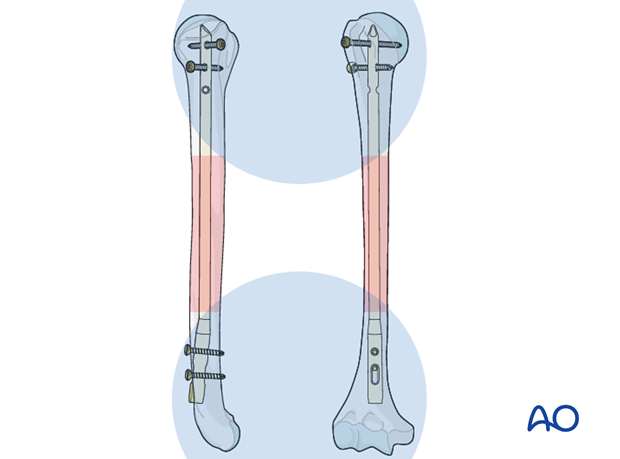
X-ray showing final construct
10. Nail capping
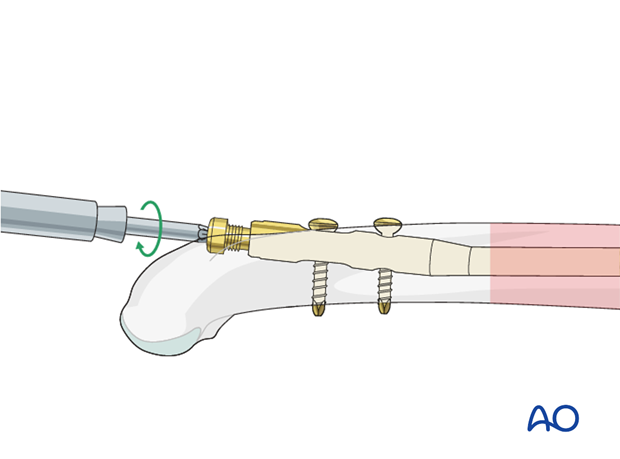
Cap the end of the nail
Remove the insertion handle/aiming guide and its connecting screw (with or without the compression device).
Insert an end cap to prevent ingrowth of bony tissue.
11. Aftercare
Principles
The aim of any surgical fixation of humeral shaft fractures is a stable osteosynthesis of the fracture allowing early passive and active motion. This is crucial to prevent shoulder stiffness.
Immediate postoperative care
Carefully examine the patient for neurological deficits and pulses.
Early treatment
In the beginning lymph drainage and elastocompressive bandages may be helpful.
Consider a sling for pain relief within the first days.
Mobilization
In the early phase the rehabilitation consists of classic maneuvers eg overhead motion exercises.
Rehabilitation should address the entire upper limb.
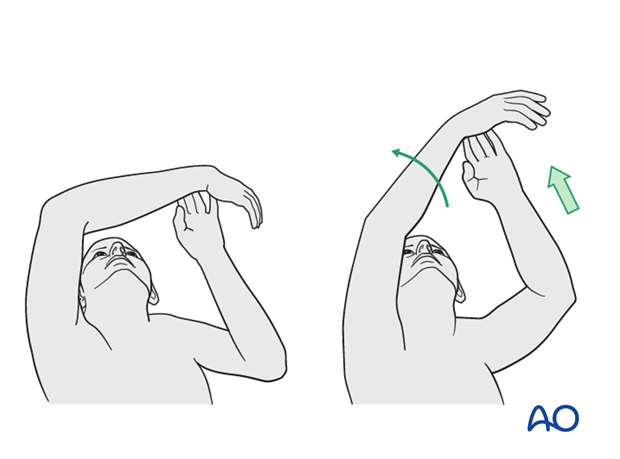
Exercise against resistance
Depending on the bone quality and compliance of the patient, exercise against resistance might be limited.
Follow-up
Clinical and radiological follow-up should be scheduled at least 6 weeks, 12 weeks and 6 months after surgery and continued until a bony healing is confirmed.
Hardware removal
Typically, humeral nails are left in situ indefinitely.
If the head of the nail causes impingement or partial elbow stiffness, it may require removing. If individual locking screws cause problems, they may be removed without having to remove the nail.
