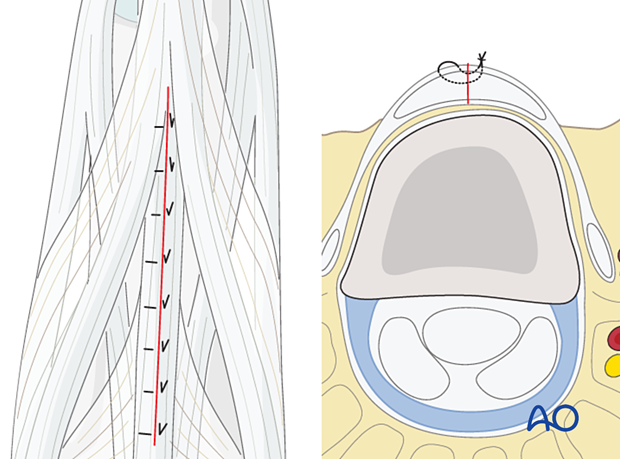
Dorsal approach to the proximal phalanx (after Pratt)
1. Introduction
The dorsal approach to the proximal phalanx (after Pratt) offers access to the extensor tendon and the dorsal aspect of the proximal phalangeal shaft. If extended, the metacarpophalangeal (MCP) and proximal interphalangeal (PIP) joints may be exposed.
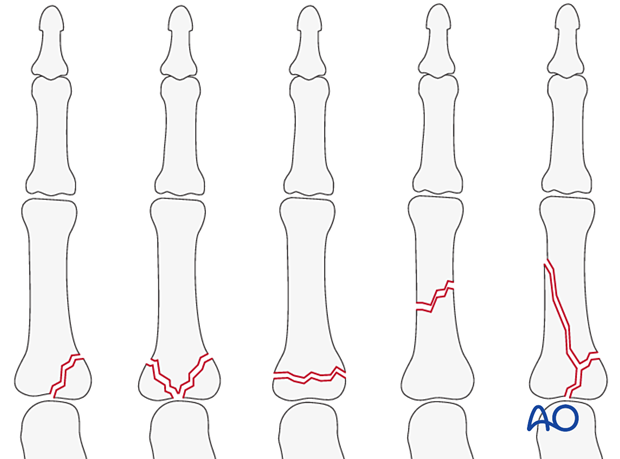
Use this approach to access:
- Proximal intraarticular fractures
- Proximal metaphyseal fractures
- Diaphyseal fractures
- Any basal intraarticular fracture extending into the metaphysis or diaphysis
AO teaching video
Dorsal Approach to Proximal Phalanx of the Finger
2. Surgical anatomy
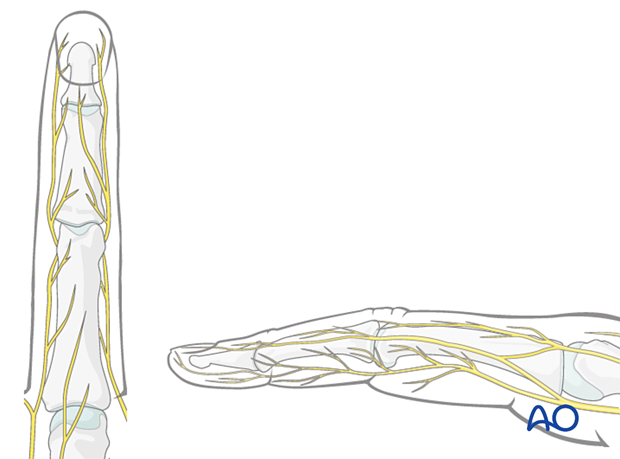
Nerve identification
In the thin subcutaneous tissue, identify and protect the dorsal sensory branches of the radial and ulnar nerves.
Vein identification
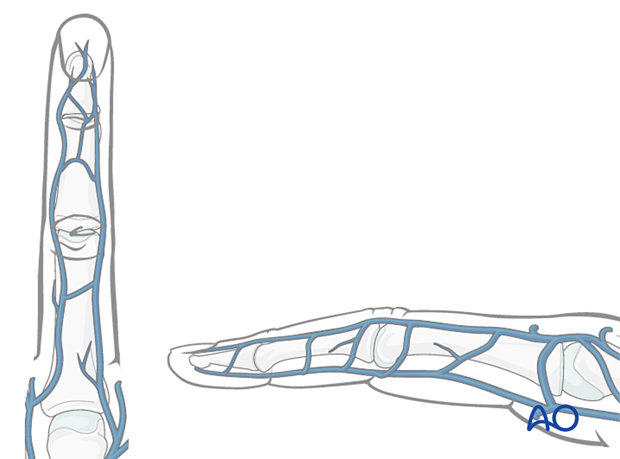
The dorsal venous system of the fingers has longitudinal and transverse branches. Be careful to preserve the longitudinal branches. For better exposure, the transverse branches may be ligated or cauterized, but preserve as many dorsal veins as possible to avoid congestion and swelling, with consequent fibrosis and stiffness.
3. Skin incision
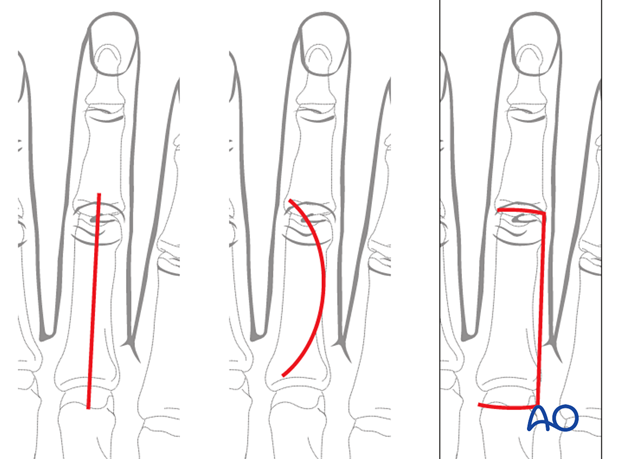
Several skin incision options are available. Each comes with benefits and disadvantages.
Straight dorsal incision
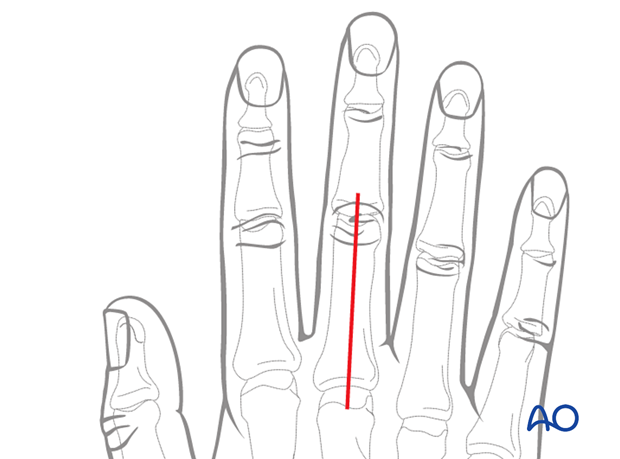
Perform a straight skin incision, starting at the MCP joint and ending at the proximal PIP joint. Depending on the fracture morphology, the incision may be shorter.
With this incision, vascularity and venous drainage are well preserved. Early postoperative motion will prevent scarring between the skin, tendon, and bone.
The disadvantage of this incision is that any skin and tendon scarring will be in the same line.
Curved skin incision
Perform a gently curved skin incision extending from the proximal phalangeal base to the PIP joint. The convexity of the incision is planned so that the scar does not involve the radial border of the index or the ulnar border of the little finger. The fracture morphology and implant placement must be considered when planning the incision.
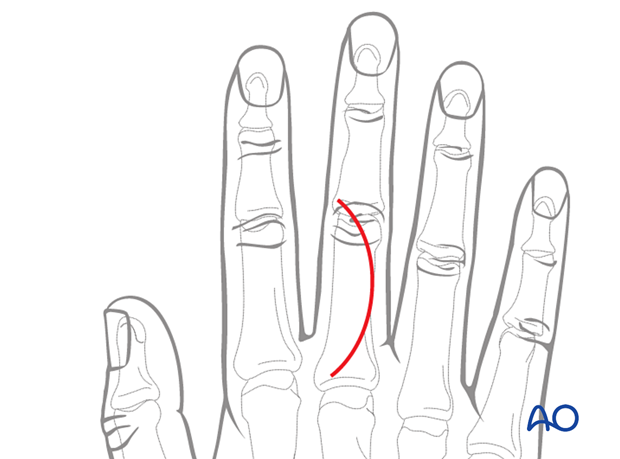
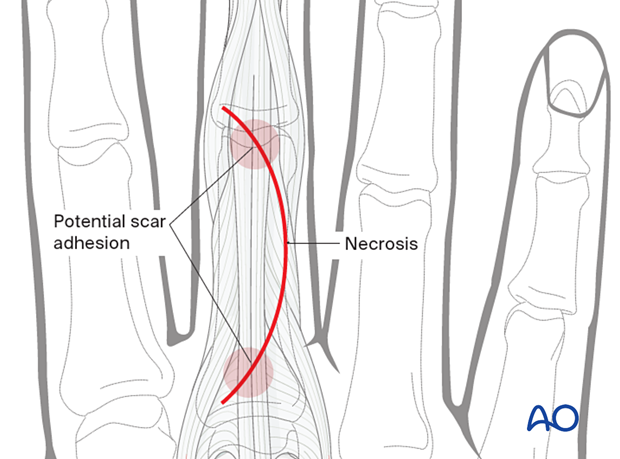
The advantage of the curved incision is that the skin and tendon scarring are not in the same line.
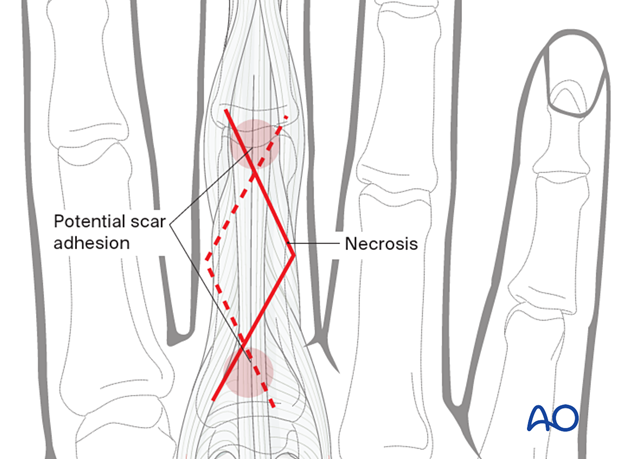
The disadvantage is reduced vascularity at the apex of the curve, with a risk of necrosis and delayed skin healing.
Zigzag skin incision
A zigzag incision may be used. This approach allows for:
- Full exposure of the proximal phalangeal shaft and base
- Paratendon or through tendon approach
Depending on the fracture pattern, the incision may be designed with an ulnar or radial apex.
The skin on the ulnar side of the 5th finger and the radial side of the 2nd finger should be preserved to protect sensitivity.
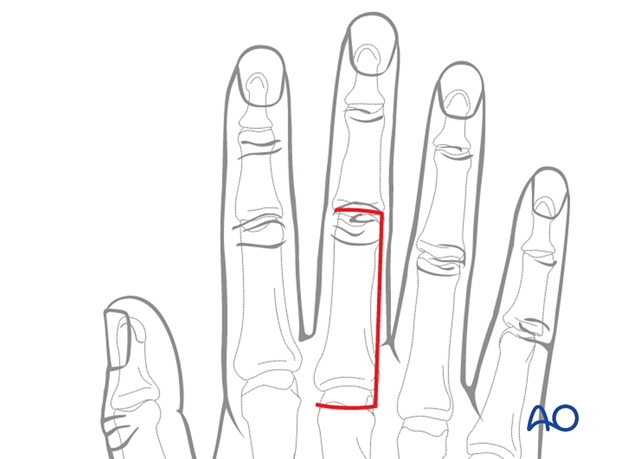
Dorsal fasciocutaneous flap
Start a transverse incision at the level of the PIP joint crease. Continue the incision midaxially parallel to the bone axis avoiding damage to the neurovascular bundle. Curve it gently over the MCP joint crease.
This skin incision allows for an extensile paratendon or tendon split approach. It has the advantage of low risk of scar adhesion, apical flap necrosis, and a better esthetic result of skin scars.
Depending on the fracture pattern, the flap may be created on the ulnar or radial side.
The skin on the ulnar side of the 5th finger and the radial side of the 2nd finger should be preserved to protect sensitivity.
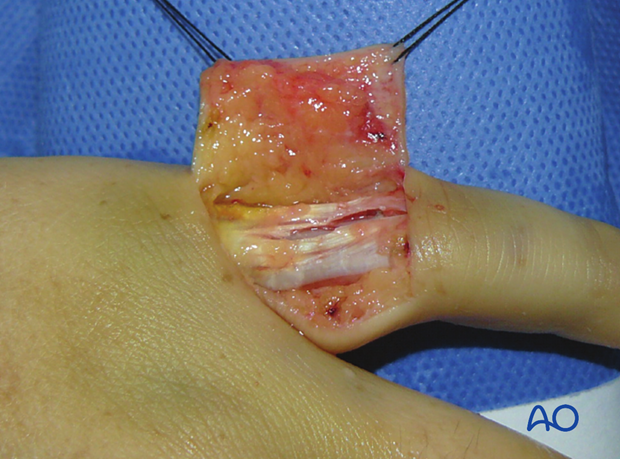
Elevate the skin flap by blunt dissection in the thin subcutaneous tissue and retract it using fine sutures.
4. Deep dissection
Extend the approach with blunt dissection through the thin subcutaneous tissue. Identify and preserve nerves and longitudinal veins.
Keep in mind, when developing the flaps, that the layers must be elevated together to avoid devascularization.
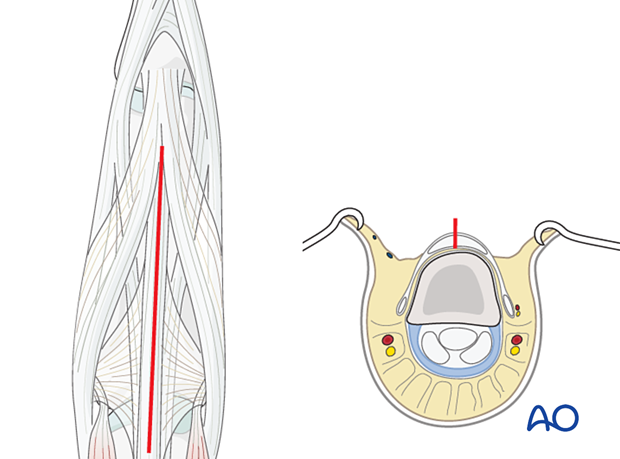
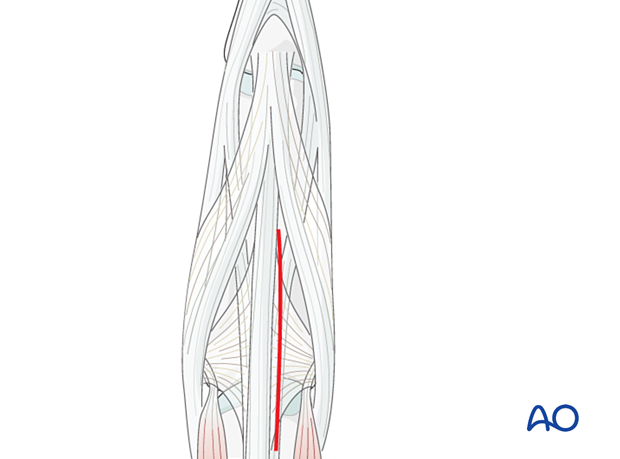
Midline extensor splitting incision
Split the extensor tendon apparatus along the midline longitudinal fibers of the tendon. Be careful not to incise the periosteum.
Avoid incising too distally, which could result in injury to the central slip and a secondary boutonnière deformity.
Paratendon incision
Alternatively, the incision may be placed between the lateral band and the central slip of the extensor tendon according to the fracture pattern.
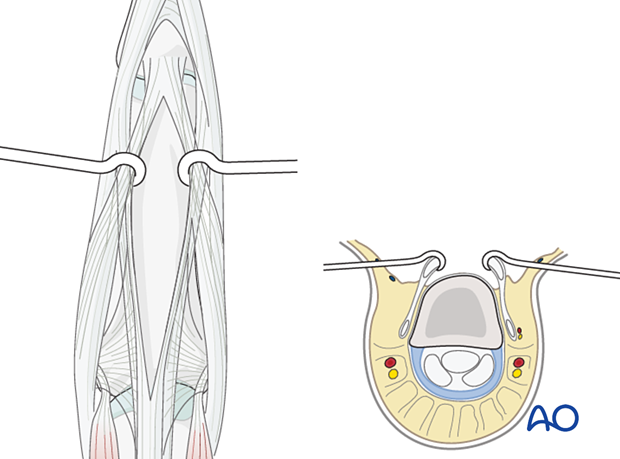
Fracture exposure
Retract the tendon to expose the fracture site. Try to preserve the periosteum, which should be elevated only adjacent to the fracture line.
5. Wound closure
Regardless of the chosen approach, all tendon incisions must be repaired with nonabsorbable monofilament sutures with an atraumatic needle before wound closure.
Cover the implant with the periosteum as far as possible; this helps minimize contact between the extensor tendons and the implant.
To avoid subluxation of the tendon after a paratendon approach, reattach the tendon.
