Lag screw fixation
1. Principles
Fractures of the diaphysis can be transverse, oblique, or comminuted.
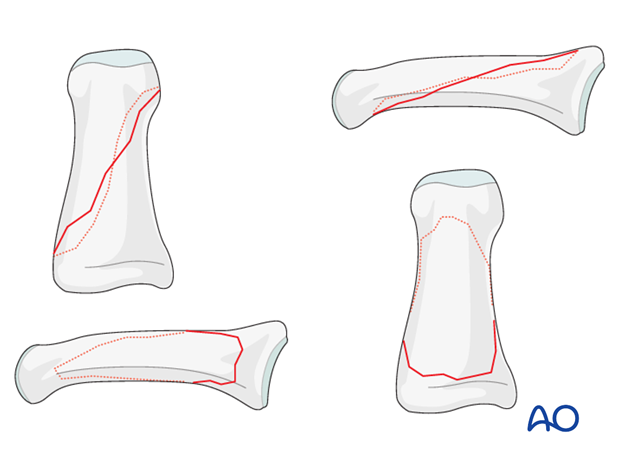
Obliquity of the fracture is possible either in the plane visible in the AP view, or in the plane visible in the lateral view. Always confirm the fracture configuration with views in both planes.
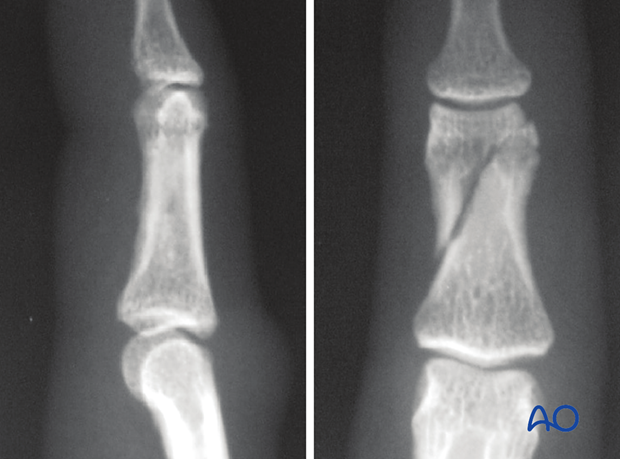
Indirect reduction is achieved by traction and digital manipulation. When the fracture is stable, it can be treated nonoperatively.
If the fracture is irreducible, ORIF is indicated.
Other indications for ORIF are open fractures, or soft-tissue lacerations.
Outcome of fractures of the middle phalanx is usually more favourable that in the proximal phalanx. This is largely due to the fact that limitations in DIP joint motion is not as great a problem as similar limitations in the PIP and MCP joints.
However, since fragments in this segment are generally smaller than in the proximal phalanx, management and stabilization can be more of a challenge.
Consequences of malunion (pain or deformity), or of degenerative joint disease, at the DIP joint can well be dealt with by arthrodesis, which is a procedure with very predictable outcome.
K-wire fixation
Percutaneous K-wire fixation is often used for fractures of the middle phalangeal diaphysis.
- The advantages are
- technically easy
- minimal soft-tissue lesion
- affordable cost
- universal availability
However, there are some disadvantages which can sometimes be significant, such as
- less stable fixation
- no compression possible
- no early mobility
- may separate the fragments
- may irritate the skin
2. Approach
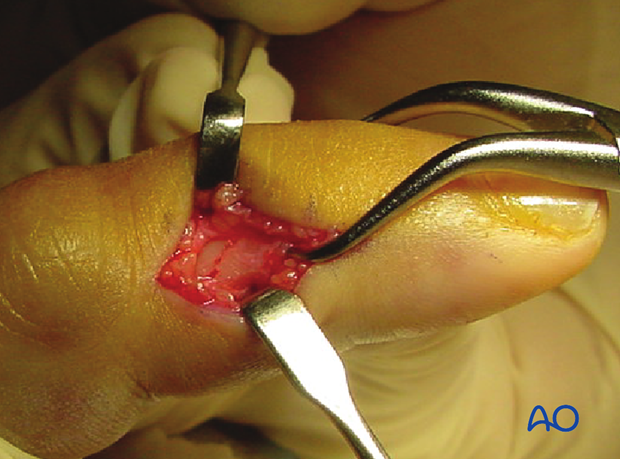
For this procedure a midaxial approach to the middle phalanx is normally used.

3. Reduction
Indirect reduction by traction
Reduction can be obtained by traction and flexion exerted by the surgeon.
Confirm reduction under image intensification.
These fractures may be stable after reduction, if the obliquity is minimal, especially when the extensor apparatus is intact, as it functions similarly to a tension band. In this case, nonoperative treatment is indicated.

Open reduction: visualization of the fracture
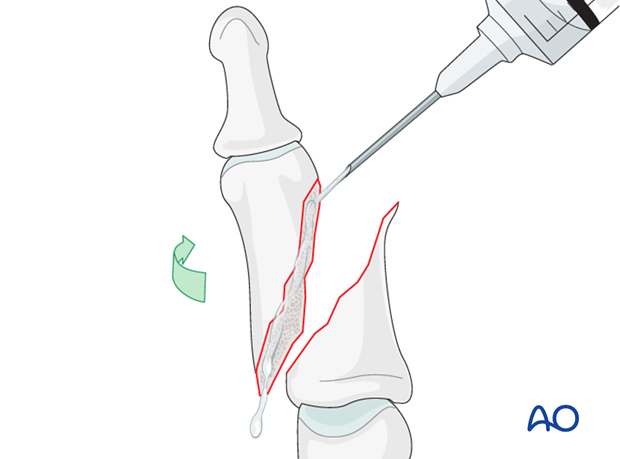
To determine the exact geometry of the fracture and correct placement of the screws, it may be helpful to open the fracture plane by exerting traction and rotation on the finger.
The fracture may be cleared of interposed soft tissues; if necessary, the fracture site can be irrigated for better visualization.
Direct reduction
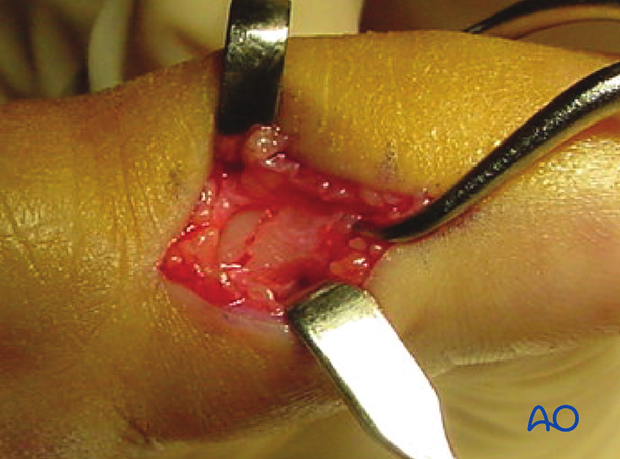
Direct reduction is necessary when the fracture can not be reduced by traction and flexion, or is unstable.
When indirect reduction is not possible, this is usually due to interposition of parts of the extensor apparatus.
It is wise to use magnifying loupes in order to be able to recognize undeveloped fracture lines.
Gently use pointed reduction forceps for direct reduction. For better direct vision, irrigate the fracture zone.
Confirm reduction under image intensification.
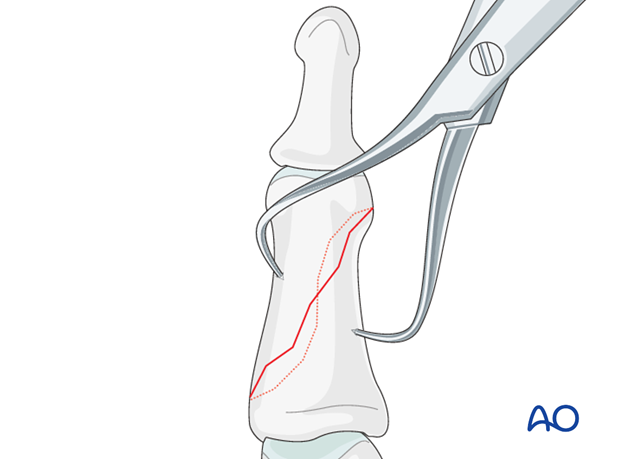
Preliminary fixation
Use a pointed reduction forceps to hold the preliminary reduction, or insert a 1.0 mm K-wire.
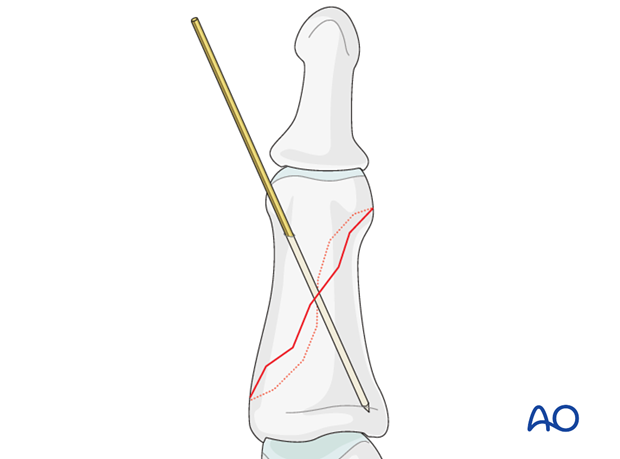
Identifying malrotation
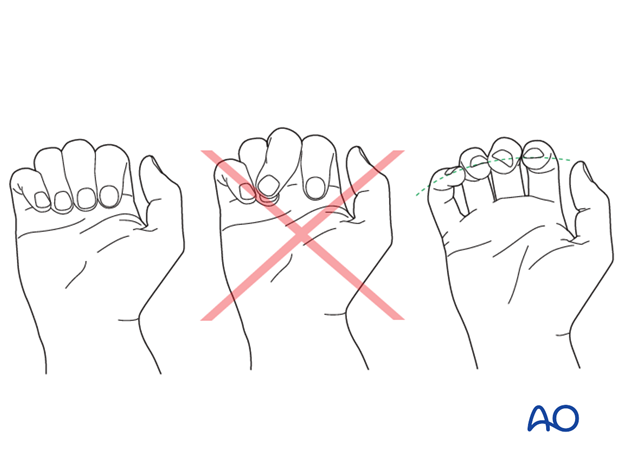
At this stage, after provisional fixation, it is advisable to check the alignment and rotational correction by moving the finger through a range of motion.
Rotational alignment can only be judged with the fingers in a degree of flexion, and never in full extension. Malrotation may manifest itself by overlap of the flexed finger over its neighbor. Subtle rotational malalignments can often be judged by tilting of the leading edge of the fingernail, when the fingers are viewed end-on.
If the patient is conscious and the regional anesthesia still allows active movement, the patient can be asked to extend and flex the finger.
Any malrotation is corrected by direct manipulation and later fixed.
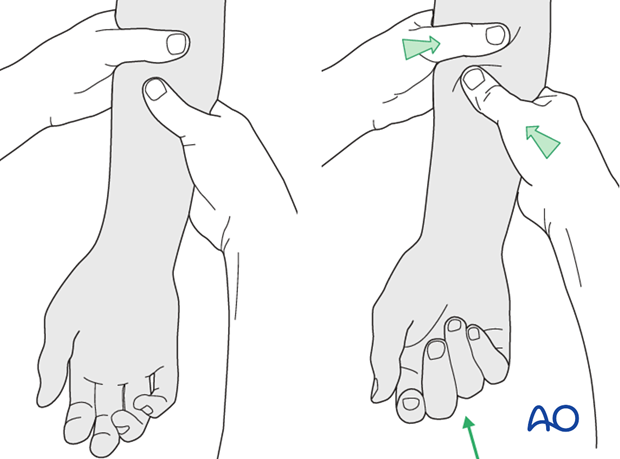
Using the tenodesis effect when under anesthesia
Under general anesthesia, the tenodesis effect is used, the surgeon fully flexing the wrist to produce extension of the fingers, and fully extending the wrist to cause flexion of the fingers.
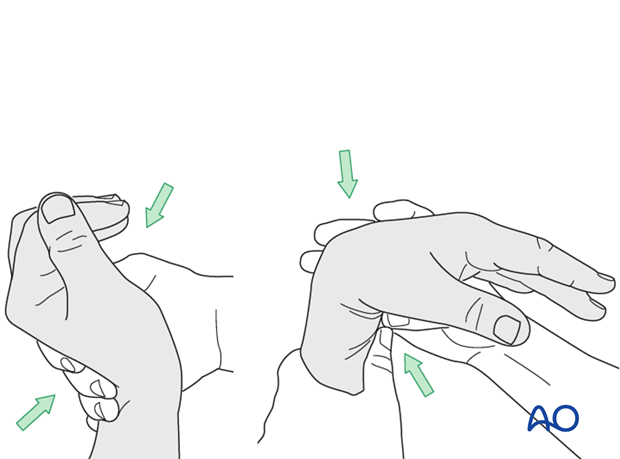
Alternatively, the surgeon can exert pressure against the muscle bellies of the proximal forearm to cause passive flexion of the fingers.
4. Preparations for fixation
Plan screw location
If the fragment is long enough, 2 screws should be inserted, equally spaced.
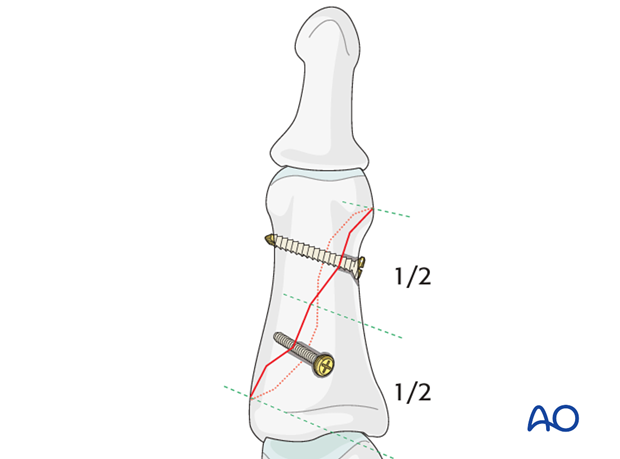
If the screws are not perpendicular to the fracture plane, screw tightening may lead to fracture displacement.

5. Fixation
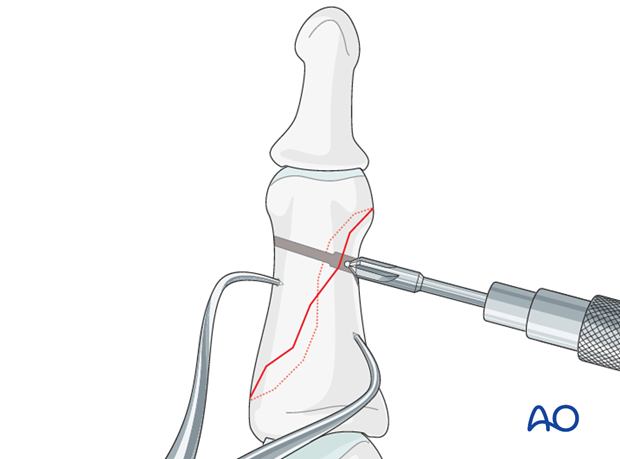
Drilling for lag screws
There are two options to prepare the gliding hole and the thread hole:
1) Gliding hole first
Drill the gliding hole in the near cortex. Ensure perfect fracture reduction and then insert a drill guide. Drill the thread hole in the far (trans) cortex through the drill guide.
This method ensures that the thread hole is perfectly in line with the gliding hole.
This is the preferred method.
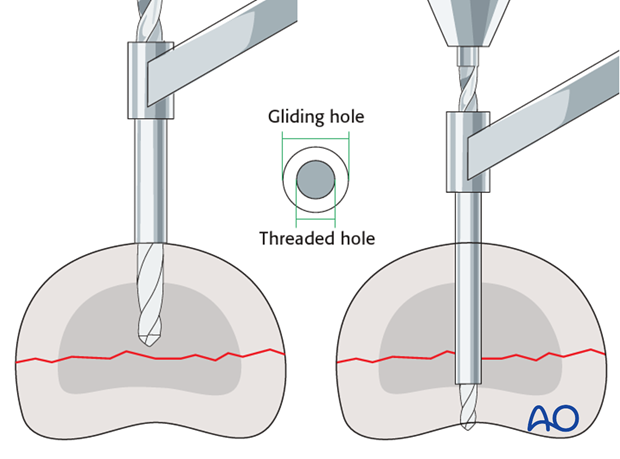
2) Thread hole first
Drill a hole through both cortices, using the drill for the thread hole. Then use the corresponding larger drill bit to overdrill the near cortex to create the gliding hole.
This technique is useful for small fragments. The disadvantage, however, is that the holes may not be centered in relation to each other.
Pearl
If the near cortex is tapped prior to overdrilling for the gliding hole, eccentric passage of the second drill is less likely. This can be achieved by inserting the chosen self-tapping screw through the near (cis) cortex and then removing it. The drill will now follow exactly the threaded axis.
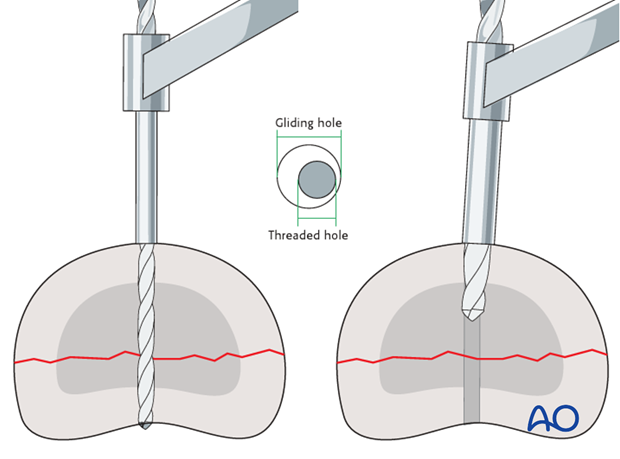
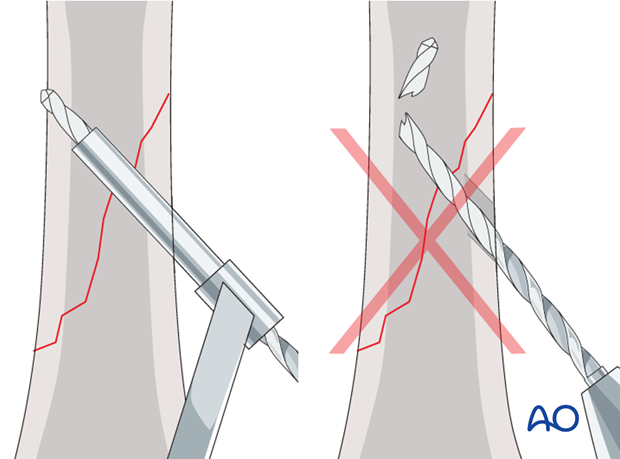
Pearl: Drill guide
Using a drill guide not only preserves the soft tissues and ensures ideal centering of the threaded hole,...
...but also helps to prevent the drill from breaking, due to excessively oblique insertion.
Measurement
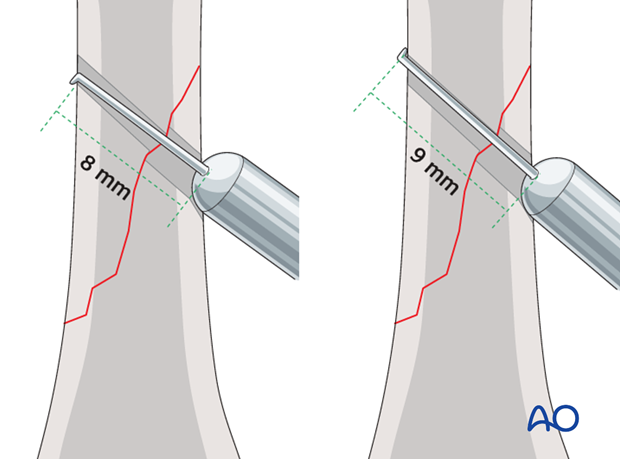
Use a depth gauge to measure for screw length.
When measuring for screw length in oblique drill holes, the measurement to the acute angle is different from the measurement to the obtuse angle. This problem increases with the degree of obliquity.
Always measure both angles and use the longer measurement. However, keep in mind that too long a screw can protrude to the extent that it puts the soft tissues at risk.
Screw length pitfalls
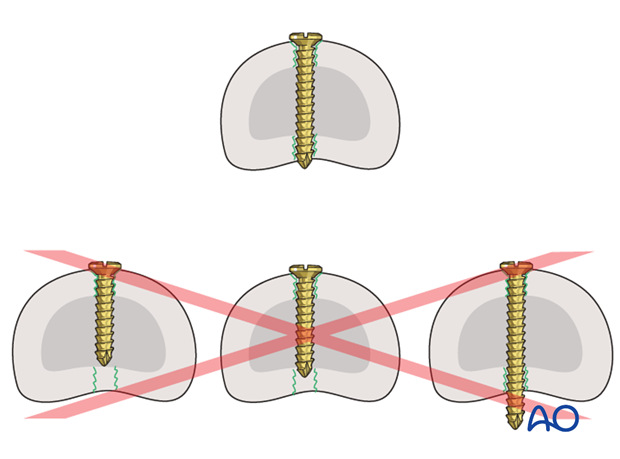
Ensure that a screw of the correct length is used.
- Too short screws do not have enough threads to engage the cortex properly. This problem increases when self-tapping screws are used due to the geometry of their tip.
- Too long screws endanger the soft tissues, especially tendons and neurovascular structures. With self-tapping screws, the cutting flutes are especially dangerous, and great care has to be taken that the flutes do not protrude beyond the cortical surface.
Countersinking
Countersink the gliding hole in order to reduce contact pressure and prevent the screw head from being too prominent. This should never be undertaken using a power tool.
Screw insertion
Insert the first screw, but do not yet tighten it.
Prepare for the second screw in a similar fashion. Insert the second screw.
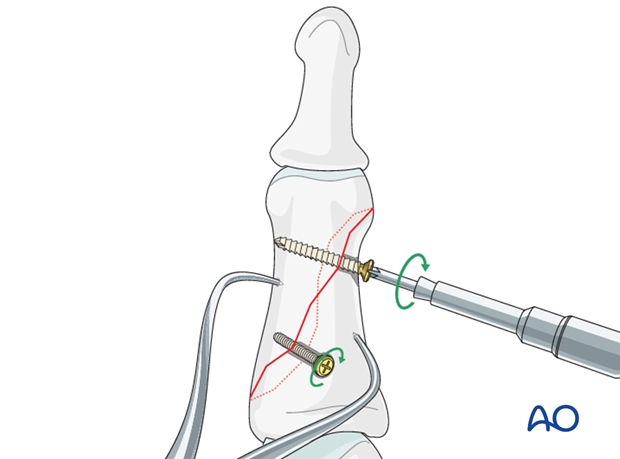
It is important to tighten the two screws alternately, so as not to displace the fracture reduction.
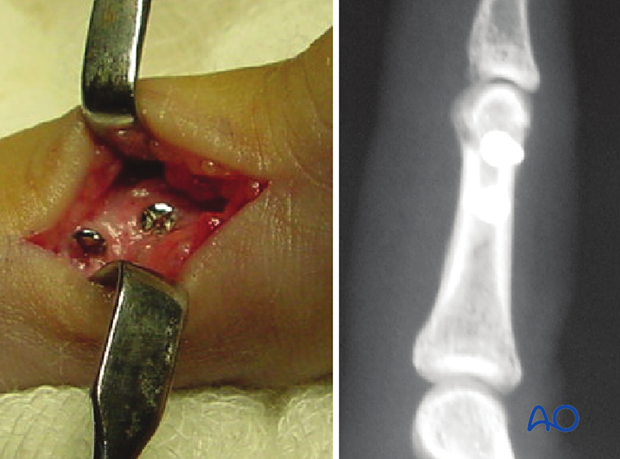
6. Alternative fixation
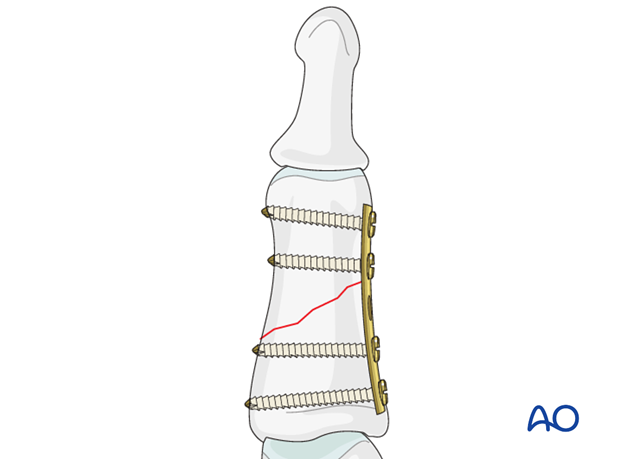
Plate fixation in short oblique fractures
In the rare cases of short oblique fractures, plate fixation may be the better option.
7. Aftertreatment
Postoperatively
Protect the digit with buddy strapping to the adjacent finger, to neutralize lateral forces on the finger.
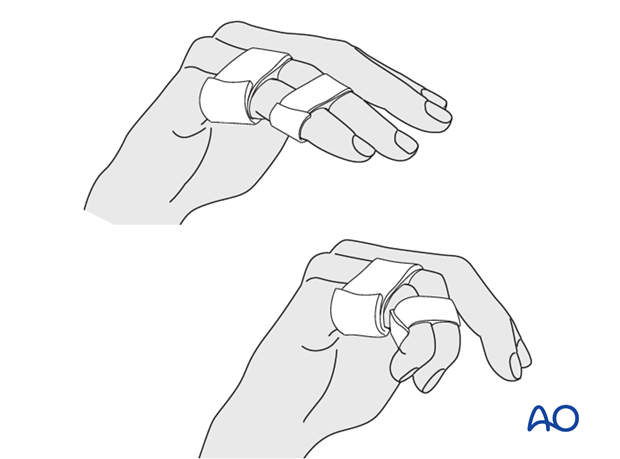
While the patient is in bed, use pillows to keep the hand elevated above the level of the heart to reduce swelling.
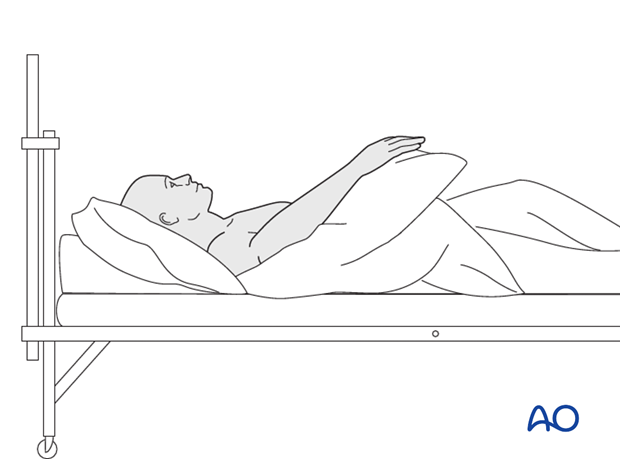
Follow up
See the patient 5 days and 10 days after surgery.
Functional exercises
The patient can begin active motion (flexion and extension) immediately after surgery.
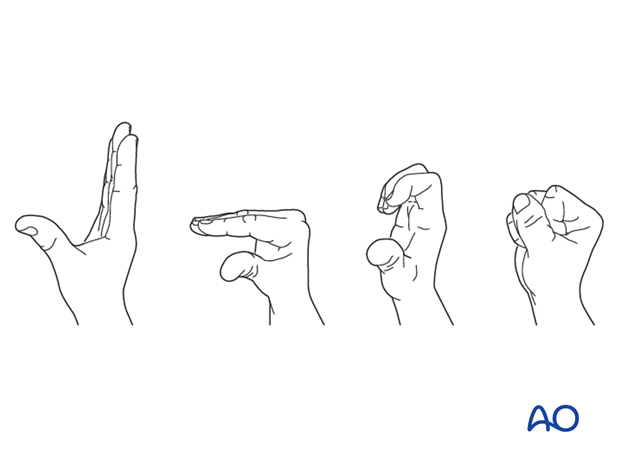
For ambulant patients, put the arm in a sling and elevate to heart level.
Instruct the patient to lift the hand regularly overhead, in order to mobilize the shoulder and elbow joints.

Implant removal
The implants may need to be removed in cases of soft-tissue irritation.
In case of joint stiffness, or tendon adhesion’s restricting finger movement, tenolysis, or arthrolysis become necessary. In these circumstances, take the opportunity to remove the implants.


