Cerclage compression wiring
1. Principles
Lesion classification
There is a number of lesions produced by a hyperflexion mechanism.
All of these are characterized by detachment of the central slip of the extensor apparatus. They are considered as acute boutonnière injuries.
Lesions without dislocation
- Hyperflexion with detachment of the central slip (no fracture)
- Simple avulsion fracture of the central slip with a small nonarticular fragment
- Simple avulsion fracture of the central slip with a larger articular fragment
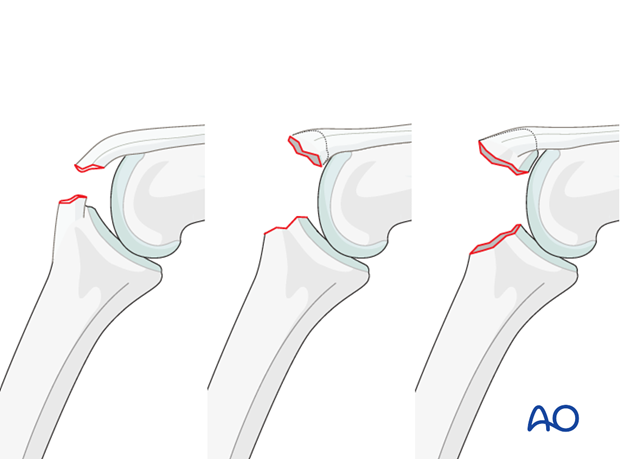
Sometimes, lesions such as these are considered minor injuries by traumatologists, and often they are confused with simple ligament sprains. However, if not treated early and correctly, boutonnière deformity, which is difficult to treat at a later stage, is a common consequence.
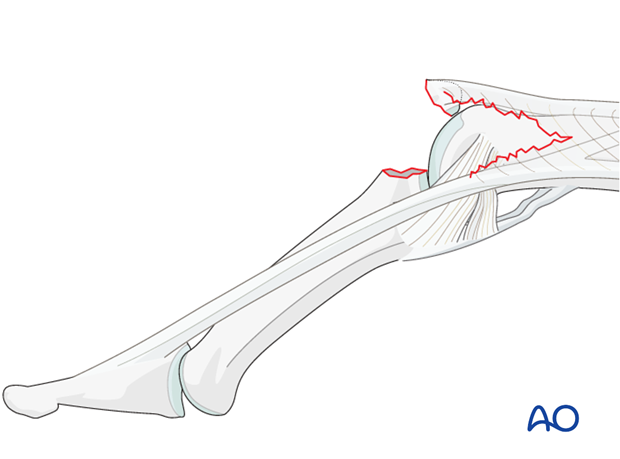
Lesions with palmar dislocation
If palmar dislocation of the PIP joint is present, a rupture of the collateral ligament and detachment of the central slip are involved. In injuries of this kind, a swan-neck deformity is present, and the finger cannot be flexed.
Lesions with dislocations
- Detachment of the central slip without a fracture
- Avulsion fracture of the central slip with a small nonarticular fragment
- Avulsion fracture of the central slip with a larger articular fragment
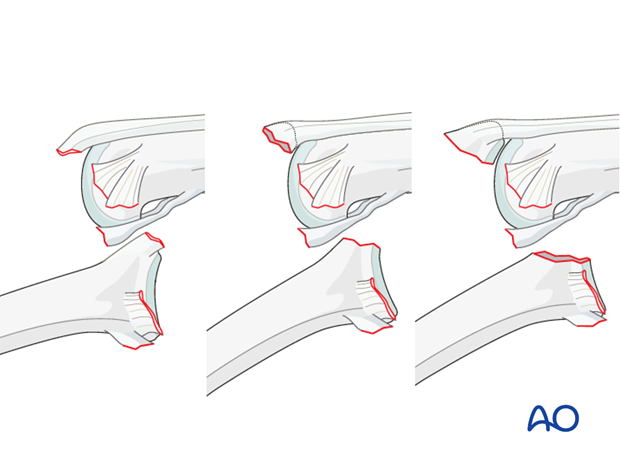
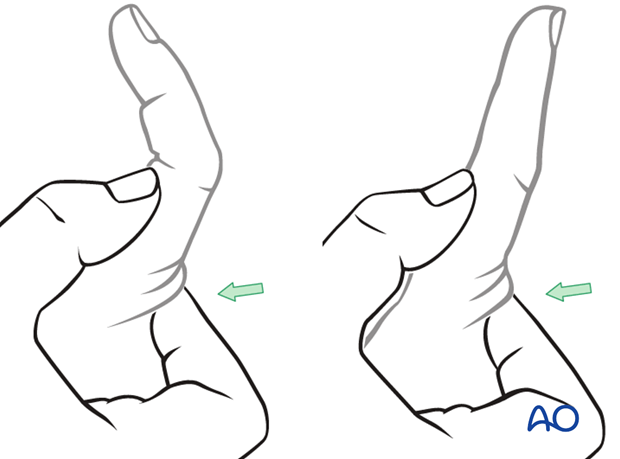
Undislocated lesions: Early diagnosis by Stark maneuver
Early diagnosis of injuries without dislocation is important. This is not always easy due to the swelling and often inconclusive x-rays.
Keep the PIP joint hyperextended. Passively flex the DIP joint.
If passive movement of the DIP joint is limited, this is a strong indication for the presence of a central slip detachment.
Compare with the uninjured hand.
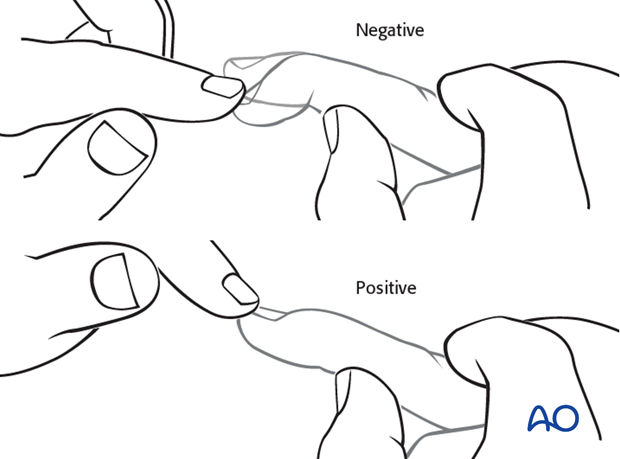
Recognizing detachment of the central slip
In order to recognize detachment of the central slip, ask the patient to extend the PIP joint with the MP joint in hyperextension.
If the PIP joint can be fully extended in this position, the central slip is still attached, and nonoperative treatment may be indicated.
Pitfall: MP joint not hyperextended
If the MP joint is not hyperextended, extension of the PIP joint may still be possible, even with a detached central slip. In this case, the intrinsic muscles will extend the joint.
Mechanism of the injury
These injuries are commonly caused by sporting accidents, often in ball games such as cricket, volleyball, basketball, etc.
Typically, hyperflexion of the finger causes an avulsion lesion of the central slip.
Often, in addition to hyperflexion, impact on the finger tips causes longitudinal compression forces on the middle phalanx towards the proximal phalanx, leading to an additional impaction fracture.

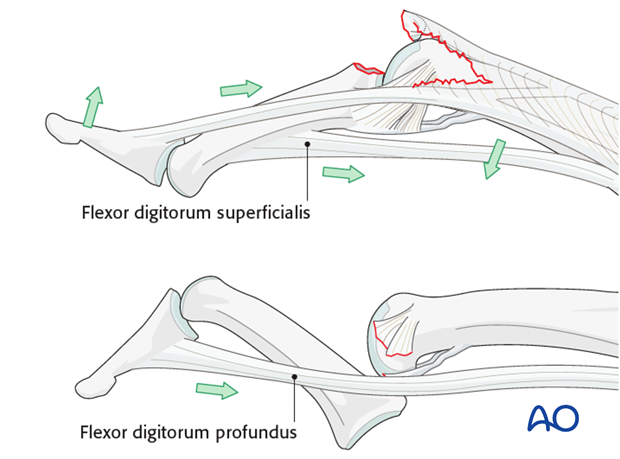
Deforming forces
Boutonnière deformity
When the central slip is detached, the lateral bands are palmarly displaced and pull the DIP joint into hyperextension.
The flexor digitorum superficialis (FDS) pulls proximally on the middle phalanx, forcing the PIP joint into flexion.
Swan-neck type deformity
If the middle phalanx is palmarly dislocated at the PIP joint by the energy of the trauma, the flexor digitorum profundus (FDP) pulls the DIP joint into flexion.
2. Indications
Nonoperative treatment
The majority of these lesions can be treated by closed reduction and splinting for 6 weeks, leaving the DIP joint free for active mobilization. Encourage the patient actively to flex and extend the DIP joint, which allows healing of the lateral band in the right position.

Large fragment avulsion fracture
An avulsion fracture of the central slip can usually be reduced by full extension. Confirm using image intensification.
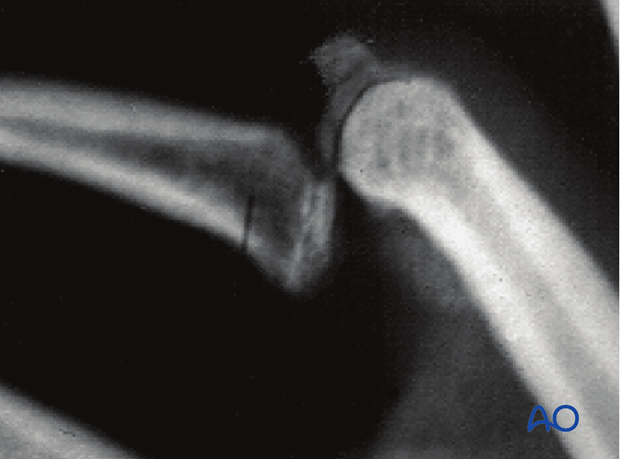
If the fracture does not reduce, usually this is an indication of soft-tissue interposition. In such cases, surgical treatment is indicated.
Possible treatments include lag screw fixation, or percutaneous K-wire fixation. Cerclage compression wiring is another option.
This form of fixation was referred to as “Tension band wiring”. We now prefer the term “Cerclage compression wiring” because the tension band mechanism cannot be applied consistently to each component of the fracture fixation. An explanation of the limits of the Tension band mechanism/principle can be found here.
3. Approach
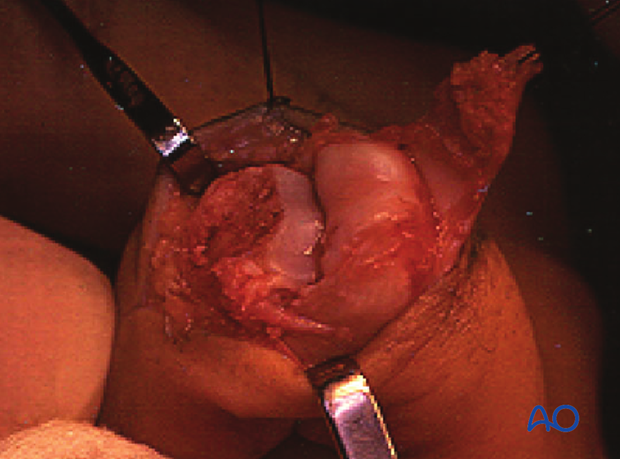
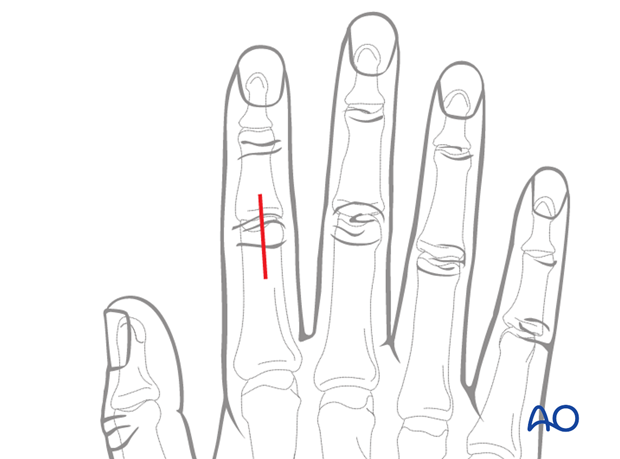
For this procedure a dorsal approaches to the PIP joint is normally used.
4. Reduction
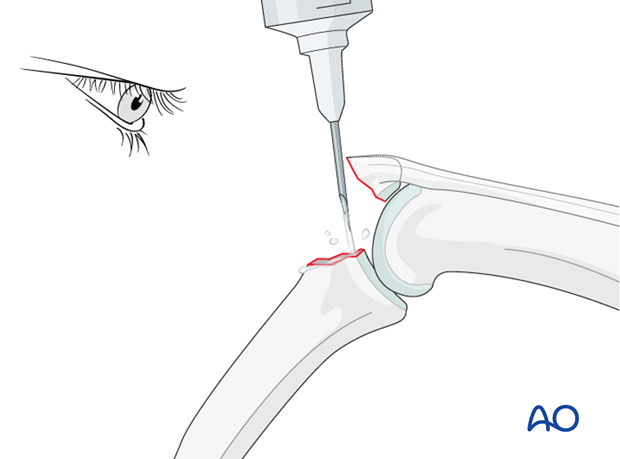
Clean the fracture site
Flex the PIP joint. In order to gain a better view of the fracture and the joint, use a syringe to clear out blood clot with a jet of Ringer lactate.
Often the presence of comminution is not apparent from the x-rays, and can only be determined under direct vision.
Use a dental pick carefully to free interposed tissues, and to remove blood clot and other debris.
Reduce the fracture
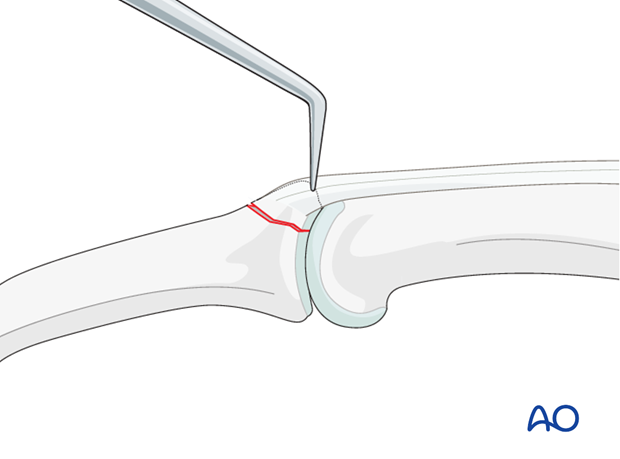
Extend the PIP joint and apply traction. Put manual pressure on the palmar side of the middle phalanx.
Complete the reduction with help of a dental pick.
5. Wire fixation
Prepare transverse hole
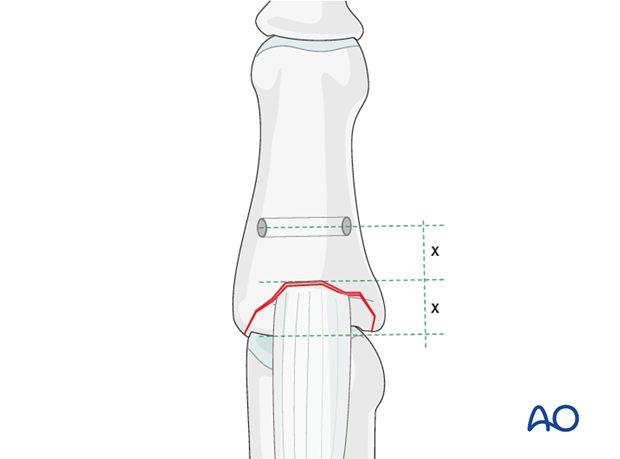
Use a drill guide and a 1.5 mm drill bit to make a transverse hole in the metaphysis of the middle phalanx.
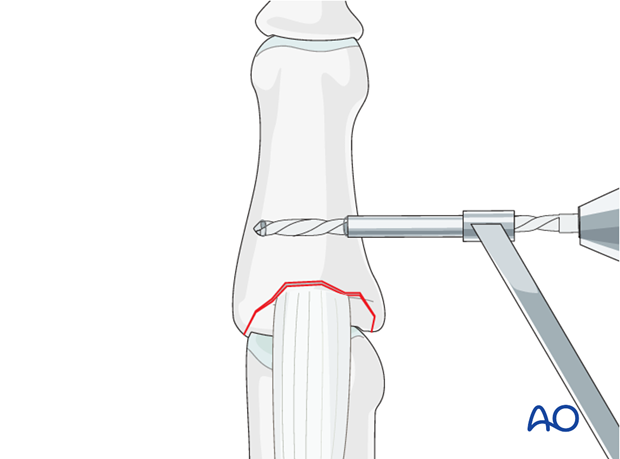
The location of the drill hole should be the same distance from the fracture line as the avulsed fragment’s length (usually approximately 1 cm). This will help the wires to cross above the fracture line, resulting in optimal force distribution.
Alternative: Insert screw
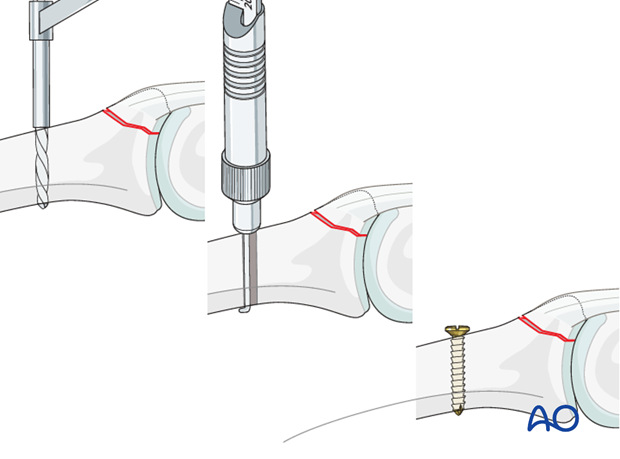
As the middle phalanx has a comparatively flat dorsal surface, it is sometimes difficult to drill a transverse hole.
As an alternative for anchoring the cerclage wire, a screw can be inserted approximately 1 cm from the fracture line. Follow standard screw inserting technique, including drilling and measuring. The screw must engage the far cortex. The screw head must protrude just enough for the wire to find anchorage.
Pass wire through the hole
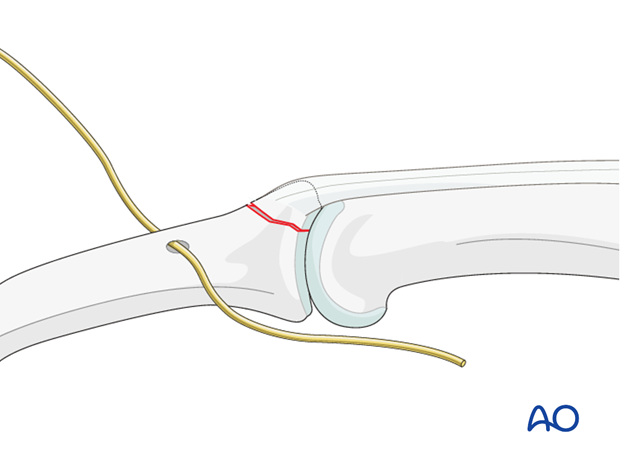
Pass 0.6 mm stainless steel wire through the hole. Alternatively, a 4.0 nonabsorbable multifilament suture can be used, double-mounted on a straight needle.
Pass wire through central slip
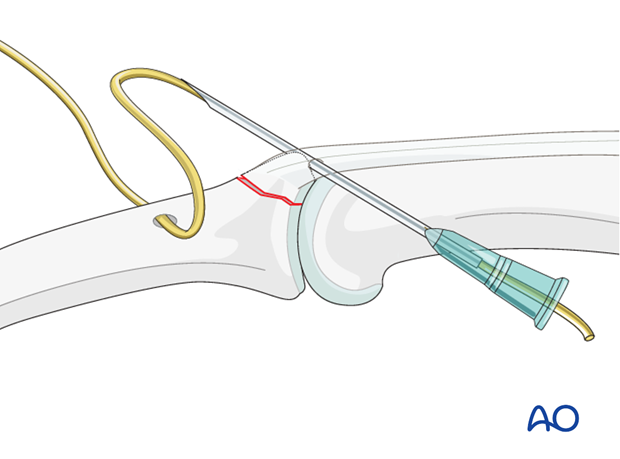
Pass the wire through the central slip, as close as possible to its insertion into the bone. A 21 hypodermic needle can be used to pass the wire through the tendon as close as possible to the bony fragment.
Do not place the wire on top of the central slip, as this may cause necrosis by pressure.
Pitfall: tilting
Depending on the fracture geometry, the avulsed fragment may tilt when the wire is tightened.
If this is the case, and the fracture size allows it, one or two 0.6 mm K-wires can be inserted to secure the reduction.
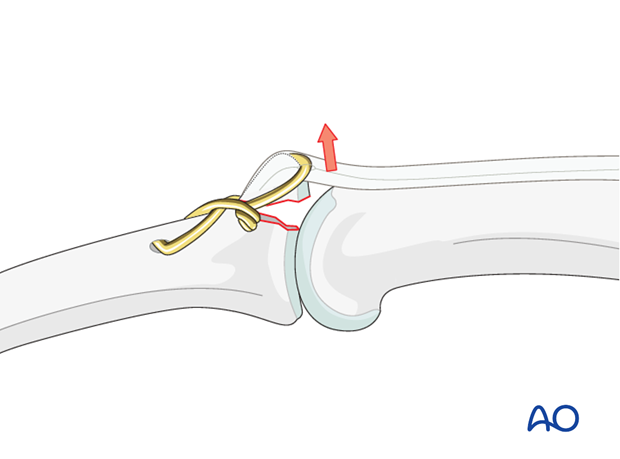
Alternative: use K-wires in avulsed fragment
If the avulsed fragment is large enough, two 0.6 mm K-wires can be inserted to secure it to the main fragment of the middle phalanx. These K-wires can then be used to anchor the cerclage wire on the avulsed fragment.
Check palmar protrusion of the K-wires under image intensification. Then retract the K-wires by about 2 mm, bend them through 180 degrees, cut them and impact them into the bone. The K-wires must engage the far cortex, but must not protrude into the flexor tendon tunnel, in order to avoid irritating the tendons.
The K-wires will prevent tilting of the fragment on tightening of the wire.
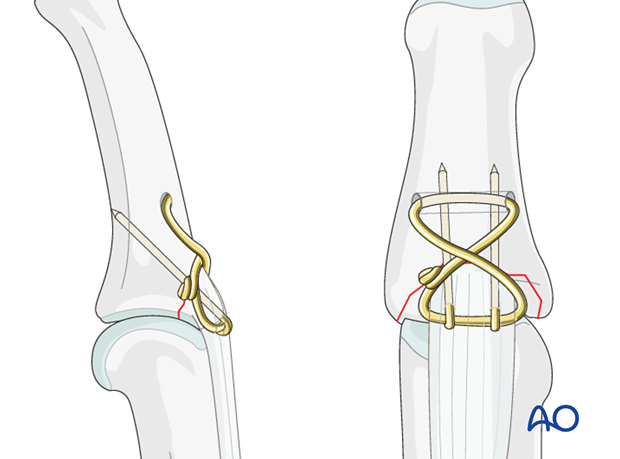
Tighten the wire
Now make a figure of eight and twist the wire. Check reduction using image intensification. Tighten the wire.
Pitfall: overtightening
Do not overtighten the wire, as the central slip may be cut, or the bone penetrated, loosening the fixation.
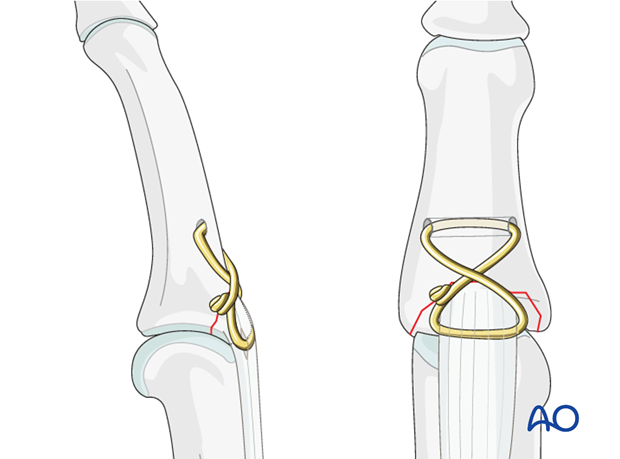
Alternative: screw technique
This drawing shows the alternative completed fixation with a screw anchor.
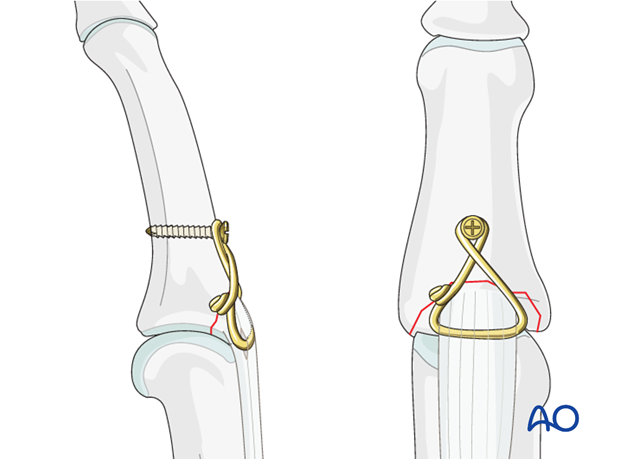
Avoid soft-tissue irritation
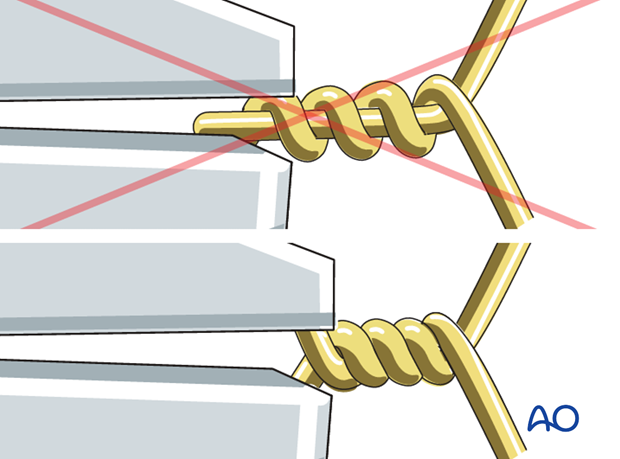
Cut the wire and bend it along the phalanx in order to avoid soft-tissue irritation.
When tightening the wire, ensure that both ends are twisted around each other rather than twisting one end around the other straight end.
This is achieved by pulling the wire twist to tighten it and then twisting further to take up the slack produced.
6. Alternative fixation: suture anchors
Indication
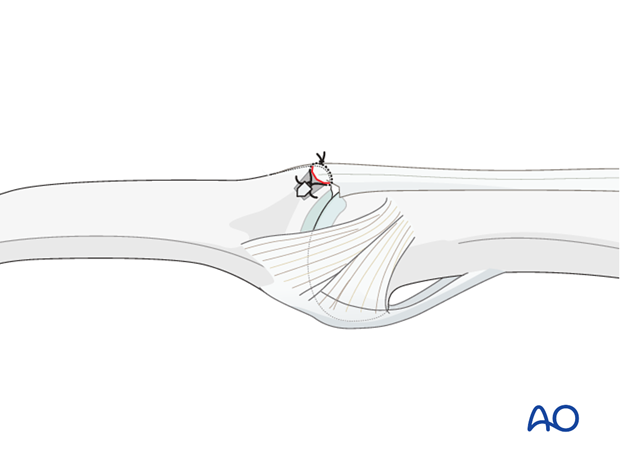
In very small fragments suture anchors may be a good alternative, as the technique is easy and faster.
Depending on the size of the fragment, two anchors can be used.

Fixation
Use an anchor that has approximately the same breadth as the avulsed fragment.
Use 4.0 multifilament nonabsorbable sutures. Wrap the sutures around the avulsed fragment. Tighten the sutures.
Alternative: fixation with 2 suture anchors
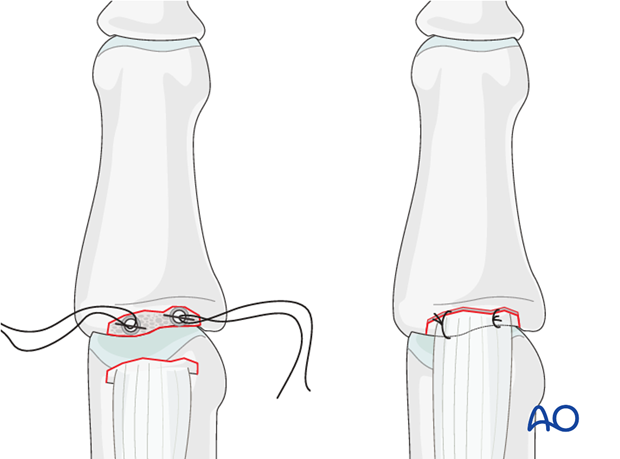
If the size of the fragment allows, two suture anchors can be used.
Choose anchors corresponding to the breadth of the fracture. If the anchors are too small, reduction will be compromised by the sutures interposing.
7. K-wire for stabilization
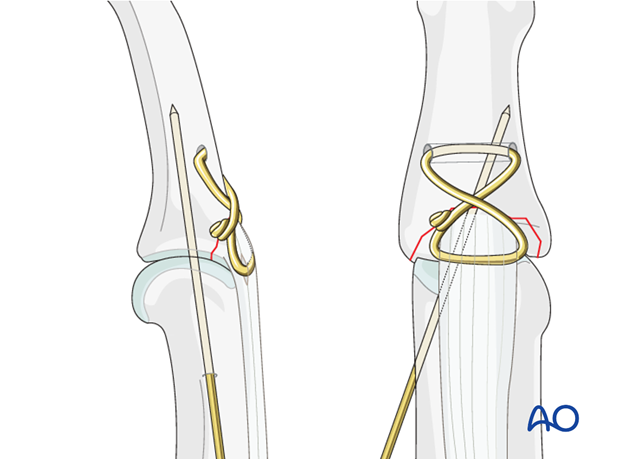
Check stability of the fixation.
If there is any doubt about the stability of the fixation, insert a K-wire obliquely crossing the PIP joint.
The K-wire can be removed after 2-3 weeks.
8. Aftertreatment
Aftertreatment depends on the size of the fragment, the quality of the bone, and the stability gained by the fixation.
The PIP joint is immobilized in extension in a palmar splint, leaving the DIP joint free.
DIP ...

... MP joint movement is encouraged immediately to avoid extensor tendon adhesion.
If the fixation is strong enough, the patient is encouraged to take off the splint 2-3 times daily, and to commence with gentle active exercises.
Use of a night splint is recommended for a duration of 6-8 weeks.
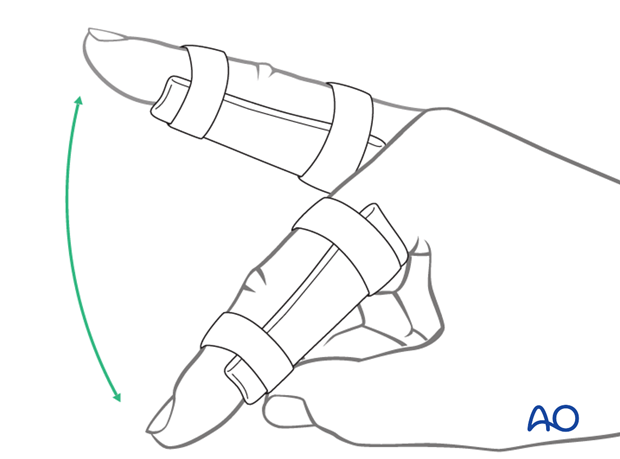
Functional exercises
After 3 weeks, the splint is removed, and unrestricted active flexion and extension is permitted.
Passive motion is only permitted after 4 weeks.
Implant removal
The implants need to be removed in case of soft-tissue irritation.
In case of stiffness or tendon adhesion restricting finger movement, tenolysis, capsulolysis, and joint mobilization during surgery are necessary. In these circumstances, take the opportunity to remove implants.


