Collateral ligament reattachment
1. General considerations
Suture anchors or bone tunneling
Two alternative techniques are available for collateral ligament reattachment: suture anchors or bone tunneling.
The advantage of suture anchors is the relative ease of the procedure. It is also a time-saving technique.
Tunneling is the more demanding procedure, but it is significantly less expensive.
Treatment principles
When ligament repair is necessary, the surgeon should be aware of three guiding principles:
- Diagnose the precise location of the lesion.
- Be familiar with the related anatomy and surgical approach.
- Minimize further soft-tissue dissection.
2. Patient preparation
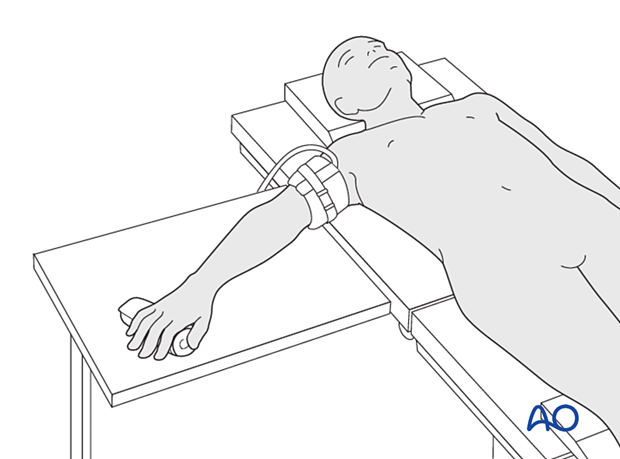
Place the patient supine with the arm on a radiolucent hand table.
3. Approach
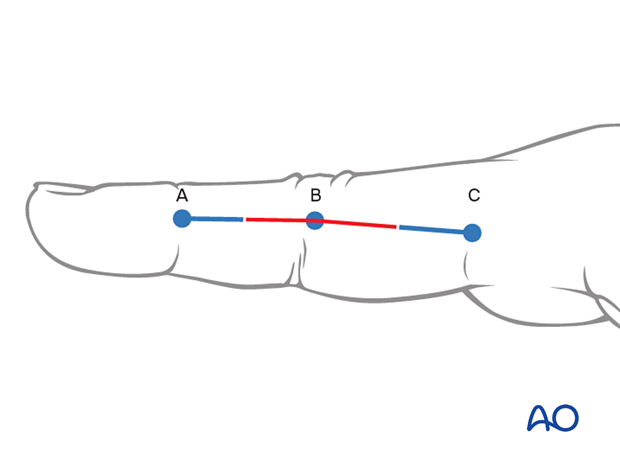
For this procedure a midaxial approach to the proximal interphalangeal joint is normally used.
4. Reduction of dislocation
Closed reduction
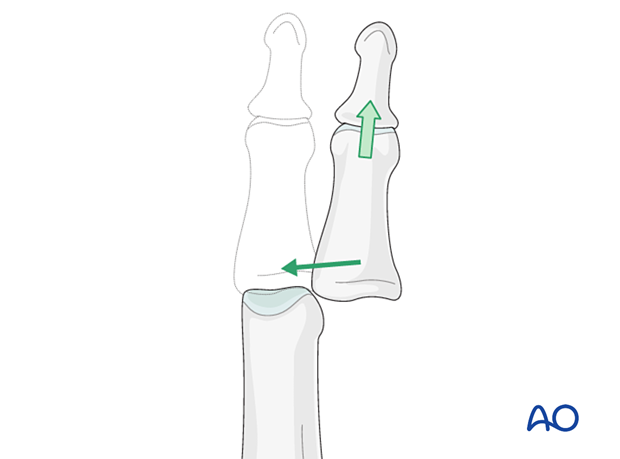
Collateral ligament avulsion may be associated with a lateral dislocation of the PIP joint.
This can be reduced by traction with gentle laterally applied pressure on the middle phalanx to reduce the joint. This keeps the palmar structures in tension and reduced the risk of soft-tissue interposition.
Stability evaluation
Confirm reduction with an image intensifier and check the joint stability by varus/valgus stress test. This should show congruent movement compared with the adjacent joints.

Open reduction
If congruent reduction can not be achieved, often due to interposed soft tissue, an open reduction is necessary.
Remove the obstructing soft tissues or fragments, reduce the joint and confirm congruity and stability of the joint.
Repair the joint capsule.
5. Open reduction and repair of interposed tissues
Indications
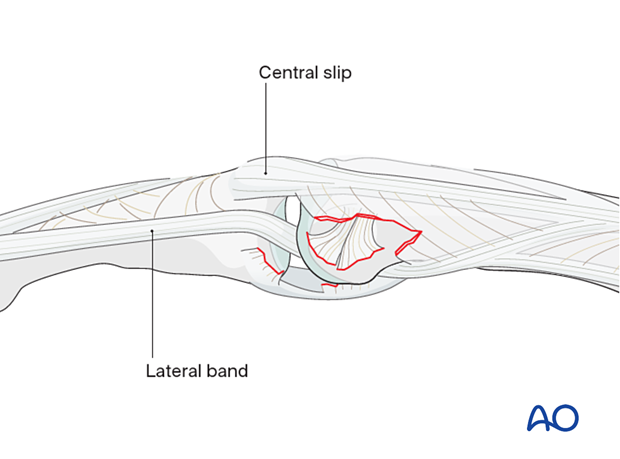
If any widening of the joint is visible, soft-tissue interposition, usually of the lateral band, may be the cause.
In this case, the condyle is trapped between the lateral band and the central slip (a so-called “buttonhole” lesion).
Management
If the lateral band (or, more rarely, the central slip or the collateral ligament) is trapped in the joint, use a dental pick to free and reduce it, while keeping the PIP joint in flexion.
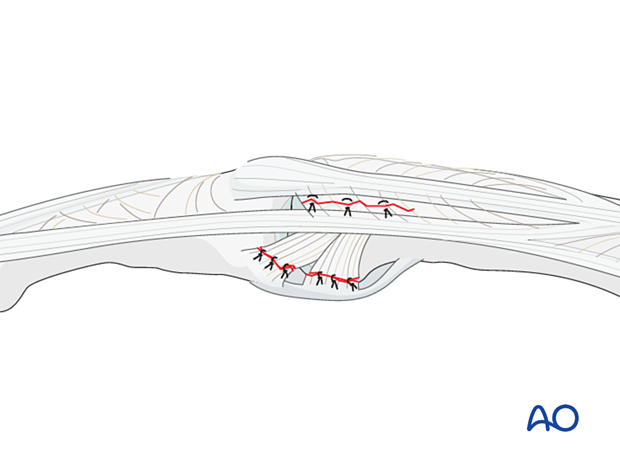
Subsequent repair is often necessary.
Use 6.0 nonabsorbable monofilament nylon to repair the injury with interrupted sutures as illustrated.
6. Visualizing the joint
All free fragments need to be removed to prevent obstruction of joint movement.
Fragments remaining attached to the ligament should be maintained.
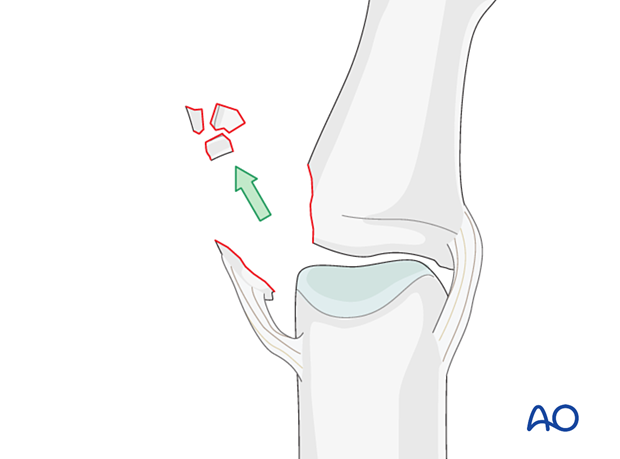
Laterally deviate the phalanx in the opposite direction to gain maximal visualization of the joint (“open the book”). Remove all loose bony fragments.
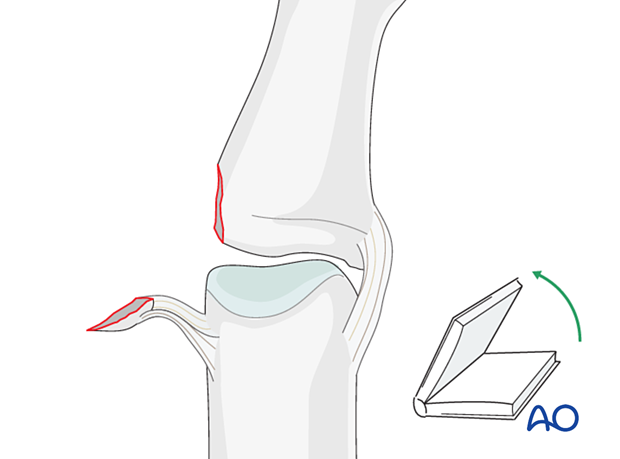
7. Option 1 – Suture anchor fixation
Description of the injury
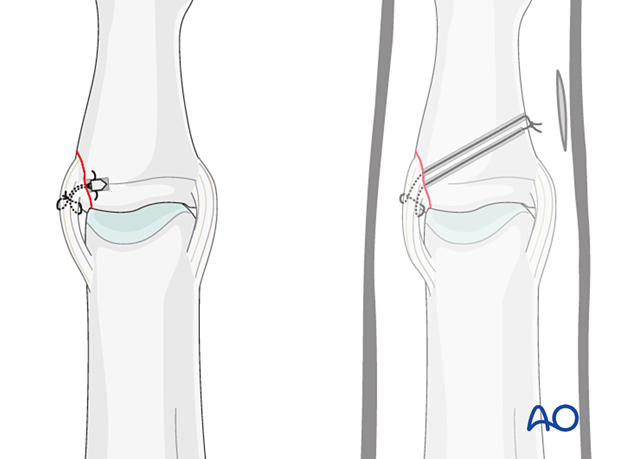
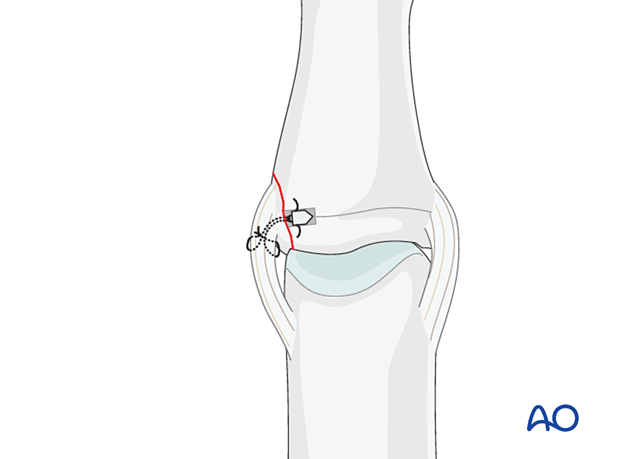
In this injury, the collateral ligament is completely detached from the middle phalanx and also from the volar plate.
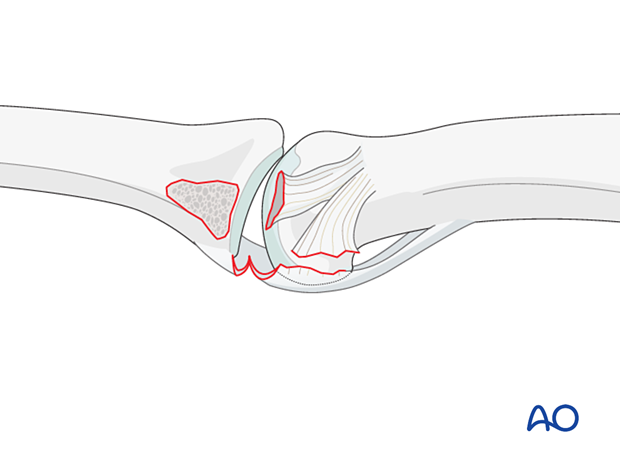
Drilling an anchor hole
Extend the finger for better visualization.
Use the appropriate drill to prepare a pilot hole for the anchor.
If space allows, consider two minianchors for bridging fixation of the fragments.
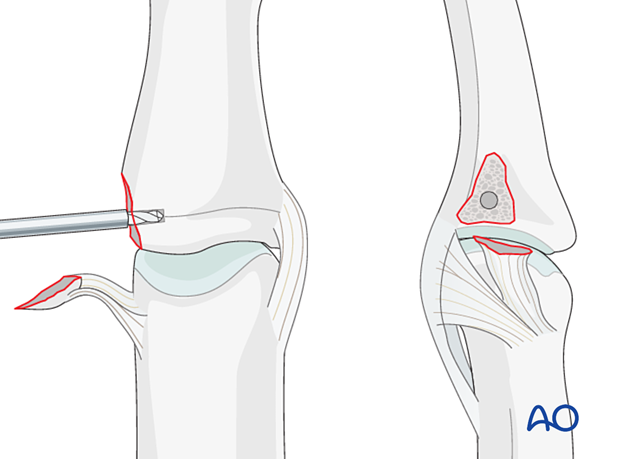
Insertion of the anchor
Insert the anchor according to the manufacturer’s instructions at the isometric point of insertion.
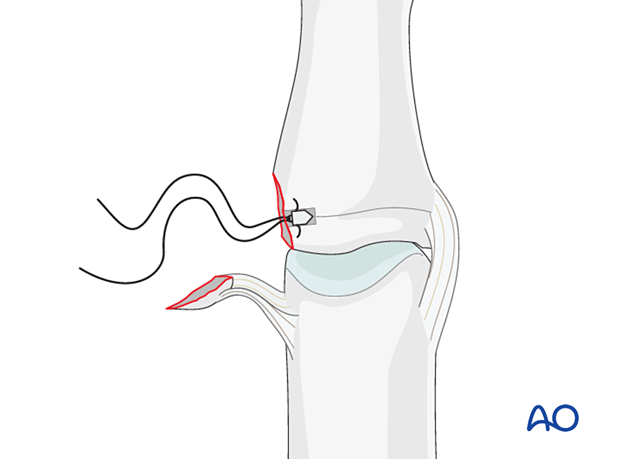
Insertion of sutures
Approximate the collateral ligament and the volar plate to the reattachment site.
Insert the suture in the proximal end of the ligament, face it to the distal end, pass the suture through it and knot.
Pitfalls
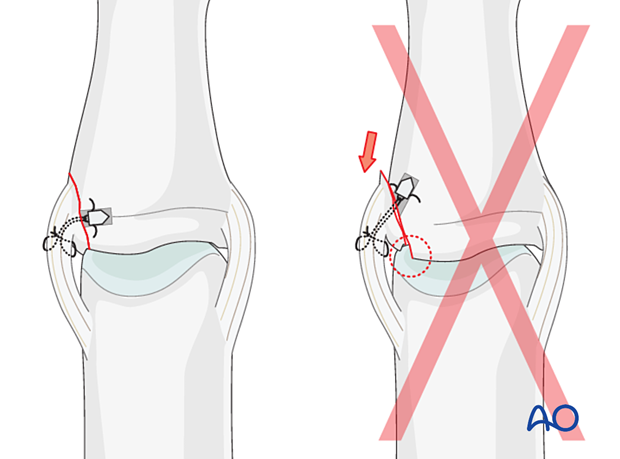
- Articular surface damage
- Joint instability
- Joint stiffness
- Progressive arthritis
- Secondary displacement of fracture fragment
8. Option 2 – Bone tunneling
Drilling holes
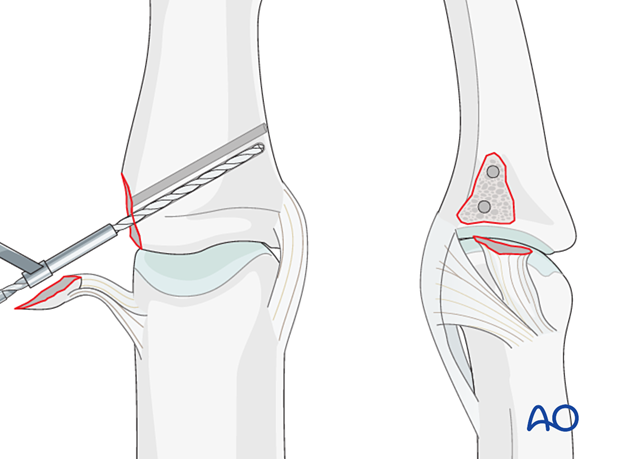
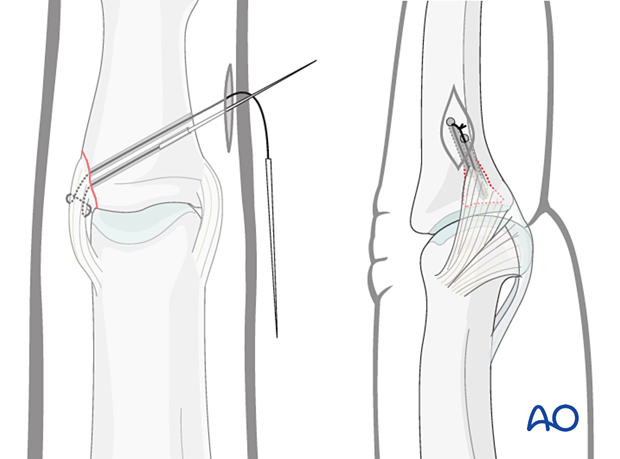
Use a 1.0 mm drill or a K-wire to create two parallel drill holes, angled from proximal to distal and penetrating the opposite cortex. The entry point is close to the articular margin.
A drill sleeve for soft-tissue protection is mandatory.
Insertion of sutures
Pass 4.0 nonresorbable, braided sutures with straight needles through the two drill holes.
Alternatively, a suture passer may be used to thread each suture through the two drill holes.
Pass the sutures through the ligament and create a locking loop to anchor the suture in the ligament.
Each needle (or a suture passer) is passed through a drill hole, taking the suture through the opposite cortex.
Reapproximating the ligament
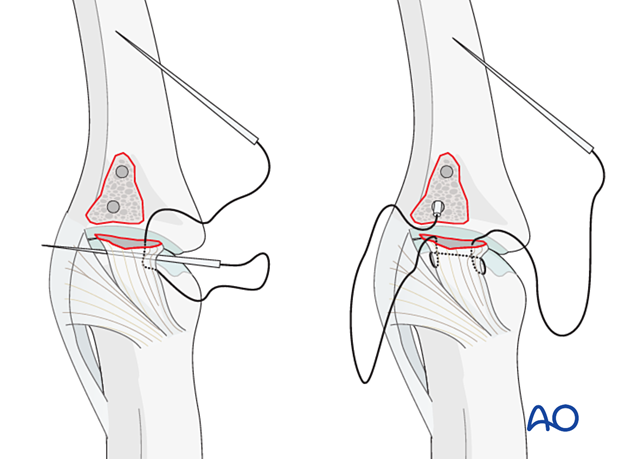
Create an incision to retrieve the sutures. Tension the sutures to approximate the ligament to the attachment site and secure them over the cortical bone bridge.
9. Joint transfixation with K-wire
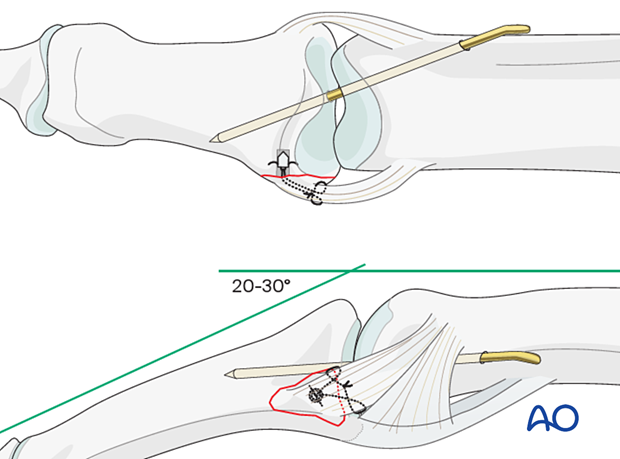
Transfixation of the joint for 3 weeks may help to protect the fixation. There is an increased risk of joint stiffness.
Pass a 1.2 mm K-wire obliquely across the PIP joint with the joint in 20°–30° of flexion. This position protects the ligament reattachment.
Leave the end of the K-wire outside of the skin to facilitate later removal.
The fixation should be protected with a splint to reduce the risk of wire breakage.
10. Final assessment
Confirm anatomical reduction and fixation with an image intensifier.
11. Aftercare
Postoperative phases
The aftercare can be divided into four phases of healing:
- Inflammatory phase (week 1–3)
- Early repair phase (week 4–6)
- Late repair and early tissue remodeling phase (week 7–12)
- Remodeling and reintegration phase (week 13 onwards)
Full details on each phase can be found here.
Postoperative treatment
If there is swelling, the hand is supported with a dorsal splint for a week. This should allow for movement of the unaffected fingers and help with pain and edema control. The arm should be actively elevated to help reduce the swelling.
The hand should be immobilized in an intrinsic plus (Edinburgh) position:
- Neutral wrist position or up to 15° extension
- MCP joint in 90° flexion
- PIP joint in extension
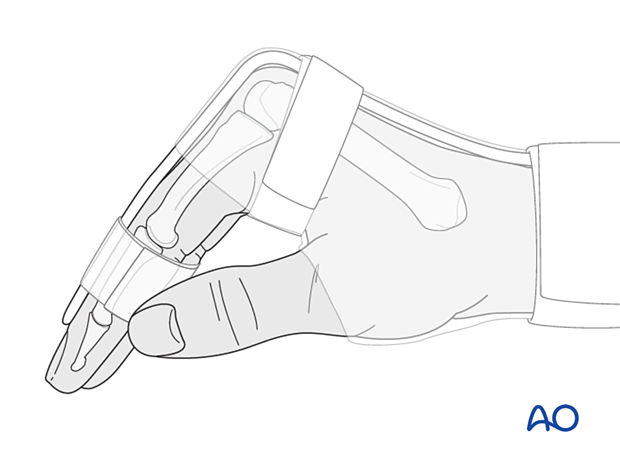
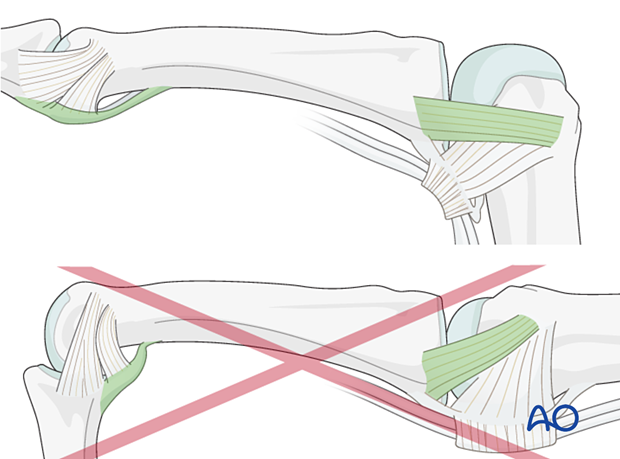
The MCP joint is splinted in flexion to maintain its collateral ligaments at maximal length to avoid contractures.
The PIP joint is splinted in extension to maintain the length of the volar plate.
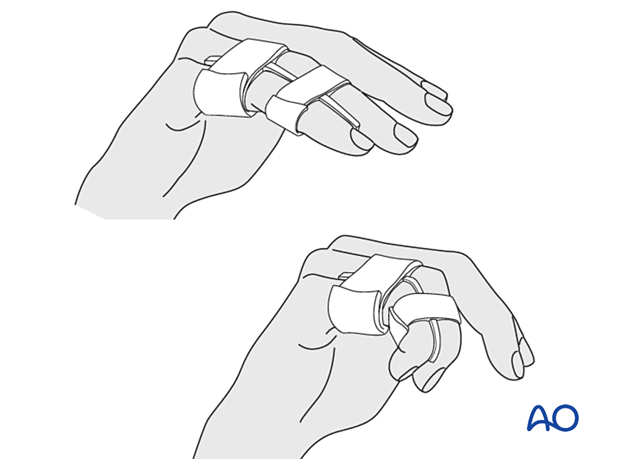
After swelling has subsided, the finger is protected with buddy strapping to neutralize lateral forces on the finger.
Mobilization
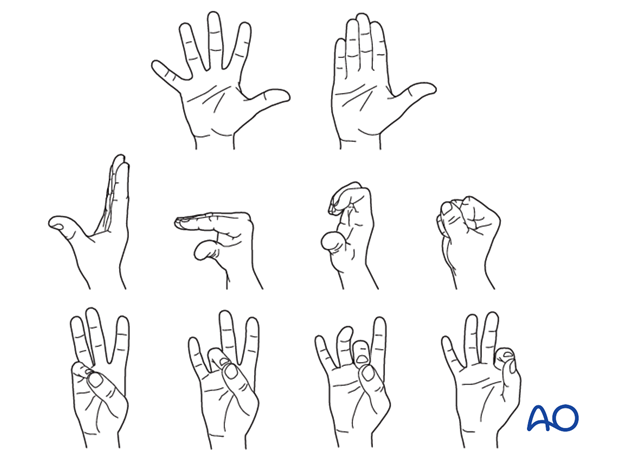
To prevent joint stiffness, the patient should be instructed to begin active motion (flexion and extension) of all nonimmobilized joints immediately after surgery.
Follow-up
The patient is reviewed frequently to ensure progression of hand mobilization.
In the middle phalanx, the fracture line can be visible in the x-ray for up to 6 months. Clinical evaluation (level of pain) is the most important indicator of fracture healing and consolidation.
K-wire removal
The K-wire is removed after 3 weeks in the outpatient clinic and mobilization is continued under supervision until optimal recovery of motion has been achieved.
