Cerclage compression wiring
1. General considerations
Introduction
A partial articular fracture of the middle phalangeal base without comminution may be stabilized with cerclage compression wiring.
A disadvantage of this fixation is the need to remove the wires as the construct is very bulky.
This fracture type may be associated with proximal interphalangeal (PIP) joint dislocation. In this case, the dislocation must be manipulated, and any interposed soft-tissue structures removed.
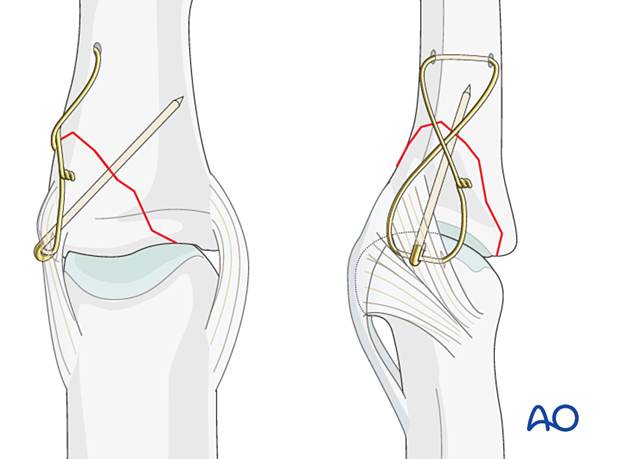
Tension band principle
The tension band converts tensile forces into compression forces.
In a case such as the illustrated fracture, the tension band will be applied in static mode.
Tension band wiring of this fracture has been shown to be effective and usually provides good results.
This form of fixation was referred to as a “Tension band fixation”. We now prefer the term “Cerclage compression wire fixation” because the tension band mechanism cannot be applied consistently to each component of the fracture fixation. An explanation of the limits of the tension band mechanism/principle can be found here.
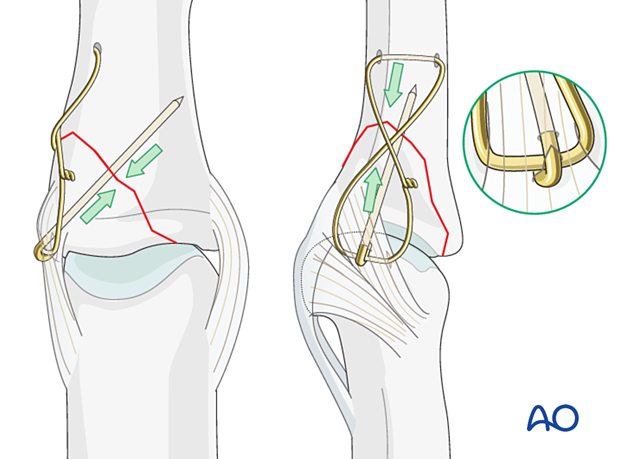
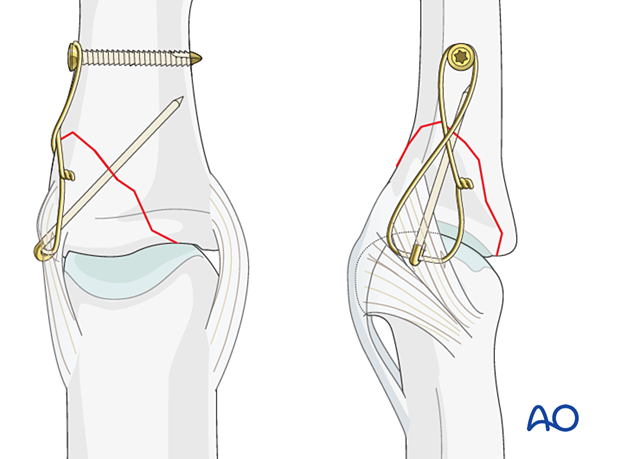
Alternative fixations
Anchor screwAn alternative way of anchoring the figure-of-eight wire distally in the phalanx is the use of a screw instead of a drill hole.
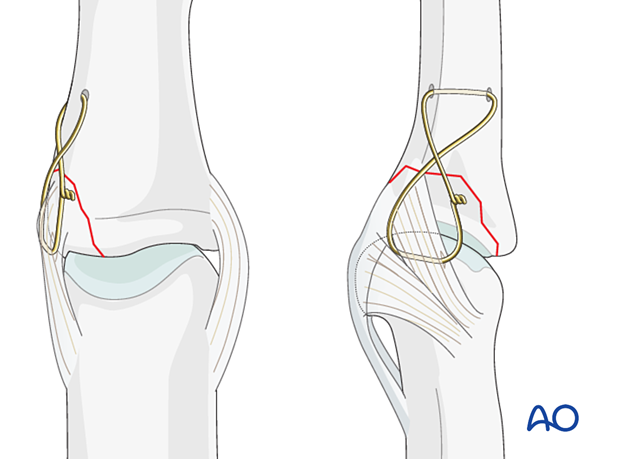
If the avulsed fragment is too small to risk further damage by passing a K-wire, a simple figure-of-eight tension band is used.
2. Patient preparation
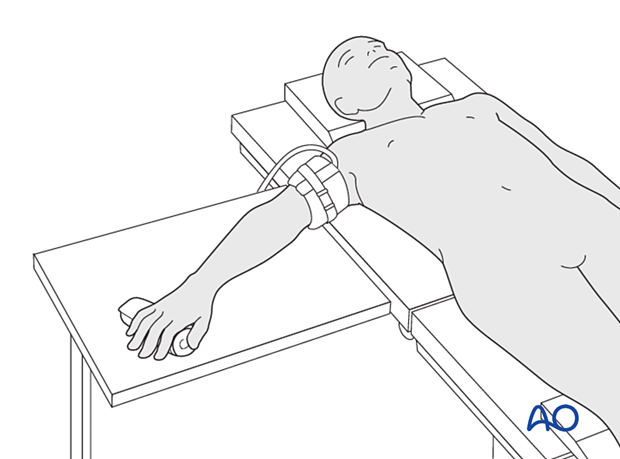
Place the patient supine with the arm on a radiolucent hand table.
3. Approach
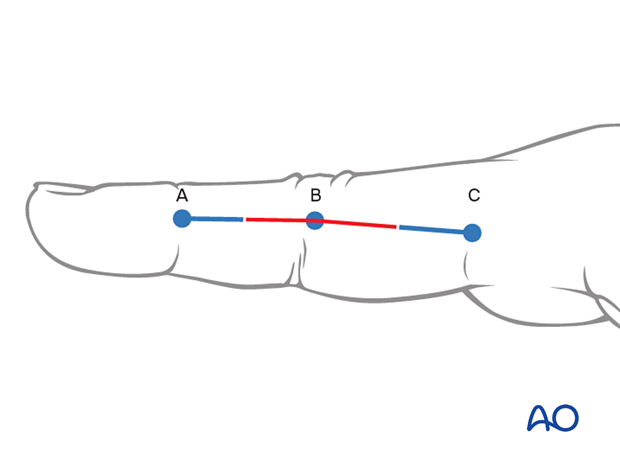
For this procedure a midaxial approach to the proximal interphalangeal joint is normally used.
4. Reduction of dislocation
Closed reduction
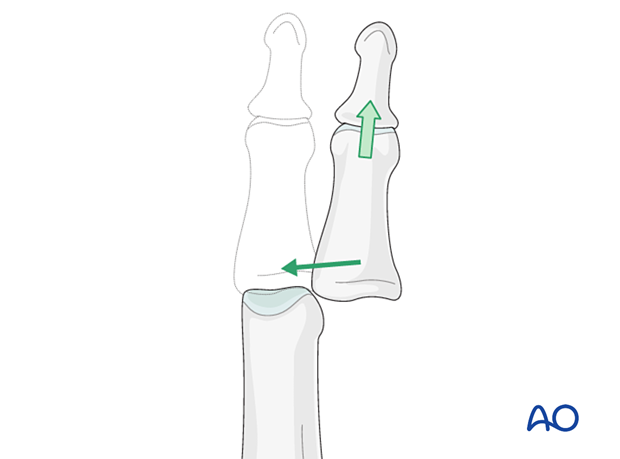
Collateral ligament avulsion may be associated with a lateral dislocation of the PIP joint.
This can be reduced by traction with gentle laterally applied pressure on the middle phalanx to reduce the joint. This keeps the palmar structures in tension and reduced the risk of soft-tissue interposition.
Open reduction
If congruent reduction can not be achieved, often due to interposed soft tissue, an open reduction is necessary.
Remove the obstructing soft tissues or fragments, reduce the joint and confirm congruity and stability of the joint.
Repair the joint capsule.
5. Fracture reduction
Direct reduction
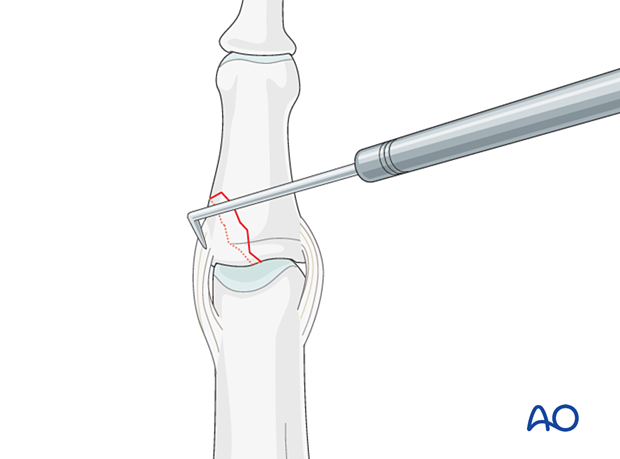
In displaced fractures, open reduction is often necessary.
Use a dental pick to gently reduce the fracture from palmar to dorsal and from proximal to distal. Application of excessive force can result in fragmentation.
Stability evaluation
Confirm reduction with an image intensifier and check the joint stability by varus/valgus stress test. This should show congruent movement compared with the adjacent joints.

6. Wire fixation
K-wire insertion
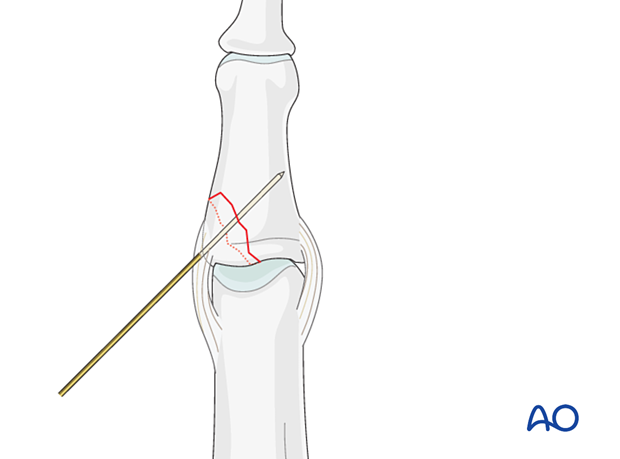
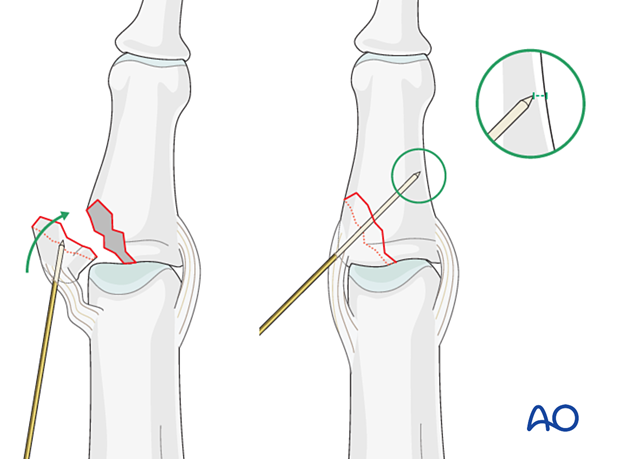
Hold the reduction by inserting a K-wire through the center of and perpendicular to the fracture surface. Make sure not to cross the far cortex.
Check reduction using image intensification.
Pearl: joystick reduction
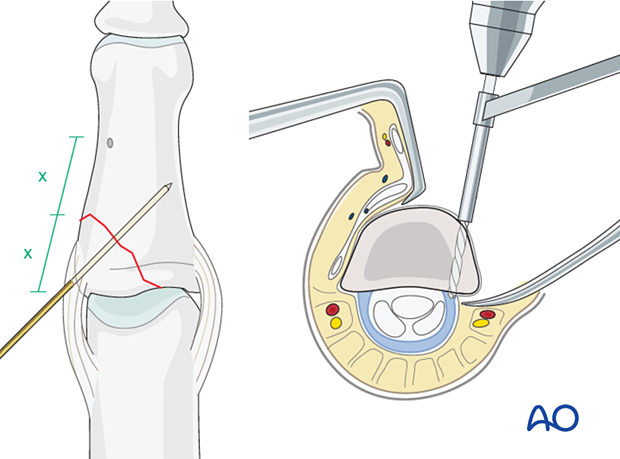
Drilling a hole
Drill a hole in the middle phalanx, from dorsal to palmar.
The location of the drill hole should be the same distance from the fracture line as the avulsed fragment’s length.
Use a drill guide, for soft-tissue protection, and either a slow-spinning 1.5 mm drill, or a 1 mm K-wire.
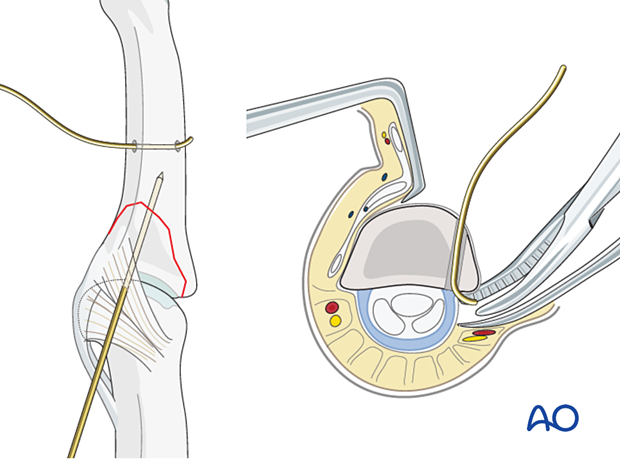
Wire insertion
Thread a 0.6 mm stainless steel monofilament wire through the drill hole.
A fine, curved hemostat can be used to retrieve the wire from the palmar surface, sliding it very closely to the cortical bone to avoid damage to the digital nerve and artery. Periosteal elevators can be used for protection.
Wire application
Pass the wire close to the bone and through the ligament to protect vascularity.
Pass it around the fragment and K-wire, and through the ligament attachment, in a figure-of-eight mode.
This can be achieved by passing a syringe needle of appropriate diameter on the surface of the bone, deep to the ligament attachment, and then inserting one end of the wire into the tip of the needle. The needle and the wire are then carefully drawn through, guiding the wire along the correct track.
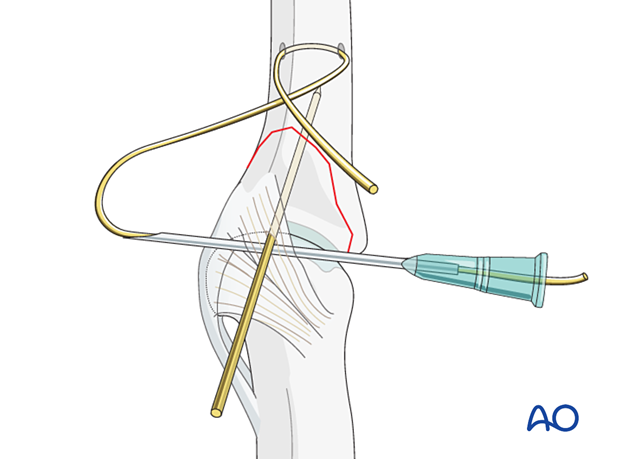
Anchoring the K-wire
Check the position of the K-wire using image intensification. If the tip of the wire is in contact with the far cortex, then retract the K-wire by about 2 mm, bend it through 180°, cut the wire to form a small hook, and impact the bent tip into the bone.
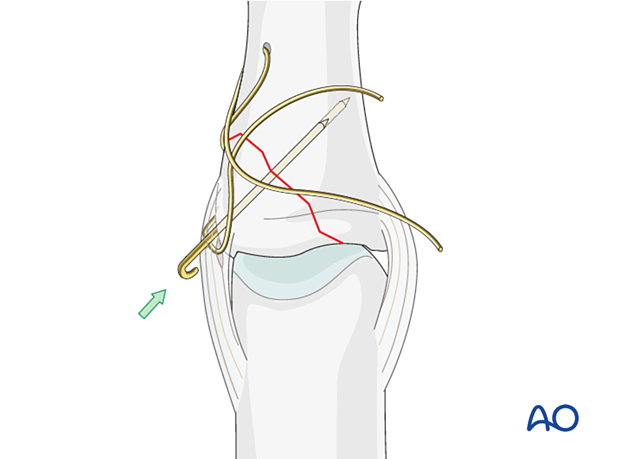
Tightening the wire
Once the fragment is reduced, the wire loop is tightened, cut short, and bent along the phalanx, to avoid soft-tissue irritation.
When tightening the wire, ensure that both ends are twisted around each other rather than twisting one end around the other straight end.
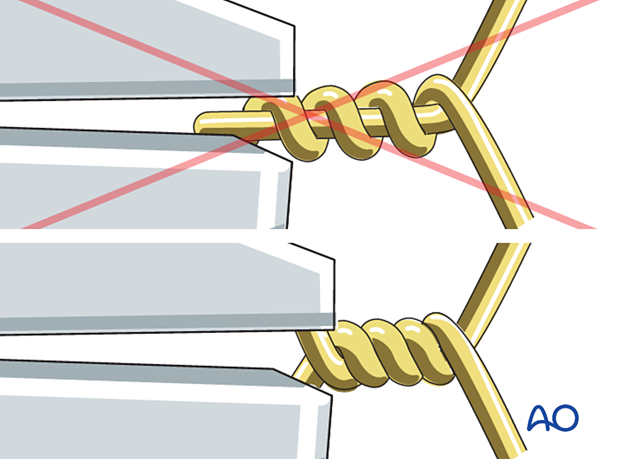
This is achieved by using traction with the pliers to tighten the loop and the twisting, still under tension, to take up the slack.
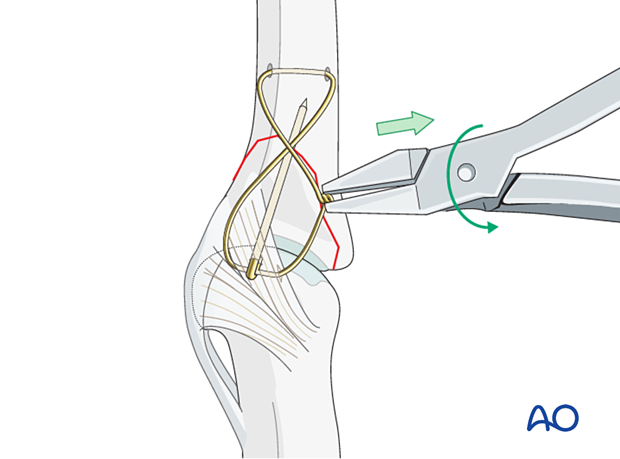
7. Final assessment
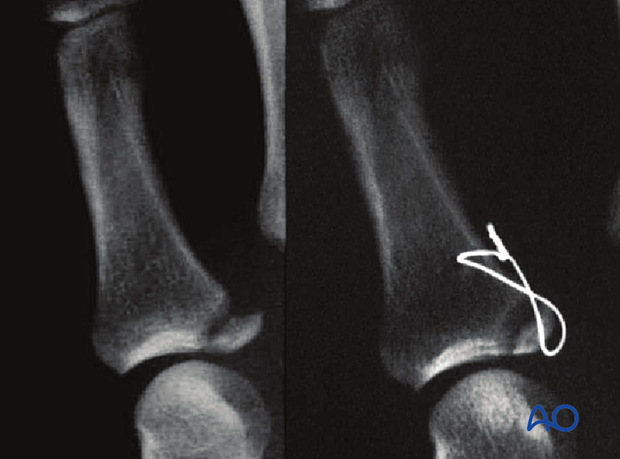
Confirm anatomical reduction and fixation with an image intensifier or an x-ray.
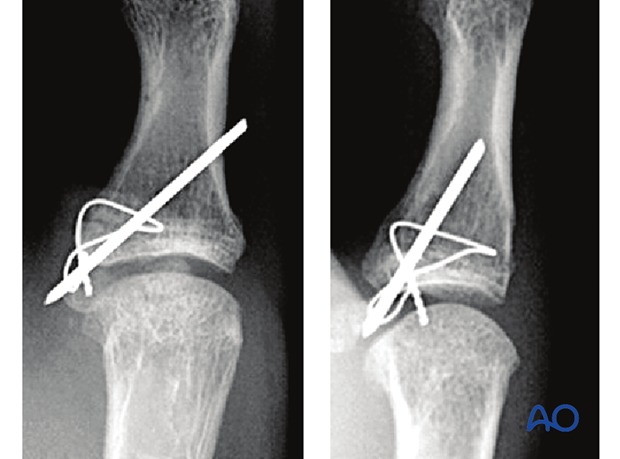
X-ray of a small fragment before and after fixation with cerclage compression wiring
8. Aftercare
Postoperative phases
The aftercare can be divided into four phases of healing:
- Inflammatory phase (week 1–3)
- Early repair phase (week 4–6)
- Late repair and early tissue remodeling phase (week 7–12)
- Remodeling and reintegration phase (week 13 onwards)
Full details on each phase can be found here.
Postoperative treatment
If there is swelling, the hand is supported with a dorsal splint for a week. This should allow for movement of the unaffected fingers and help with pain and edema control. The arm should be actively elevated to help reduce the swelling.
The hand should be immobilized in an intrinsic plus (Edinburgh) position:
- Neutral wrist position or up to 15° extension
- MCP joint in 90° flexion
- PIP joint in extension
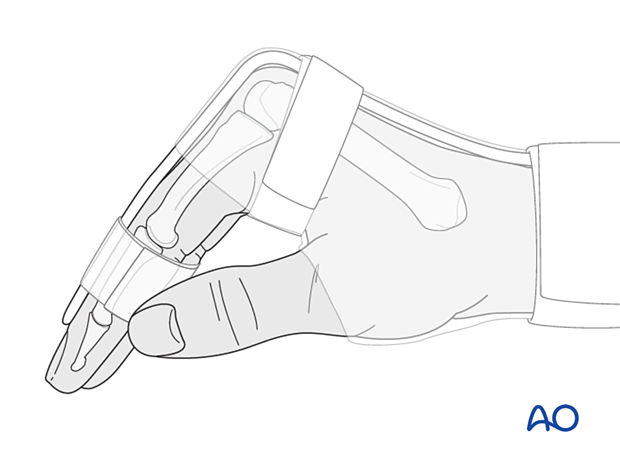
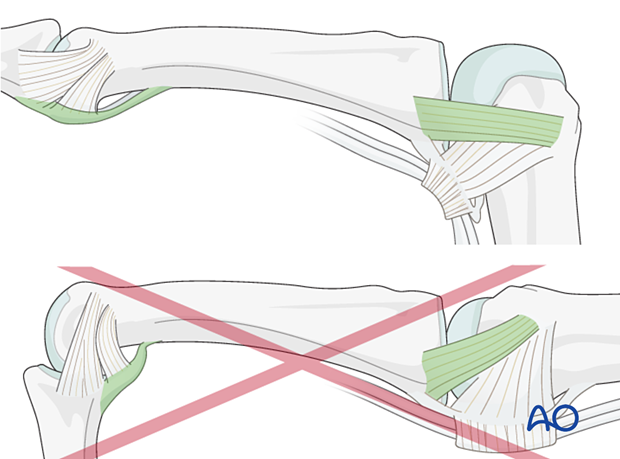
The MCP joint is splinted in flexion to maintain its collateral ligaments at maximal length to avoid contractures.
The PIP joint is splinted in extension to maintain the length of the volar plate.
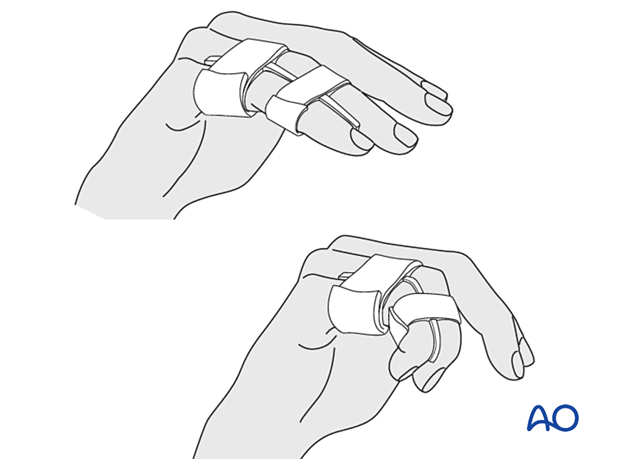
After swelling has subsided, the finger is protected with buddy strapping to neutralize lateral forces on the finger.
Mobilization
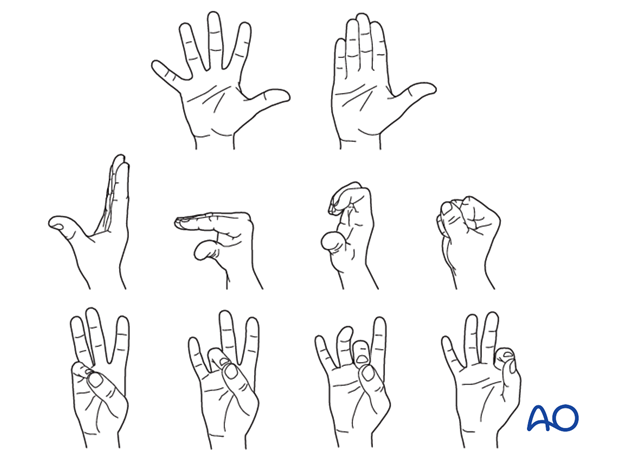
To prevent joint stiffness, the patient should be instructed to begin active motion (flexion and extension) of all nonimmobilized joints immediately after surgery.
Follow-up
The patient is reviewed frequently to ensure progression of hand mobilization.
In the middle phalanx, the fracture line can be visible in the x-ray for up to 6 months. Clinical evaluation (level of pain) is the most important indicator of fracture healing and consolidation.
Implant removal
The wires may need to be removed in case of soft-tissue irritation, but not before fracture consolidation.


