Dynamic external fixation
1. General considerations
In its various forms, the dynamic external fixation is readily available, can be easily applied, and allows for early mobilization of the joint in cases of unreconstructible articular fractures.
It may also be added temporarily for protect internally fixed articular fractures during the healing process.
Additionally, periarticular dynamic fixation can be used to reduce compressive load to the articular surface through arthrodiastasis (ligamentotaxis).
The advantage of this device is the early controlled mobilization by the patient to regain function of the finger.
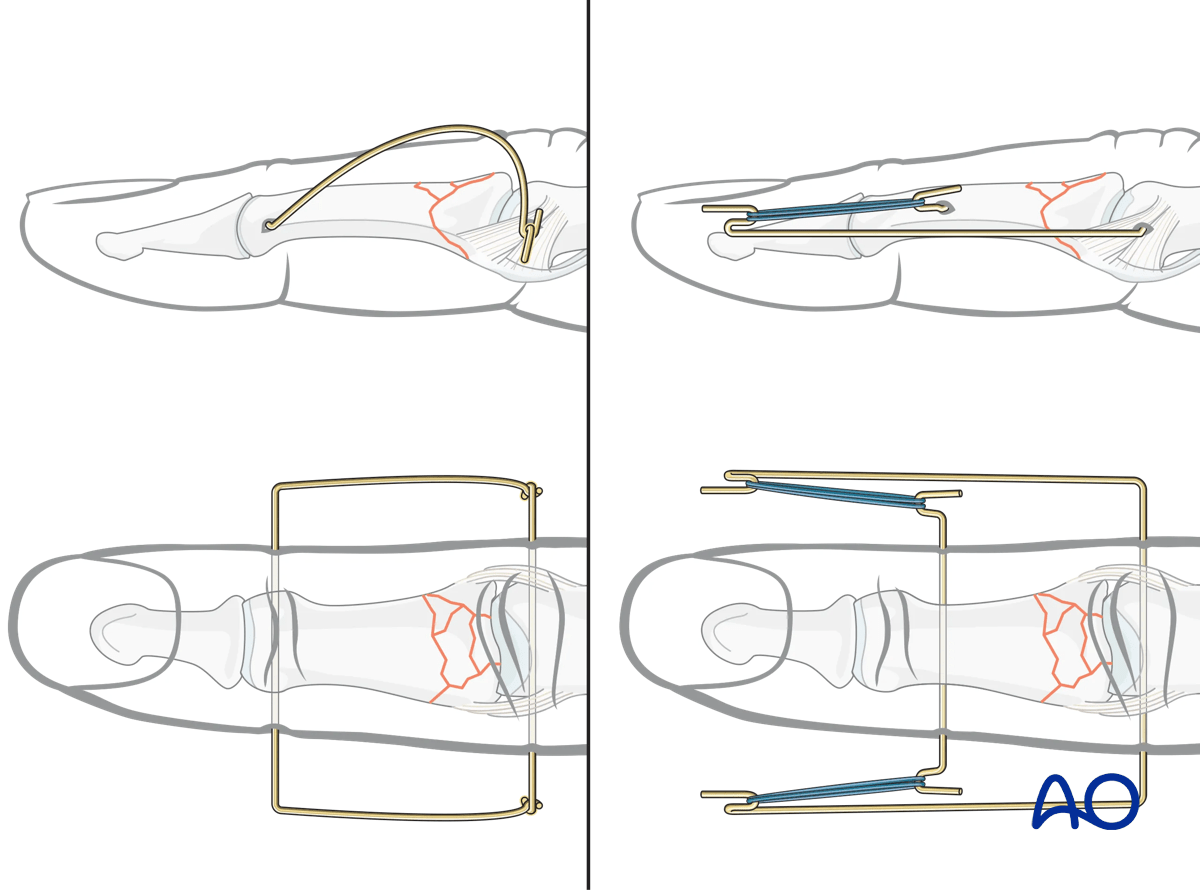
In this procedure, the application of the Suzuki type fixator frame is shown.
2. Application of the fixator
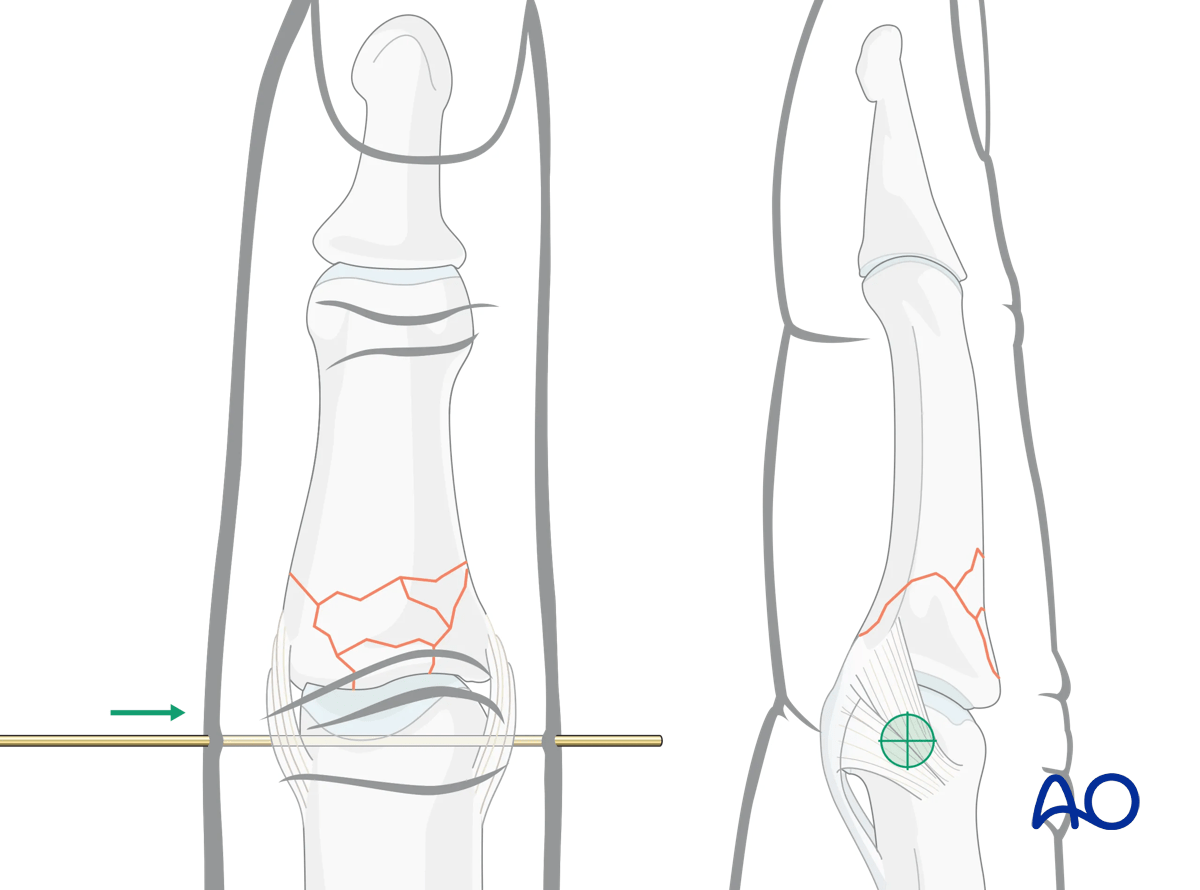
K-wire insertion
Insert the first K-wire (1.2 mm) in the center of rotation of the proximal phalangeal condylar block under image intensification.
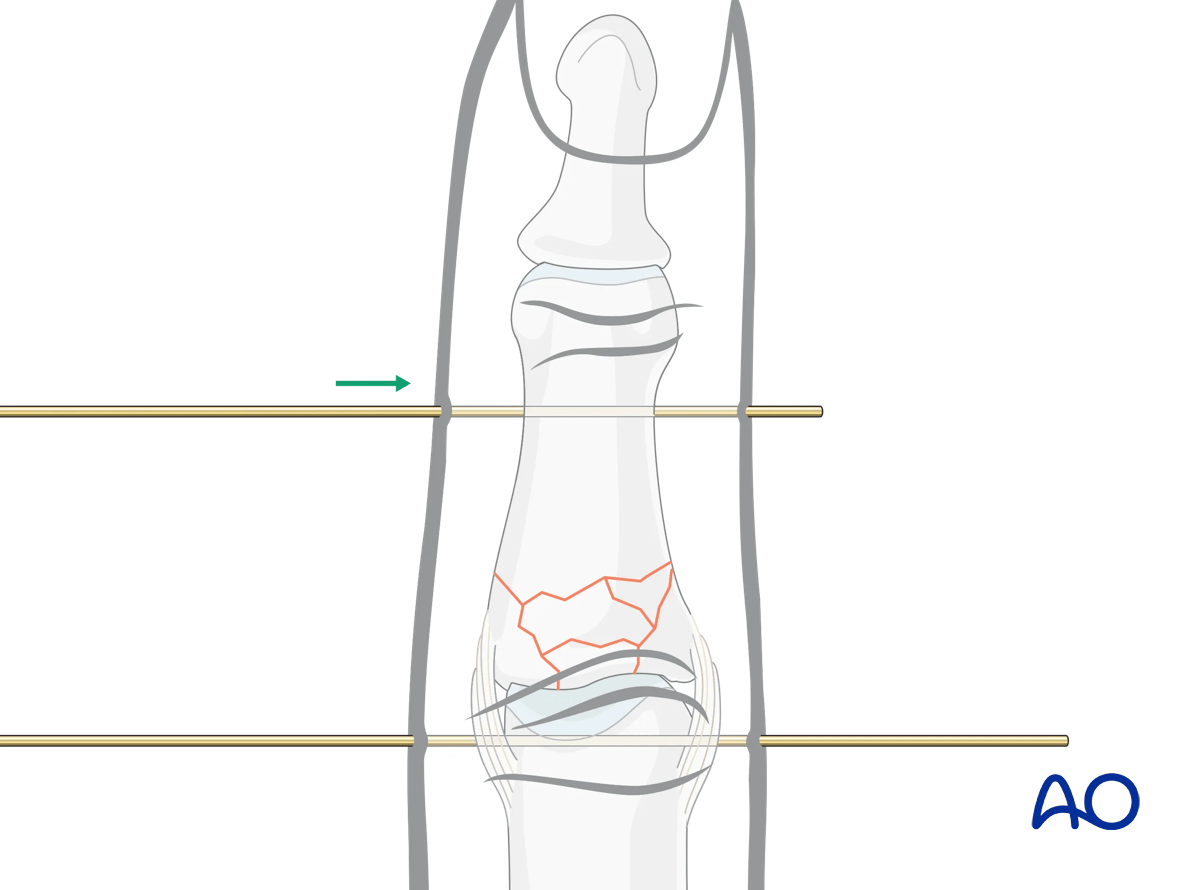
Insert the second K-wire distal to the fracture up to the condyles of the middle phalanx parallel to the first K-wire.
Bending hooks
Bend both K-wires in a U-shape.
Leave at least 0.5 cm between the first bend and the skin.
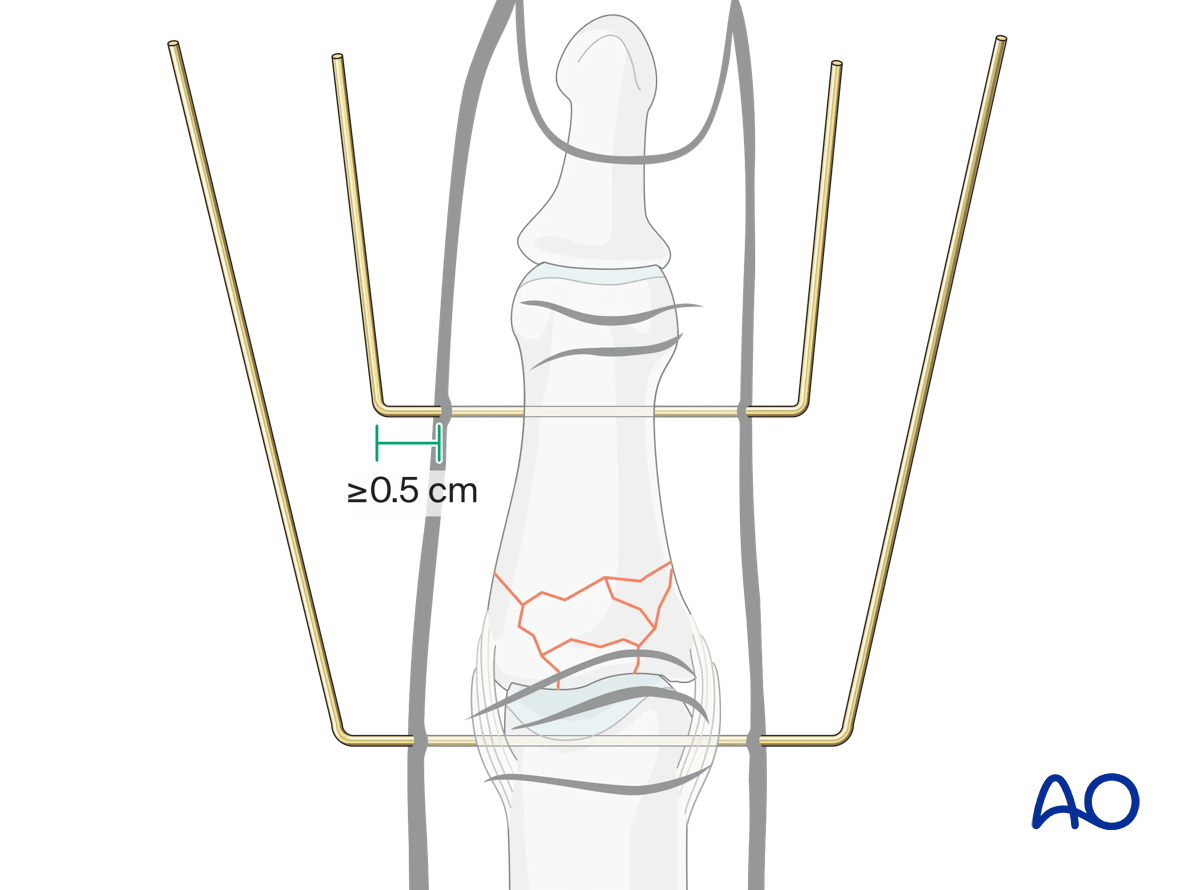
Create hooks, open proximally, on each end of the second K-wire close to the skin insertion.
Create hooks, open distally, on each end of the first K-wire so that they will be at least 2.5 cm distal to the second K-wire hooks.
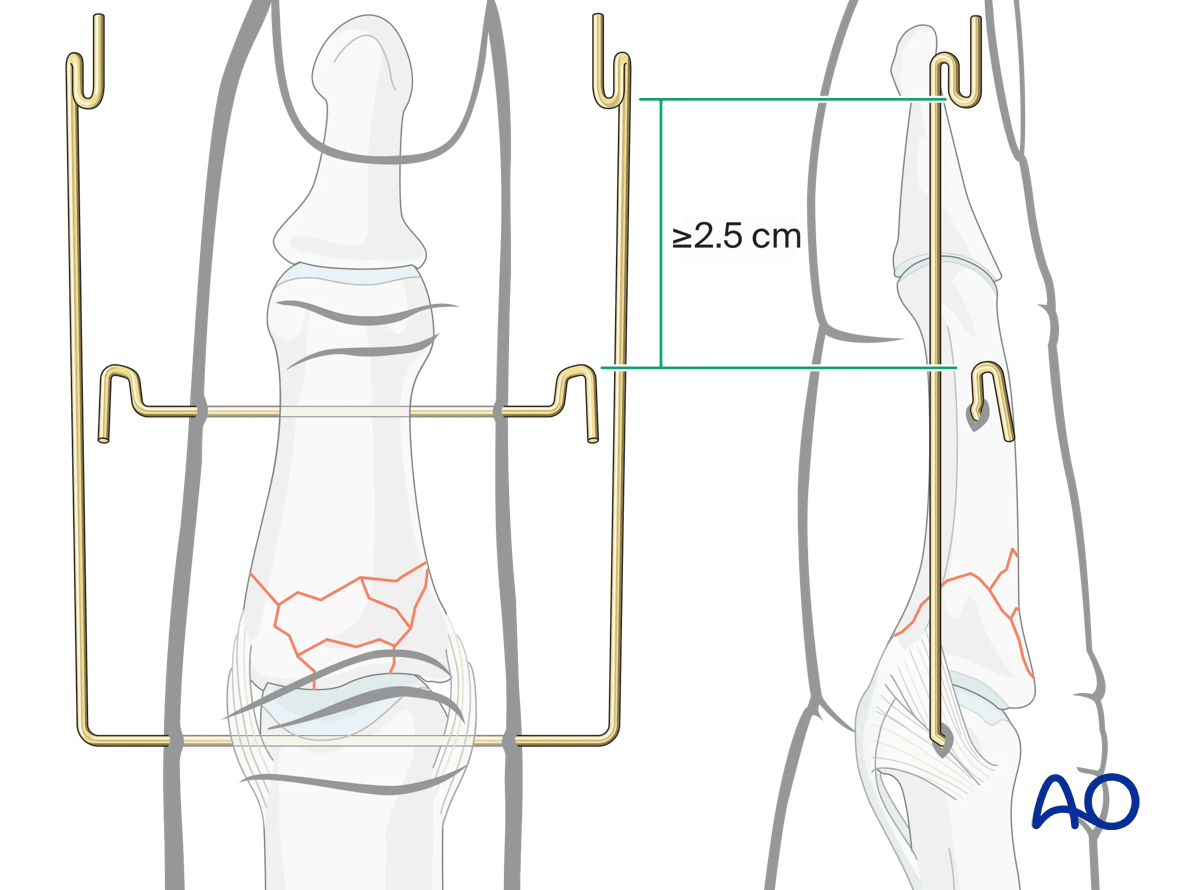
This will then allow for distraction with dental rubber bands.
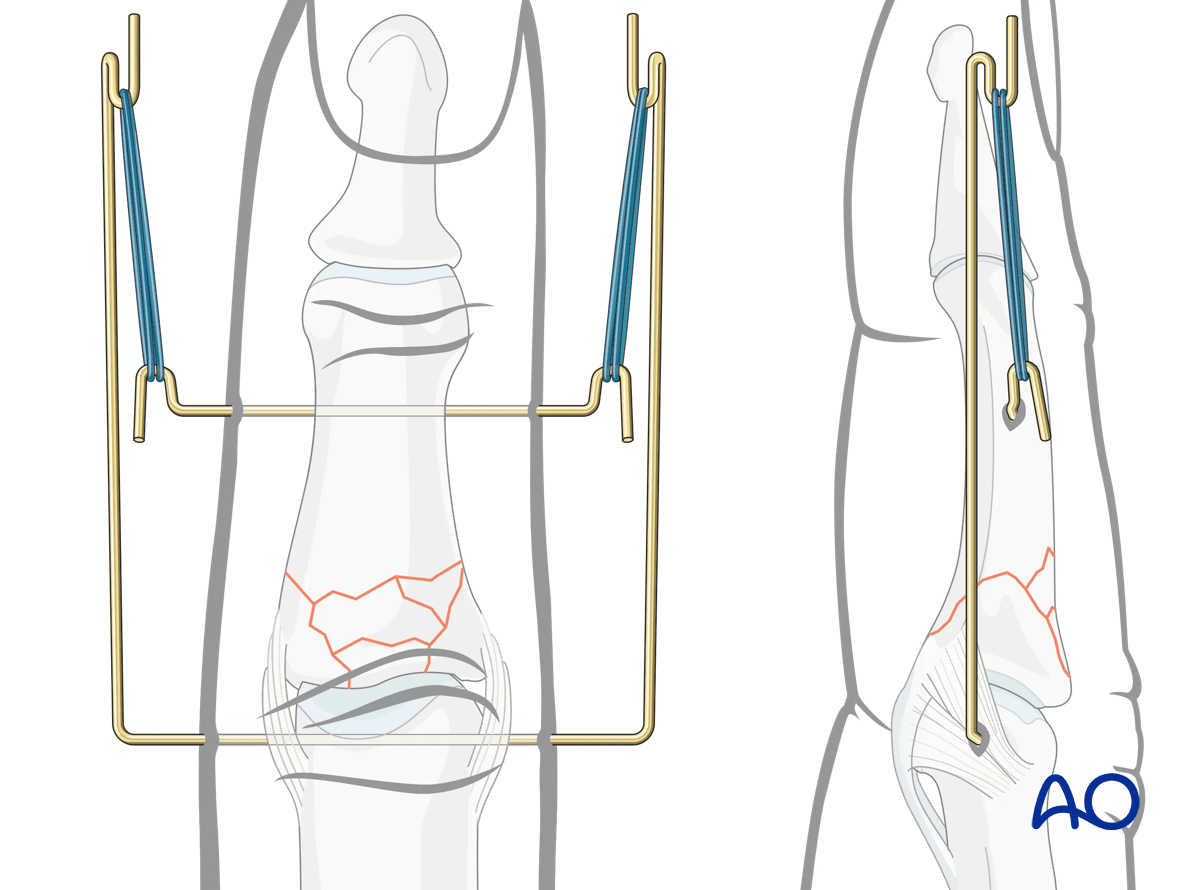
Option: third K-wire to prevent dorsal dislocation
Optionally, to control dorsal dislocation forces on the PIP joint, a third K-wire (1.0 mm) may be inserted in the middle phalanx to act as a fulcrum.
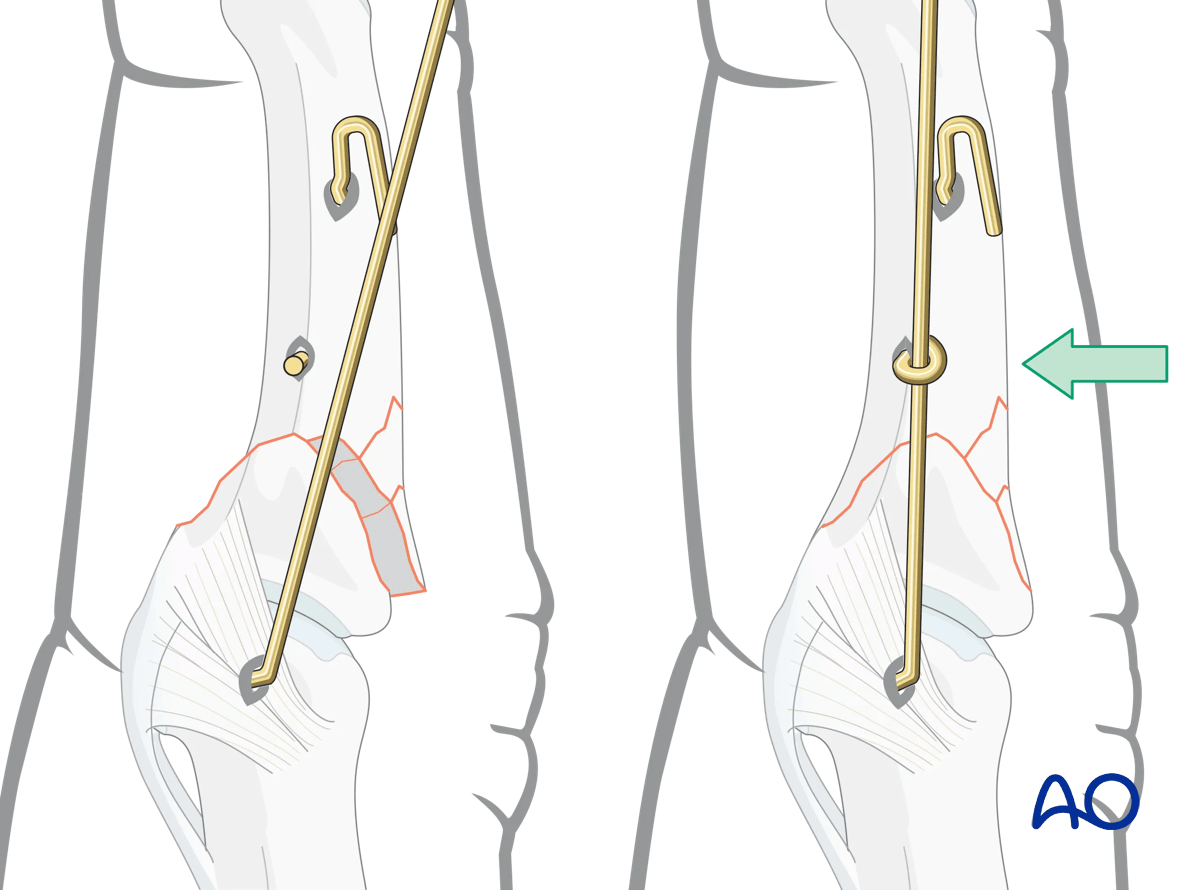
Insert it just distal to the fracture zone parallel to the other K-wires and palmar to the legs of the first K-wire.
Bend the ends around the legs of the first K-wire.
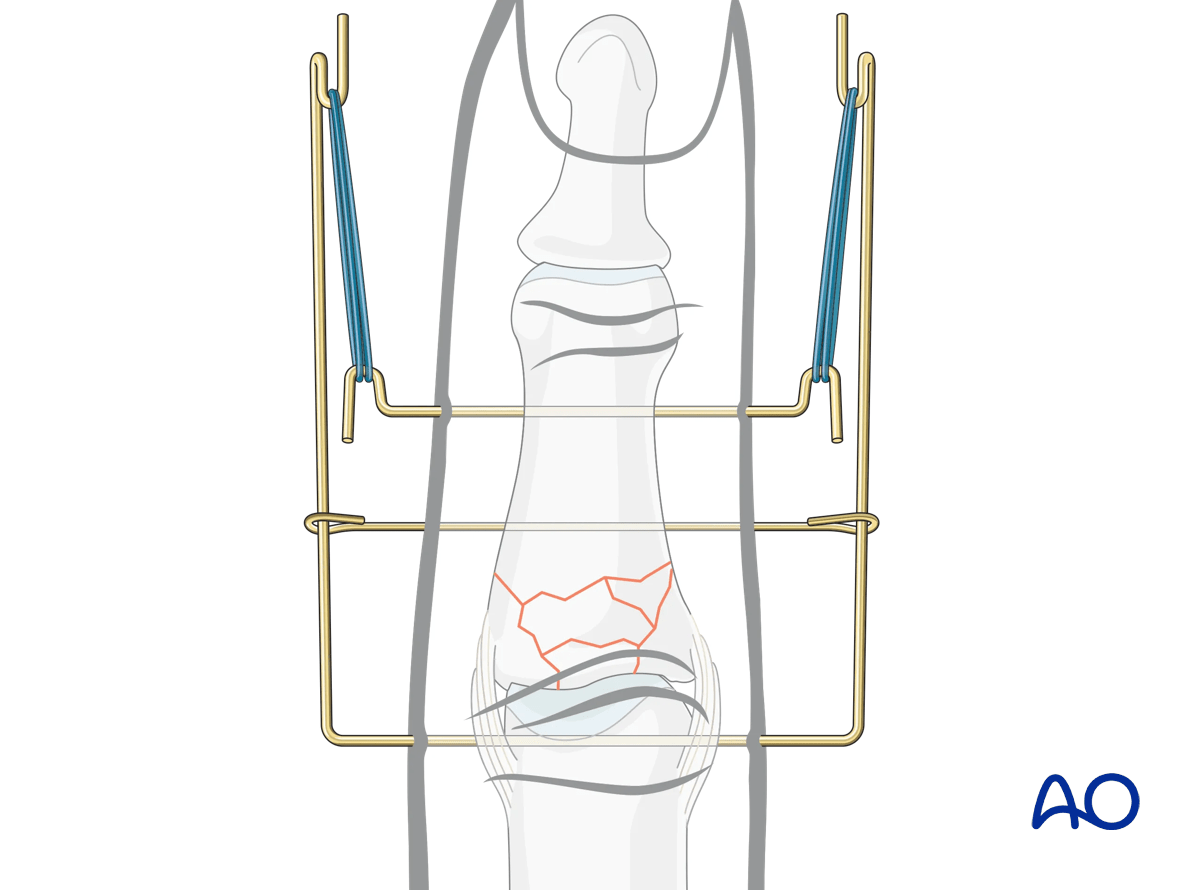
3. Final assessment
Check the construct and joint movement with an image intensifier.
The awake patient should move the PIP joint through a range of motion.
4. Pin-site care
Proper pin insertion
To prevent postoperative complications, pin-insertion technique is more important than any pin-care protocol:
- Correct placement of pins (see safe zones) avoiding ligaments and tendon
- Correct insertion of pins (eg, trajectory, depth) avoiding heat necrosis
- Extending skin incisions to release soft-tissue tension around the pin insertion (see inspection and treatment of skin incisions)
Pin-site care
Various aftercare protocols to prevent pin-track infection have been established by experts worldwide. Therefore, no standard protocol for pin-site care can be stated here. Nevertheless, the following points are recommended:
- The aftercare should follow the same protocol until removal of the external fixator.
- The pin-insertion sites should be kept clean. Any crusts or exudates should be removed. The pins may be cleaned with saline and/or disinfectant solution/alcohol. The frequency of cleaning depends on the circumstances and varies from daily to weekly but should be done in moderation.
- No ointments or antibiotic solutions are recommended for routine pin-site care.
- Dressings are not usually necessary once wound drainage has ceased.
- Pin-insertion sites need not be protected for showering or bathing with clean water.
The patient or the carer should learn and apply the cleaning routine.
Pin loosening or pin-track infection
In case of pin loosening or pin-track infection, the following steps need to be taken:
- Remove all involved pins and place new pins in a healthy location.
- Debride the pin sites in the operating theater, using curettage and irrigation.
- Take specimens for a microbiological study to guide appropriate antibiotic treatment if necessary.
Before changing to a definitive internal fixation an infected pin track needs to heal. Otherwise, infection will result.
Follow-up
The external fixator may be removed with local anesthesia after 6 weeks.


