Cannulated screw fixation
1. General considerations
Introduction
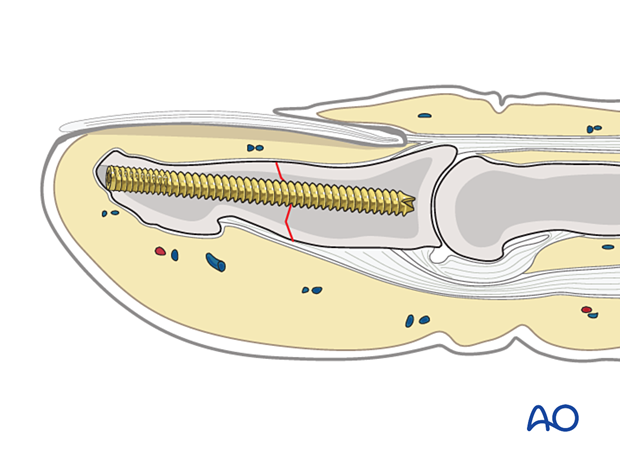
A simple transverse or oblique fracture of the distal phalangeal shaft may be stabilized with an intramedullary screw.
The application of a cannulated screw is recommended for its ease of insertion and is shown in this procedure. A headless screw may avoid a prominent implant underneath the fingertip and soft-tissue irritation with finger pinch.
Open fractures
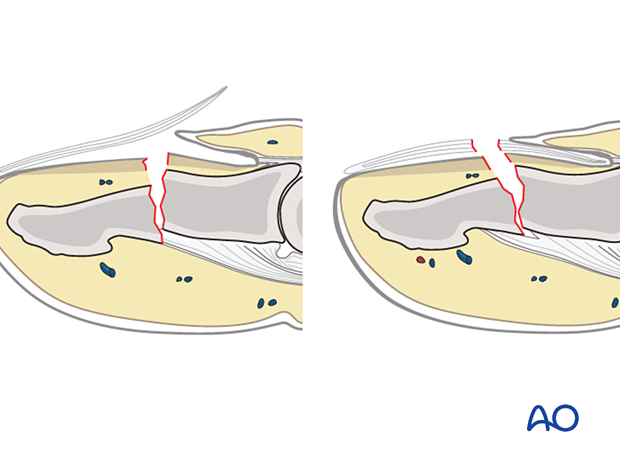
Open fractures are present in two ways: with an avulsed nail plate or a fractured nail. In both types, the fracture opens dorsally, and the nail bed is also injured.
It is mandatory precisely to repair the nail bed. Otherwise, permanent deformity of the nail growth can result.
The general principles for treating all open fractures apply. As most of these injuries are due to crushing, edema of the soft tissues is most likely to develop, and primary closure of any associated skin lacerations is not advisable.
2. Patient preparation
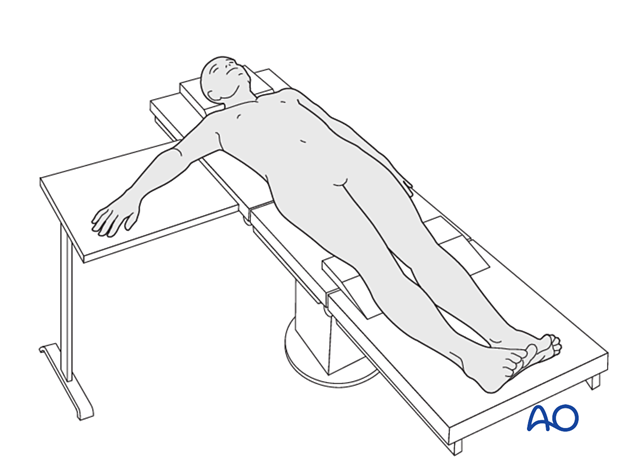
This procedure is usually performed with the patient in a supine position with the arm on a radiolucent side table.
3. Approach
For this procedure, a percutaneous approach through the fingertip is typically used.
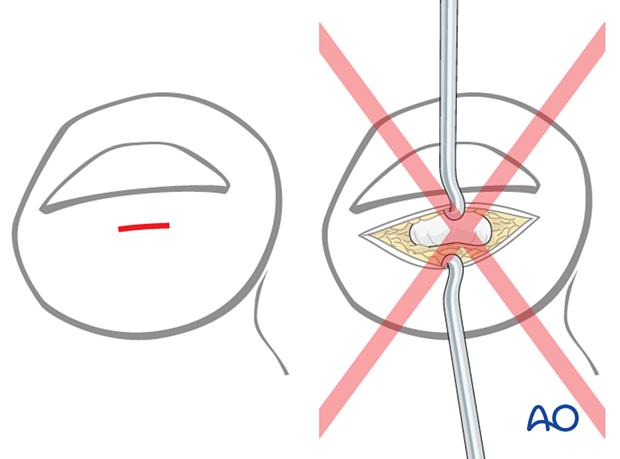
The incision should be as small as possible. Make a horizontal incision just beneath the free border of the nail, over the center of the distal phalanx.
Bluntly dissect the subcutaneous tissues to the tip of the distal phalanx.
A large incision will cause permanent digital painful scarring.
4. Reinsertion of a dislocated nail bed
If the nail bed and the germinal matrix are avulsed, they must be reinserted before fracture reduction and fixation.
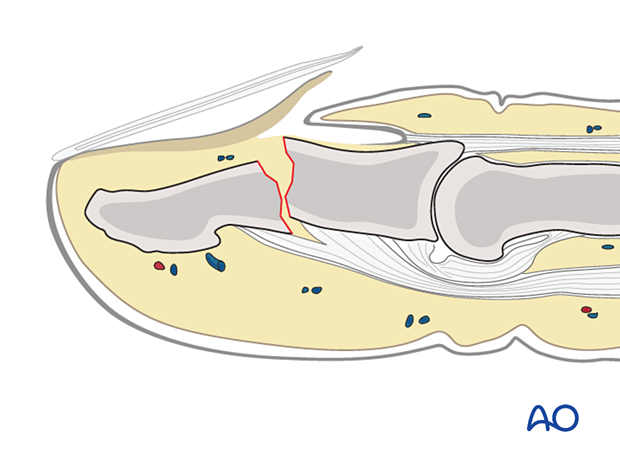
Anatomy
A thorough grasp of the detailed anatomy of the distal segment of the finger is important in the diagnosis and management of these injuries.
Nail removal
Remove the nail and preserve it in a betadine solution if it is still attached.
Suture insertion
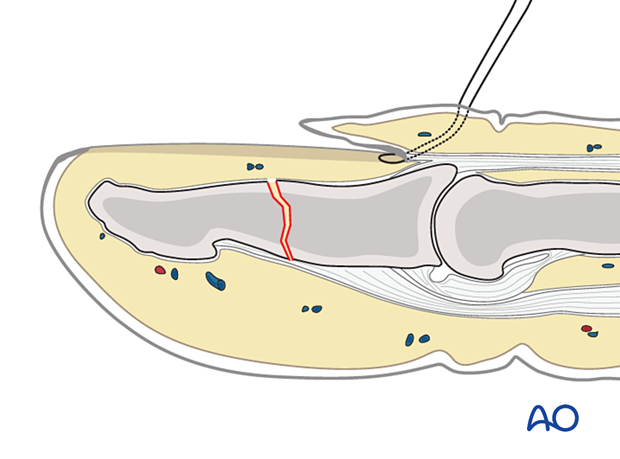
Insert a needle with a 5.0 nonresorbable nylon suture from the dorsal aspect into the sinus, exiting the sinus distally to the eponychium.
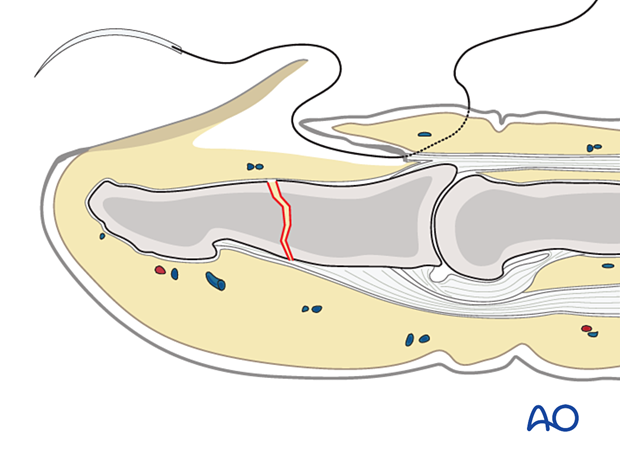
Pass the suture through the free border of the germinal matrix.
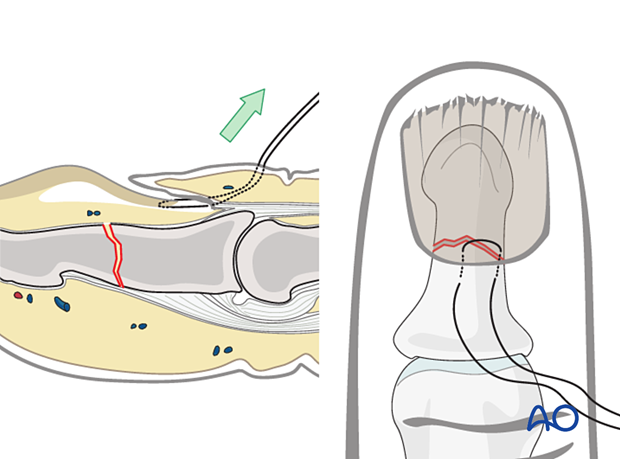
Then pass the suture back through the matrix and the sinus of the nail so that it exits parallel to the first pass of the stitch, separated from it by approximately 5 mm.
Insertion of the nail matrix
Reinsert the nail matrix into the sinus with gentle traction on both suture ends.
Continue with fracture fixation before tying the ends of the sutures.
5. Fracture reduction
In case of an open fracture, lift the nail and irrigate the fracture site to gain a better view. Clear the fracture site of blood clots and debris.
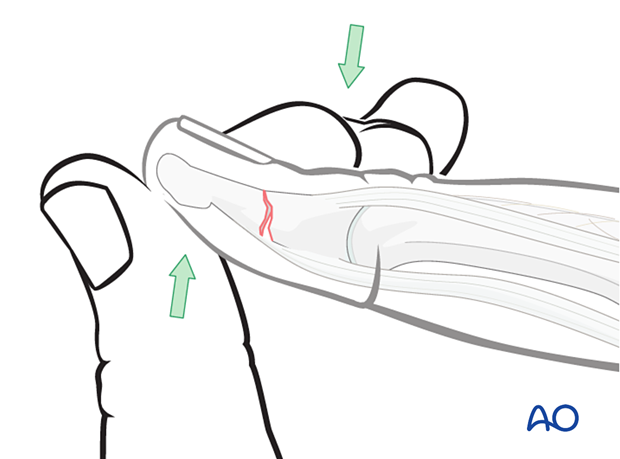
Reduction can be obtained by digital manipulation.
Extend the distal fragment of the fracture by applying pressure with the thumb. Apply counterpressure with the index finger onto the dorsal aspect of the proximal fragment.
The dorsal aspect of the fracture must be reduced without a step so that no sharp edges can injure the nail bed or the germinal zone.
6. Fracture fixation
Marking the guide wire track
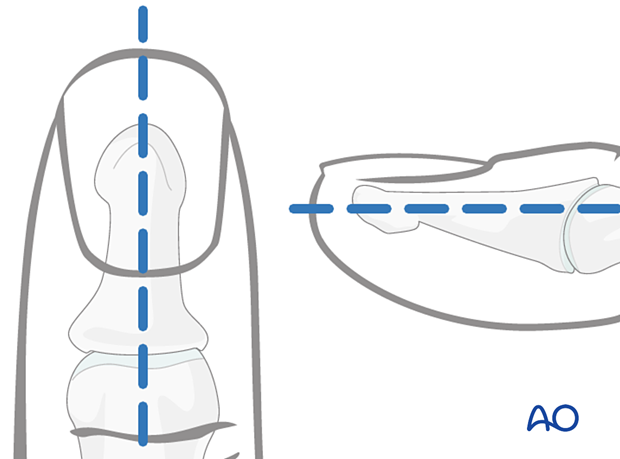
To avoid unnecessary radiation from image intensification, mark the planned track of the guide wire on the distal phalanx in both the AP and the lateral aspects.
Guide wire insertion
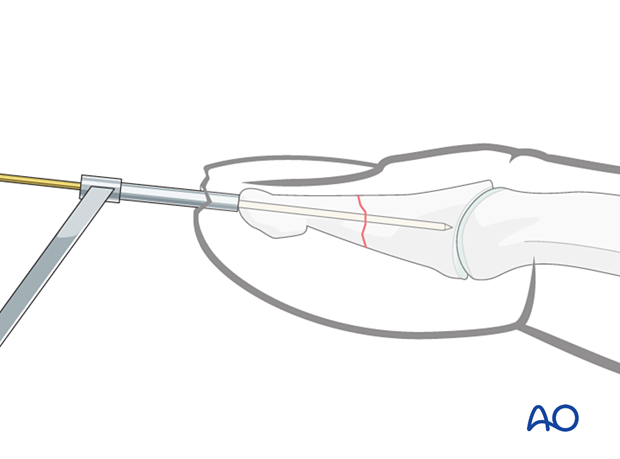
Advance the guide wire through a protection sleeve across the fracture up to the DIP joint.
Confirm with an image intensifier fracture reduction and guide wire position.
Cannulated screw insertion
Depending on the quality of the bone, predrill for screw insertion.
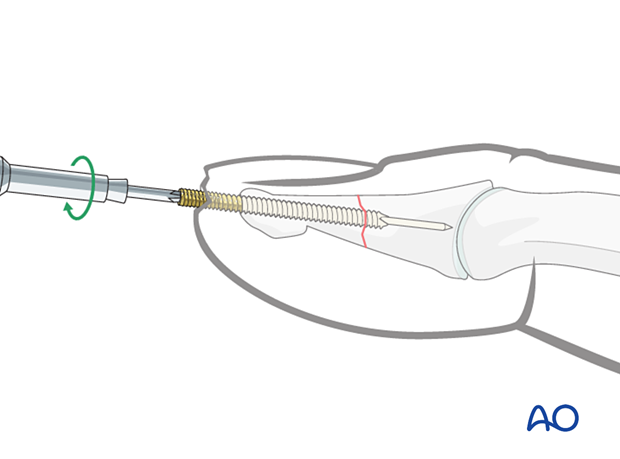
Insert the screw with the appropriate length over the guide wire.
Remove the guide wire and confirm screw fixation with an image intensifier.
Close the wound with a stitch.
7. Repair of the nail bed
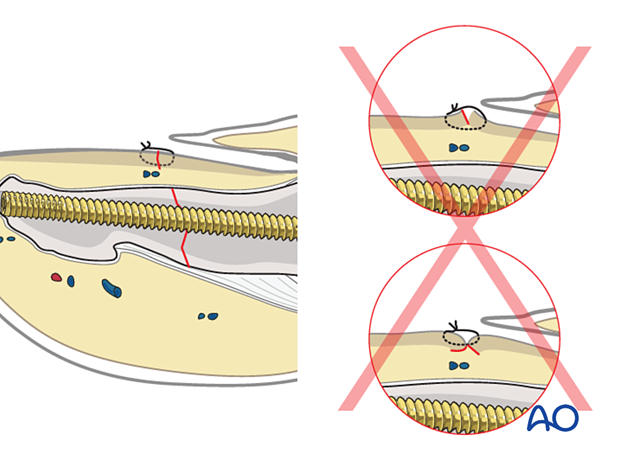
It is desirable precisely to repair the nail bed or the germinal zone. Otherwise, permanent deformity of the nail growth can result.
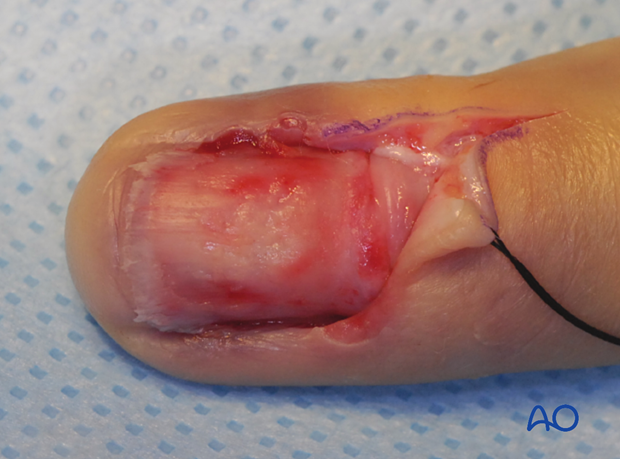
Use separate fine absorbable sutures.

Pitfall: Eversion or inversion of nail bed edges
8. Reinsertion of the nail after nail bed repair
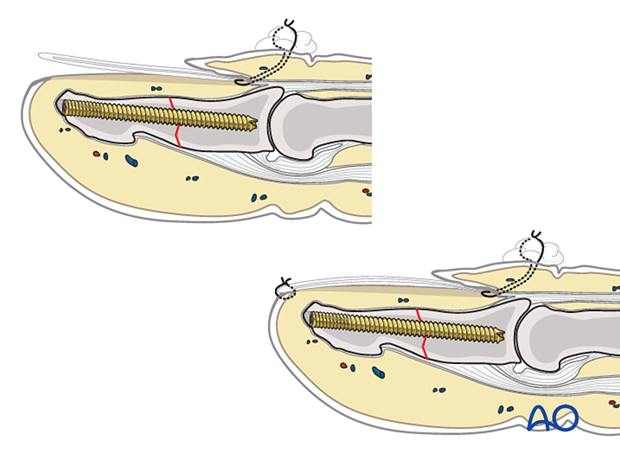
If the nail is in good condition, carefully reinsert it. Alternatively, an artificial nail may be used to protect the nail bed until the new nail has grown.
Reinsertion of the nail will stabilize the fixation and prevent scarring between the eponychium and the nail matrix.
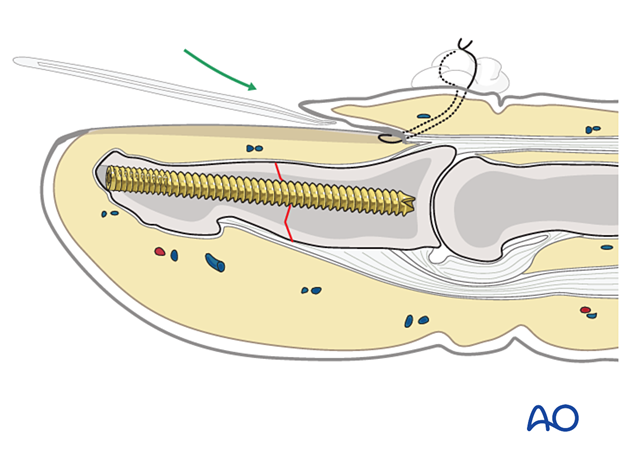
After reinsertion and proximal fixation, the nail tends to tilt upwards distally.
To prevent this, use a small nonabsorbable suture at the nail’s distal tip to secure it to the nail bed.
This can be removed after 10 days.
9. Aftercare
Postoperative phases
The aftercare can be divided into four phases of healing:
- Inflammatory phase (week 1–3)
- Early repair phase (week 4–6)
- Late repair and early tissue remodeling phase (week 7–12)
- Remodeling and reintegration phase (week 13 onwards)
Full details on each phase can be found here.
Management of swelling
The arm should be actively elevated to help reduce any swelling.
Follow-up
A wound check is performed 3–5 days after surgery, and dressings are changed.
Sutures may be removed after 10 days. X-rays are taken 3 and 6 weeks after surgery to confirm fracture alignment and healing, respectively.
Functional exercises
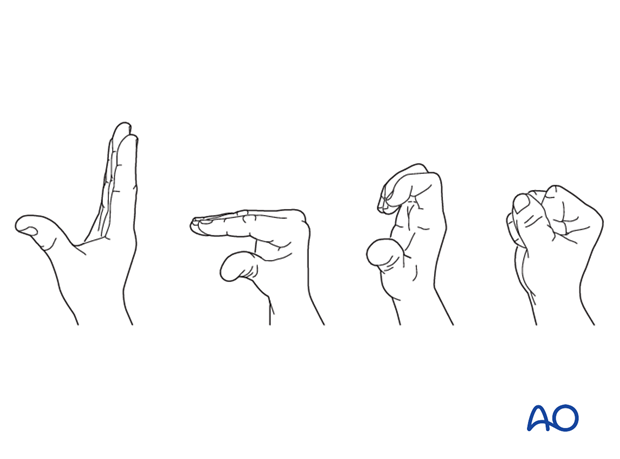
If the nail bed has been injured, active motion exercises need to be delayed until soft tissues have healed. Otherwise, active motion exercises can start immediately.
Hand therapy is recommended to prevent soft-tissue atrophy and joint contracture (typically extension of MCP joint and flexion of PIP joint), which leads to a poor outcome, and subsequent treatment is difficult. The principle is to start active motion of nonimmobilized segments as soon as possible.
