ORIF - DCS and compression plating
1. Principles
Compression plating
Compression plating provides fixation with absolute stability for two-part fracture patterns, where the bone fragments can be compressed.
Compression plating alone is usually used for simple fracture patterns with low obliquity, where there is insufficient room for a lag screw. In more oblique fractures, compression plating can be performed, with the addition of a lag screw.
Compression plating can only be undertaken as an open procedure.
The objective of compression plating is to produce absolute stability, abolishing all interfragmentary motion.
Dynamic compression principle
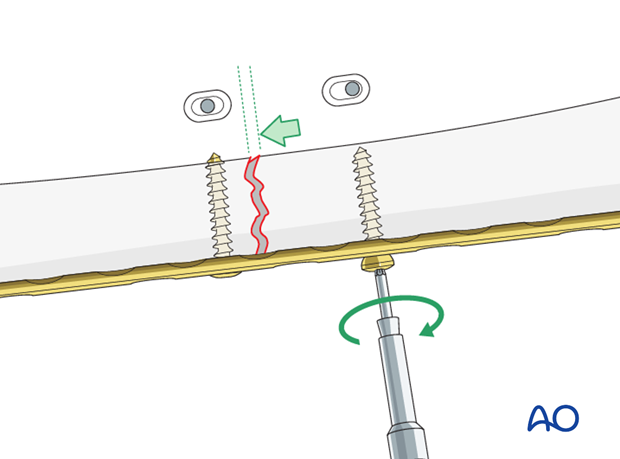
Compression of the fracture is usually produced by eccentric screw placement at one or more of the dynamic compression plate holes. The screw head slides down the inclined plate hole as it is tightened, the head forcing the plate to move along the bone, thereby compressing the fracture.
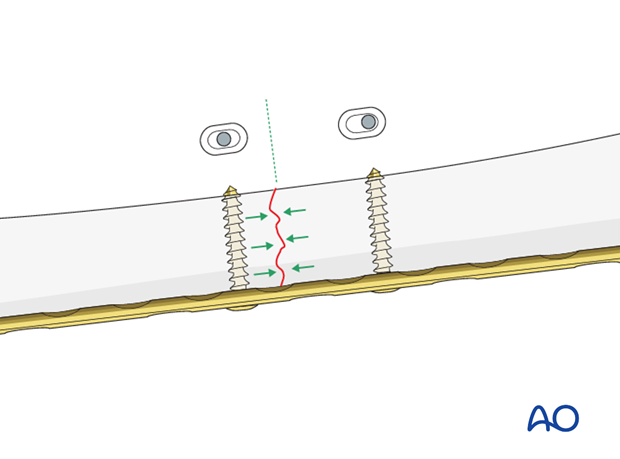
The screw head slides down the inclined plate hole as it is tightened, with the head forcing the plate to move along the bone, thereby compressing the fracture.

Plate position on the femur/tension band principle
As a general rule the plate should be positioned on the lateral aspect of the femur.
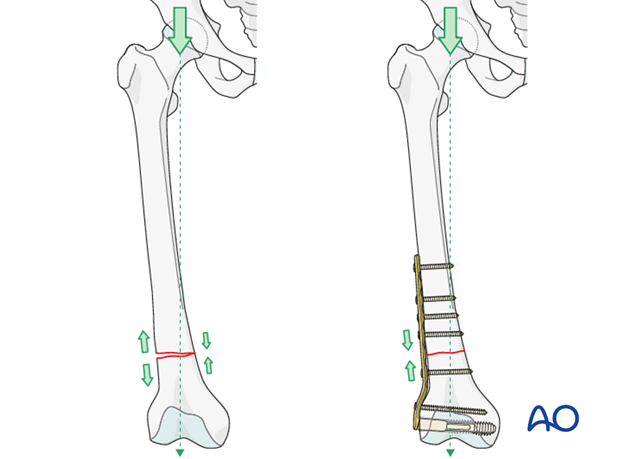
A plate acts as a dynamic tension band when applied to the tension side of the bone and when stable cortical contact is present on the opposite side to the plate.
With vertical load, the curved femur creates a tension force laterally and a compression force medially.
A plate positioned on the side of the tensile force resists it at the fracture site, provided there is stable cortical contact opposite to the plate.
Further information on the tension band principle can be found here.
Reduction
It is important to restore axial alignment, length, and rotation. That means, in a simple fracture, a direct reduction of the main fragments is required.
Reduction can be performed with direct reduction tools.
2. Patient preparation
The patient may be placed in one of the following positions:
3. Approach
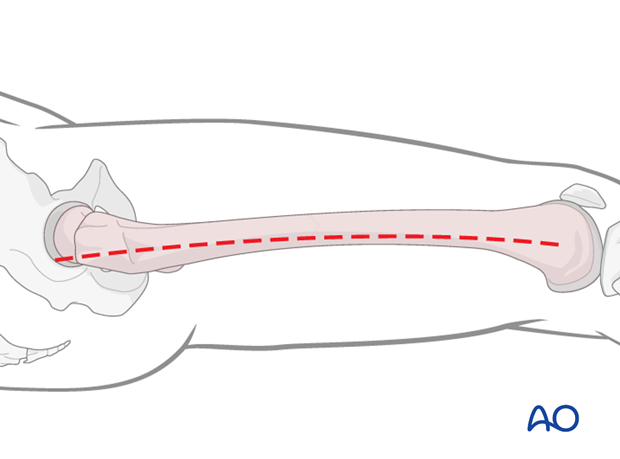
For this procedure a lateral approach is used.
4. Preliminary reduction
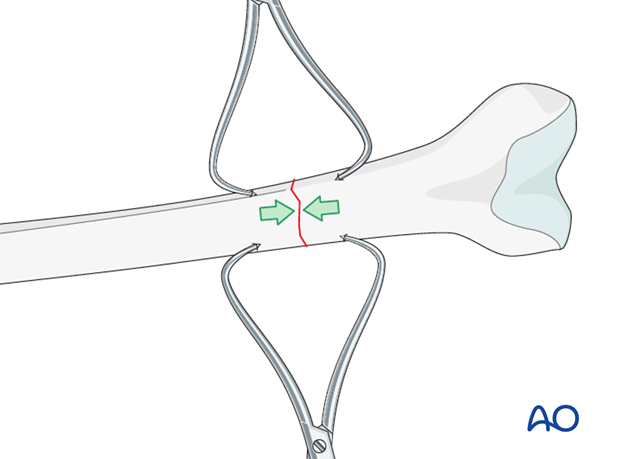
Use of reduction clamps
In an open plating technique, a preliminary reduction can be undertaken to facilitate the final reduction. Most usually, large pointed reduction clamps are used under direct vision.
5. Plate fixation to the distal fragment
Guide wire insertion
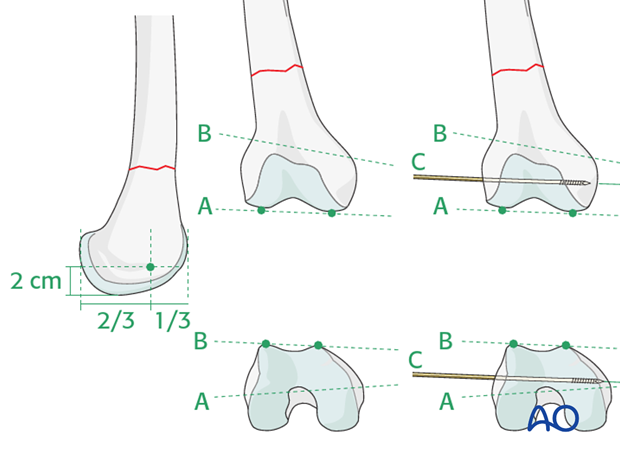
As a first step, a guide wire for the condylar screw is inserted into the distal femur.
This is an extremely important step, because it determines the later plate positioning in two planes.
The guide wire for the cannulated condylar screw is inserted into the condylar mass from laterally. The entry point lies anterior to the midpoint between the anterior and posterior edges of the lateral femoral condyle, in line with the femoral shaft axis, and 2 cm proximal to the knee joint.
The guide wire must be parallel to the plane of the tibio-femoral joint (line A) and, at the same time, parallel to the plane of the patello-femoral joint (line B).
Checking correct position of the guide wire
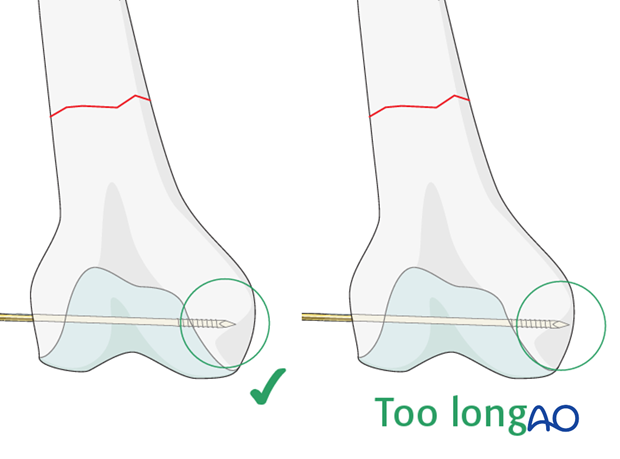
The correct positioning of the guide wire must be checked using image intensifier fluoroscopy. The depth of guide wire insertion is crucial. Remember that the cross-section of the distal femoral condylar mass is trapezoidal and slopes markedly on the medial side. The tip of the guide wire should just engage the medial cortex, and so will appear short of the medial condylar cortex on the AP intensifier image.
Screw length measurement
Next, the surgeon slides the direct measuring device over the guide wire and determines guide wire insertion depth and, thereby, the length of the condylar screw required.
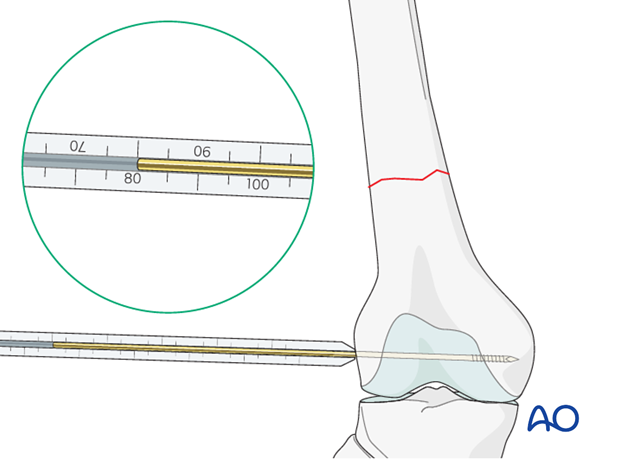
Reaming
After assembling the DCS triple reamer and setting the reamer to the correct depth, the hole for the condylar screw is reamed over the guide wire.
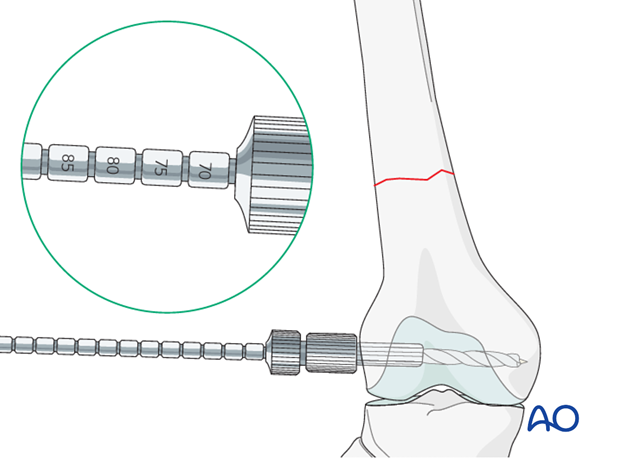
Condylar screw insertion
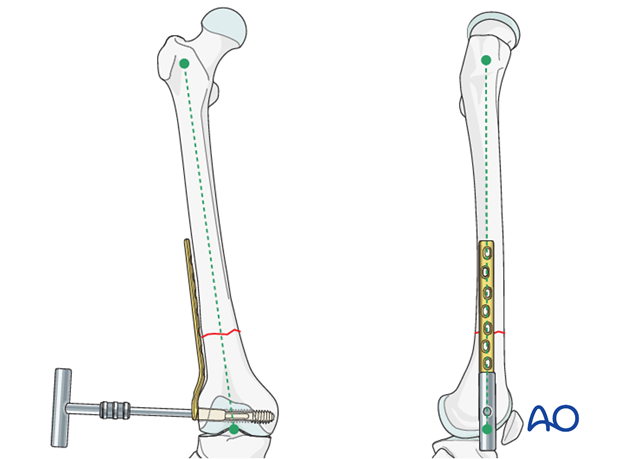
First, the condylar screw is inserted to its final position. The T-handle is lined up parallel to the femoral shaft axis to ensure an adequate plate placement.
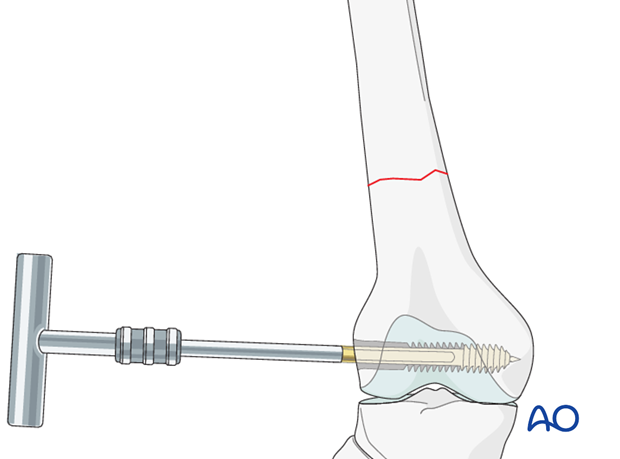
Plate placement
Now the T-handle is detached, and the plate barrel is placed over the screw shank. Afterwards, the T-handle is reconnected to the screw …
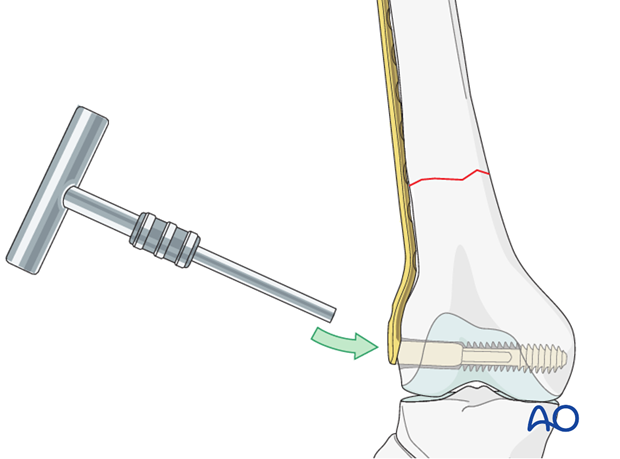
… and the plate position fine-tuned.
6. Plate fixation to proximal fragment
Insertion of first screw into proximal fragment
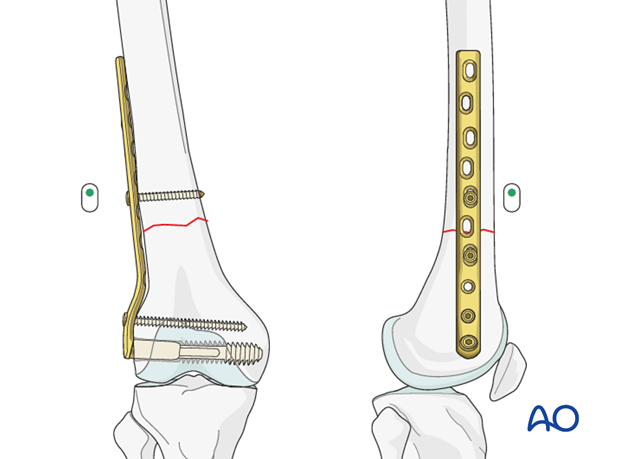
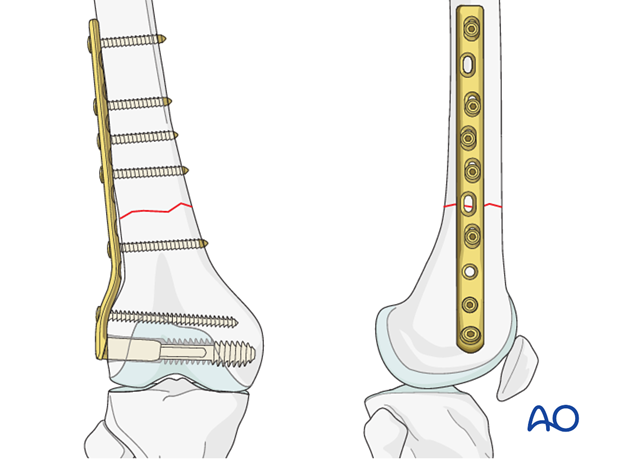
Before fixation to the proximal fragment, it is often advisable to insert a cancellous screw into the most distal plate hole, to prevent rotation of the plate about the axis of the condylar screw.
If the overall reduction is found to be sufficient, the first cortical screw is placed in the proximal fragment. To further improve the compression, the screw is placed eccentrically.
Alternative: articulated tension device
In cases of nonunion, the articulated tension device is helpful in achieving compression.
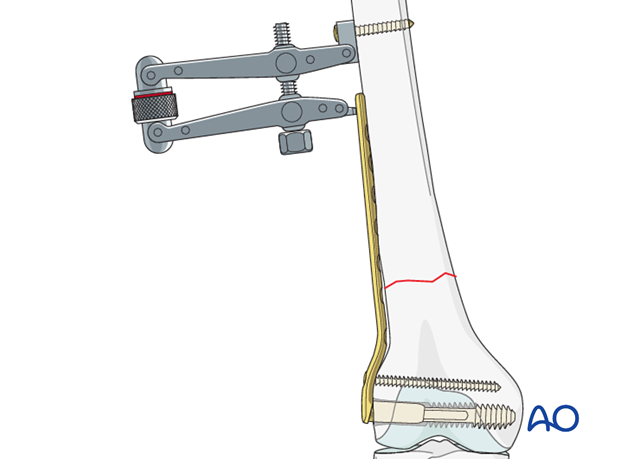
To improve the compression further, the screw is inserted eccentrically.
The tension device is dismantled after two additional screws are inserted into the proximal fragment.
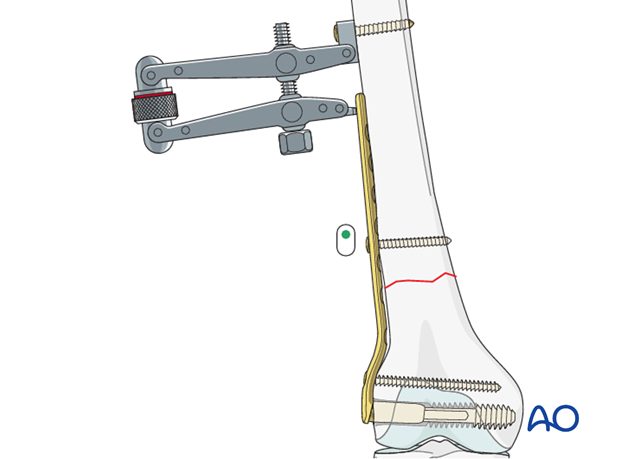
Insertion of additional screws
According to the preoperative planning, additional screws are placed in the proximal and distal fragments.
Pearl: osteoporotic bone
In osteoporotic bone, the use of locking-head screws is advantageous.
7. Aftercare
Compartment syndrome and nerve injury
Close monitoring of the femoral muscle compartments should be carried out especially during the first 48 hours, in order to rule out compartment syndrome.
Postoperative assessment
In all cases in which radiological control has not been used during the procedure, a check x-ray to determine the correct placement of the implant and fracture reduction should be taken within 24 hours.
Functional treatment
Unless there are other injuries or complications, mobilization may be started on postoperative day 1. Static quadriceps exercises with passive range of motion of the knee should be encouraged. If a continuous passive motion device is used, this must be discontinued at regular intervals for the essential static muscle exercises. Afterwards special emphasis should be placed on active knee and hip movement.
Weight bearing
Full weight bearing may be performed with crutches or a walker.
Follow-up
Wound healing should be assessed regularly within the first two weeks. Subsequently a 6 and 12 week clinical and radiological follow-up is usually made. A longer period may be required if the fracture healing is delayed.
Implant removal
Implant removal is not mandatory and should be discussed with the patient, if there are implant-related symptoms after consolidated fracture healing.
