Temporary external fixation
1. Note on illustrations
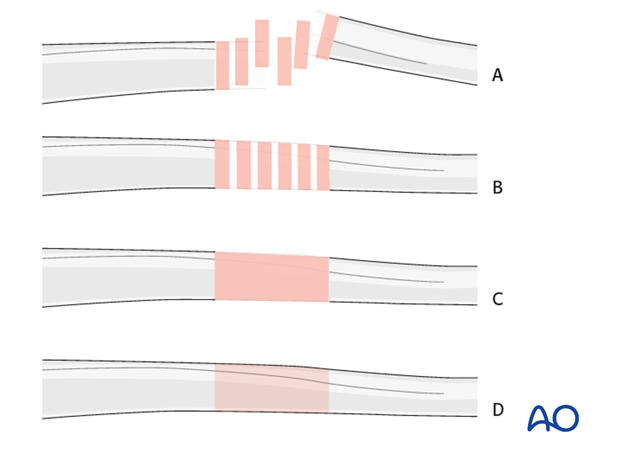
Throughout this treatment option illustrations of generic fracture patterns are shown, as four different types:
A) Unreduced fracture
B) Reduced fracture
C) Fracture reduced and fixed provisionally
D) Fracture fixed definitively
2. Principles of modular external fixation
The modular external fixator is optimal for temporary use. It is rapidly applied without need for intraoperative x-rays and can be adjusted later. If possible the external fixation should be converted to a nail or plate within a week or two, before pin sites become infected. Ensure adequate pin care treatment until frame removal.
Details of external fixation are described in the basic technique for application of modular external fixator.
Specific considerations for the femur are given below.
3. Patient preparation
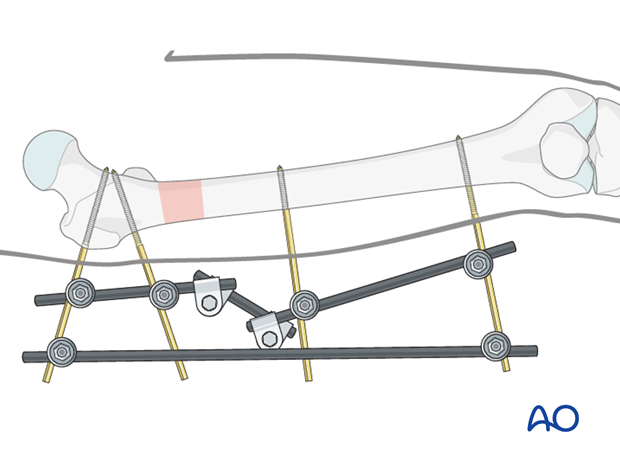
This procedure is normally performed with the patient in a supine position with manual traction.
4. Pin insertion (femoral shaft)
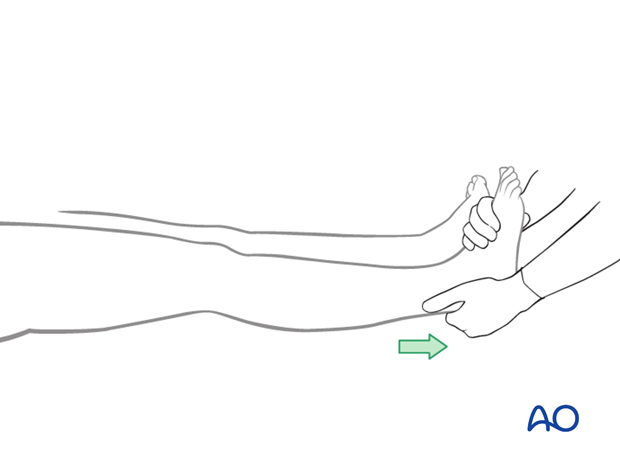
Initial reduction
Prior to pin insertion, it is advisable to correct by manual traction any rotational deformity as well as any overlap of the fracture fragments. By maintaining axial traction, it will be possible to optimize pin placement, thereby facilitating the subsequent reduction maneuvers.
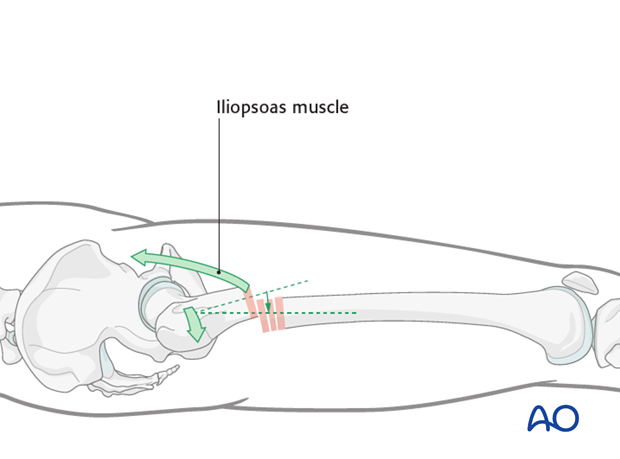
Iliopsoas muscle forces
Be aware of the pull of the iliopsoas muscle which flexes and rotates the proximal fracture segment. In addition, the glutei may abduct the fragment.
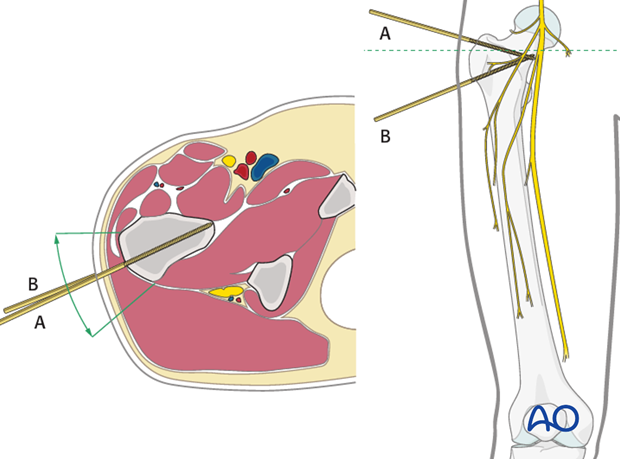
Pin placement
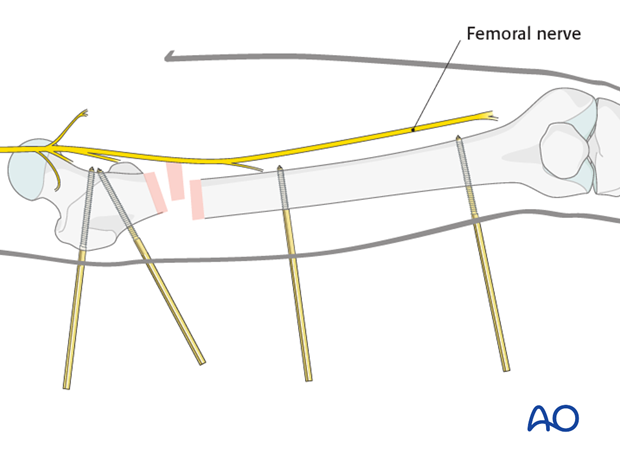
For safe pin placement make use of the safe zones and be familiar with the anatomy of the femur.
The safe zone for the femur is lateral. In temporary external fixation, the pins should be placed so that they do not interfere with planned later definitive fixation; this may mean placing femoral pins a little anteriorly.
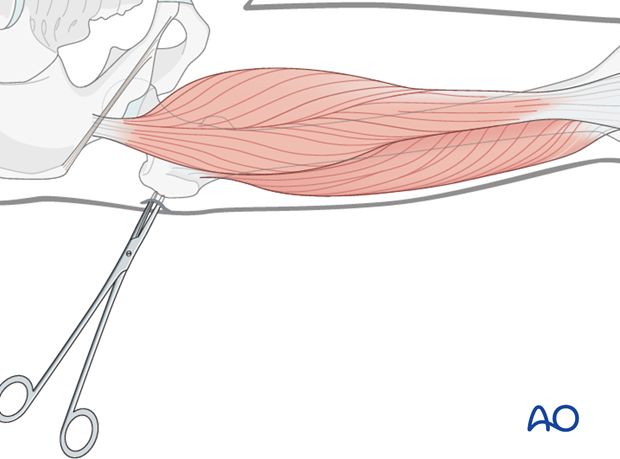
Soft-tissue dissection
In the midshaft region blunt dissection of the soft tissues and the use of small Langenbeck retractors will minimize muscular damage.
Using a straight clamp, prepare a channel for insertion of the pin.

Blunt dissection of the soft tissues in the trochanteric region is simpler as there is no muscle here.
Pin insertion
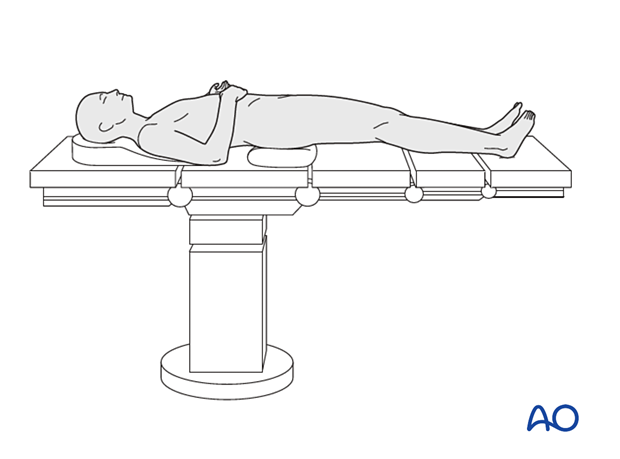
The most proximal pin is inserted through the greater trochanter slightly inferiorly. Its correct insertion and placement is essential for the stability of the proximal segment.
Pearl: When applying three pins in each fragment, insert only two pins initially and link with a rod fully loaded with three clamps. After tightening the clamps on the initial two pins, insert the third pin through its relevant clamp. If all three pins are inserted at once, it may prove impossible to link all three to the tube, if they are in slightly different alignments.
5. Frame construction / reduction and fixation (femoral shaft)
To increase frame stability a neutralization rod should be added.

6. Potential postoperative complications
Loss of reduction
In cases of delayed conversion of the external fixator to a definitive fixation, check x-rays are advisable within the first week and regularly thereafter, to ensure that the quality of reduction has been maintained.
Compartment syndrome
Close monitoring of the femoral muscle compartments should be carried out, especially during the first 48 hours, to ensure that compartment syndrome, requiring decompression by urgent fasciotomy, has not developed.
7. Aftertreatment following temporary external fixation
The patient should be taught appropriate pin-track care.
Whether the external fixation is temporary or definitive must be decided early after its placement. If desired, conversion to a nail or plate should be done within a week or two, before pin sites become infected. Of course, the patient’s general condition and local soft tissues must have become suitable to allow conversion of the external fixator to either a nail or plate.
If soft-tissue problems persist and/or the external fixator has been left on for 3 weeks or longer, the following steps need to be taken:
- Remove the external fixator and curette and wash the pin sites.
- Temporarily stabilize the femoral fracture in a Thomas’s splint.
- Let pin-tracks heal and then proceed to either nailing or plating.
Thick soft tissues around external fixation pins should be stabilized with compressive dressings or sponges. Otherwise, once bleeding has ceased, dressings can be replaced with daily pin site cleansing and an antibacterial ointment.
In the rare event that the fixator becomes the definitive fixation the aftercare should follow the guidelines as for definitive external fixation, as follow:
Functional treatment
Unless there are other injuries or complications, mobilization may be started on postoperative day 1. Special emphasis should be placed on active knee and hip flexion. Continuous passive motion may be used, but interrupted from time to time for active muscle strengthening exercises.
Weight bearing
Partial weight bearing (touch down, or 10-15 kg) may be performed with crutches or a walker. In transverse fractures weight bearing may be performed more assertively.
Follow-up
Wound healing should be assessed regularly on a short term basis within the first two weeks. Subsequently 6 and 12 week follow-ups are usually undertaken and more as indicated until the fracture has united.
Pin site care should be carried out daily until the frame is removed following fracture healing.
