Nailing limited open approach to the distal tibia
1. Skin incision
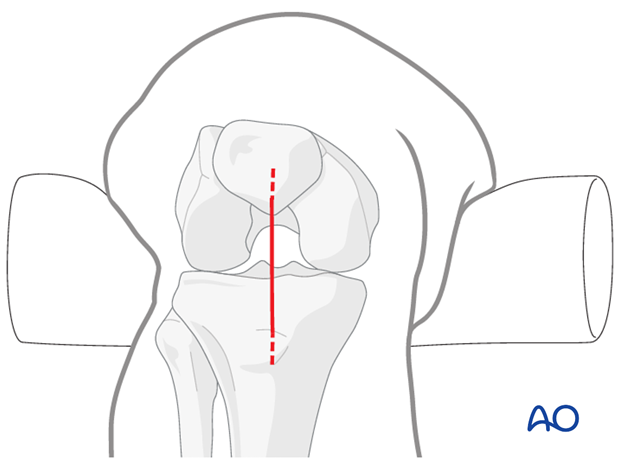
A longitudinal skin incision is made from lower pole patella to the tibial tuberosity. The incision is centered over the patellar ligament.
2. Relationship to patellar ligament
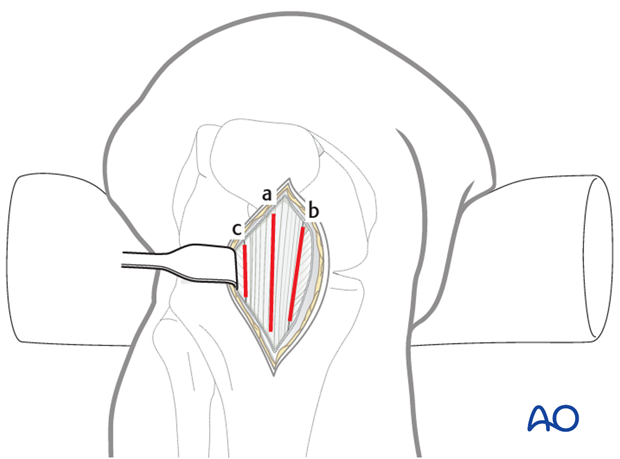
The patellar ligament can either be split in the middle or retracted after dividing the fascia on either the medial or lateral side. The entry site should be centered over the tibial medullary canal.
3. Mobilizing the fat pad
The anterior edge of the tibial plateau is identified. The retro-patellar fat pad is released from the tibia and moved posteriorly without opening the knee joint.
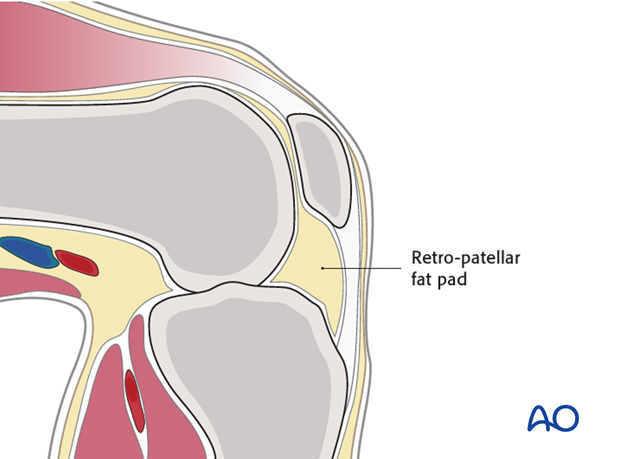
4. Determination of the entry point
The nail entry point, on the lateral view, varies depending on nail design.
The recommendations for the selected nail must be carefully considered. The more proximal the entry point, the less likely it is to create a large anterior tibial defect from reaming.
The nail must clear the patella, but not penetrate the posterior tibial cortex. It is first aimed slightly posteriorly, but then redirected along the medullary canal.
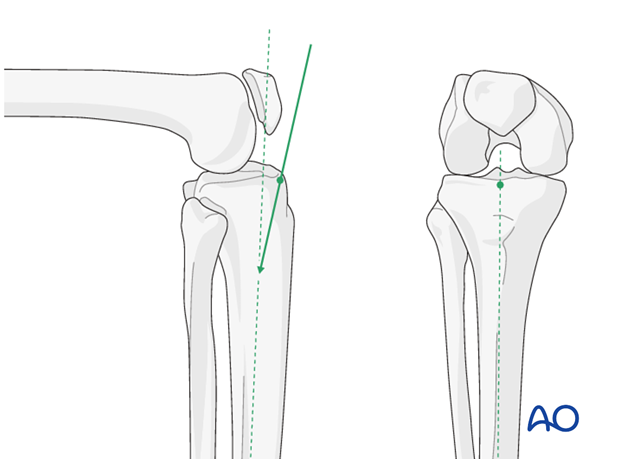
Entry point location
The nail entry point is on the anterior edge of the tibial plateau, missing the menisci, and centered over the medullary canal on the AP view.
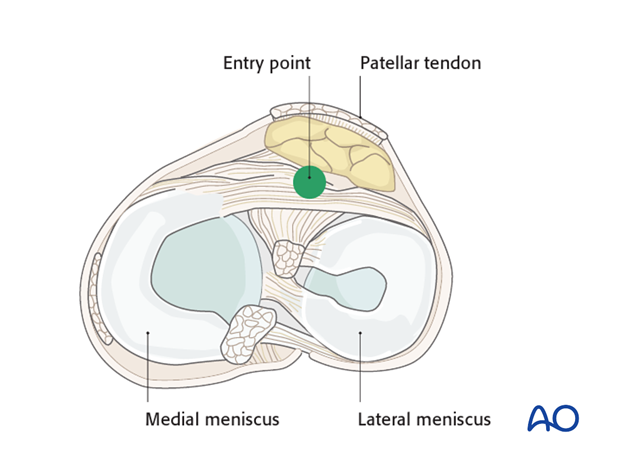
Entry site fluoroscopy
The entry site is just medial to the lateral tibial spine on the AP fluoroscopic view.
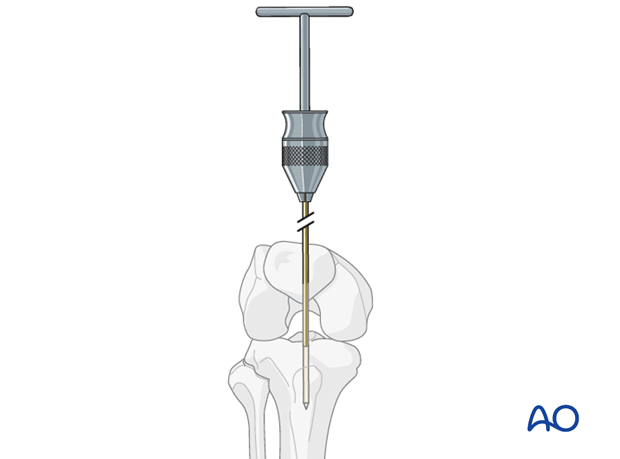
5. Opening the cortex
Different instruments are available for opening the cortex. A cannulated drill or cannulated cutting instrument can be inserted over a guide wire or pin. Alternatively, a curved entry site awl may be used, according to the surgeon’s preference. Initial placement of a guide pin allows radiographic confirmation before entering the bone.
Insertion of centering pin
(For cannulated cutter) A 4 mm centering pin (Steinmann pin) is inserted and passed distally, angled 15° in the sagittal plane to the axis of the tibial shaft, into the proximal aspect of the medullary canal. In the coronal plane, the pin is inserted in line with the axis of the tibia shaft.
Placement should be verified under image intensification in both planes.

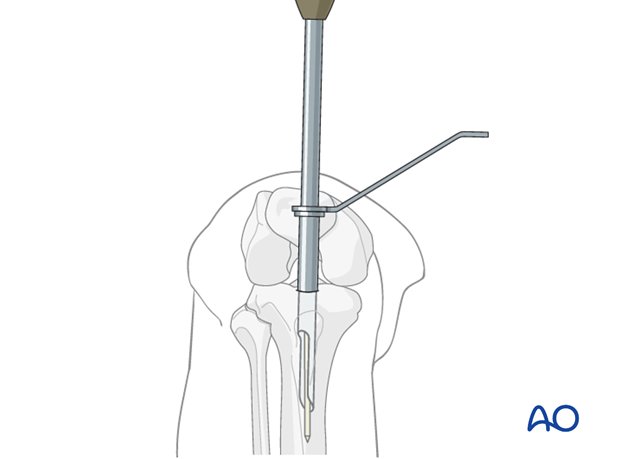
Opening the medullary canal with a cutter
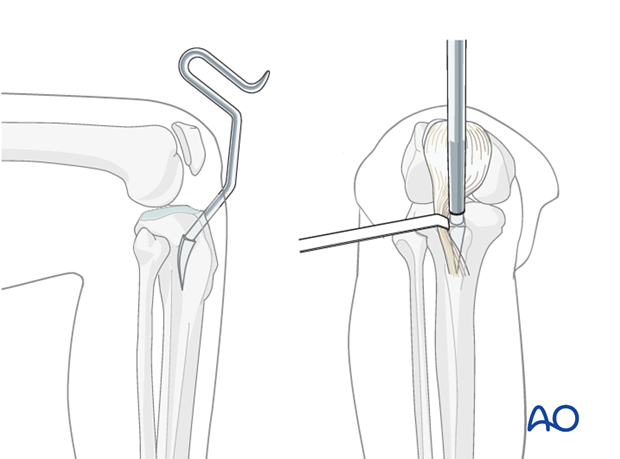
A cannulated cutter is inserted over the centering pin. The cutter is manually advanced rotating it to remove a core of cancellous bone until the canal is entered. The protection sleeve may be used to prevent damage of the patellar tendon.
Alternative: Opening the medullary canal with an awl
The sharp tip of the awl is pressed into the cortex at the entry site, aiming posteriorly, and advancing it, turning the awl back and forth. The awl should stay posterior to the anterior cortex, and in the midline aiming down the medullary canal on the AP view. The awl is gradually rotated to align it with the center of the canal on the lateral view.
The shaft of the awl should finish parallel to the anterior cortex of the tibia.
The patellar tendon is protected with a retractor.
