Cerclage compression wire fixation of olecranon osteotomy
1. Cerclage compression wiring
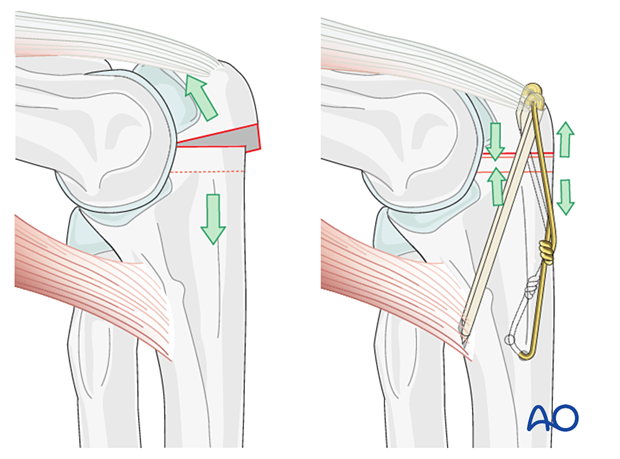
The philosophy behind cerclage compression wiring for the olecranon is that it converts tensile forces on the posterior side of the olecranon into compression forces at the joint line during flexion. The fixation is simple and inexpensive and works well if executed properly.
Choose a wire of sufficient strength to withstand the tensile forces generated in the figure-of-eight loop (1.2 mm/18 gauge). Positioning the K-wires as close to the joint while also penetrating the volar cortex is paramount.
This form of fixation was referred to as a “Tension band fixation”. We now prefer the term “Cerclage compression wire fixation” because the tension band mechanism cannot be applied consistently to each component of the fracture fixation. An explanation of the limits of the Tension band mechanism/principle can be found here.
Teaching video
AO teaching video: Ulna, Olecranon—Transverse Fracture (2U1B1) Cerclage compression wiring
2. Reduction
Reduce and hold the osteotomy with pointed reduction forceps to apply compression.
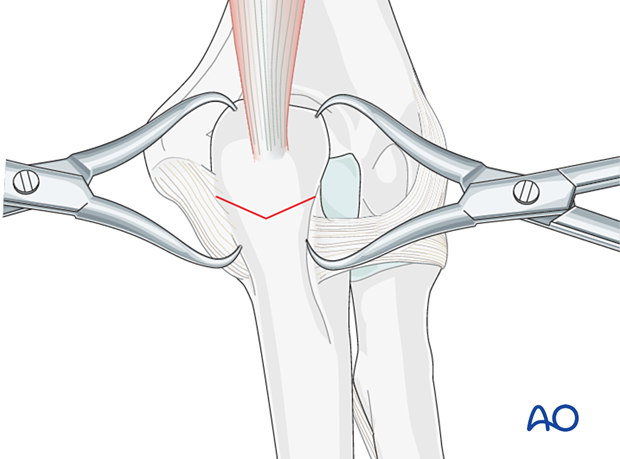
3. Preparation of wire insertion
Drilling
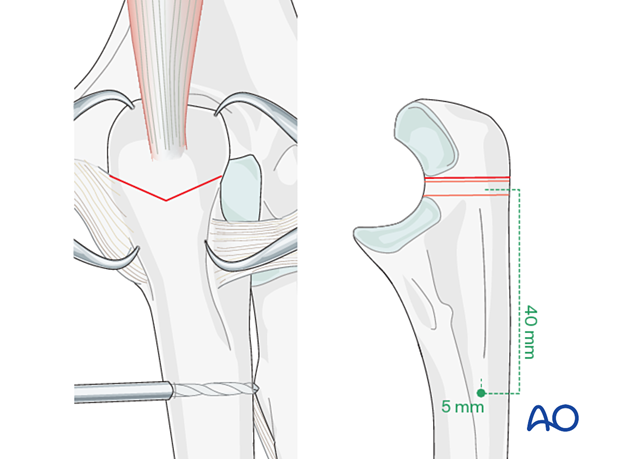
Approximately 40 mm distal to the fracture line and at least 5 mm from the posterior cortex, drill a hole through the ulna with a 2.0 mm drill, using a sharp drill guide as the drill tends to slide dorsally.
Wire preparation and insertion
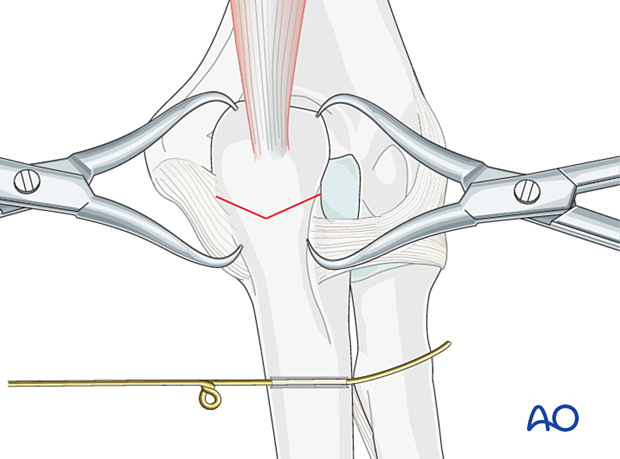
Prepare a 1.2 mm/18 gauge mm wire by making a loop approximately one third along its length.
Insert the shorter segment of the wire through the drilled hole from medial to lateral. As the ulnar nerve is medial, it is safer to introduce the wire from this side.
4. Insertion of K-wires
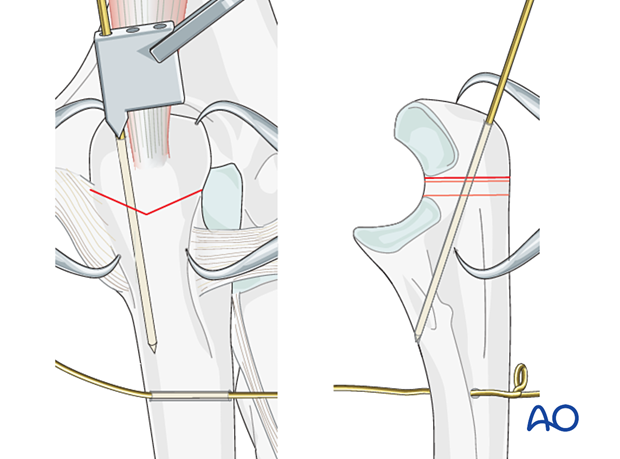
First K-wire
Using the drill guide, introduce the first 1.6 mm K-wire medially through the proximal end of the olecranon. Aim the drill towards the anterior cortex, passing as close as possible to the joint. Leave enough space on the lateral side for the second K-wire.
Drill the K-wire through both cortices.
Second K-wire
Insert the drill guide over the first K-wire, and insert the second 1.6 mm K-wire parallel to the first one.
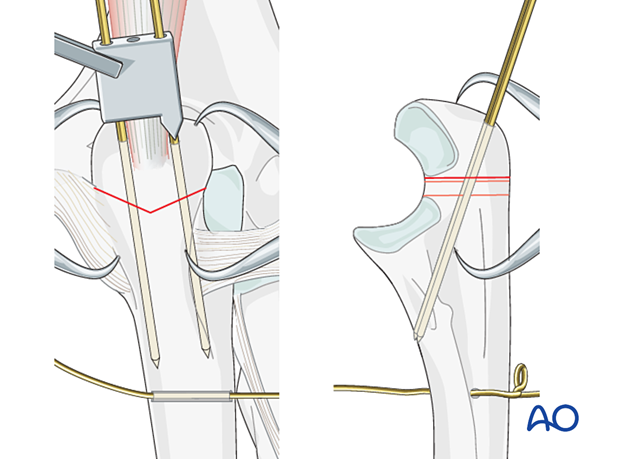
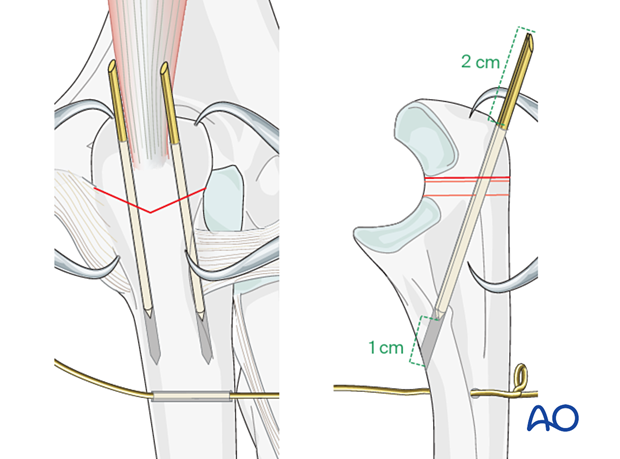
Check the position of both K-wires under image intensification. If the position of wires and osteotomy reduction is good, pull both K-wires back approximately 1 cm.
Provisionally cut the K-wire ends 2 cm above the bone.
5. Wire fixation
Figure-of-eight configuration
The small pointed reduction forceps can now be removed.
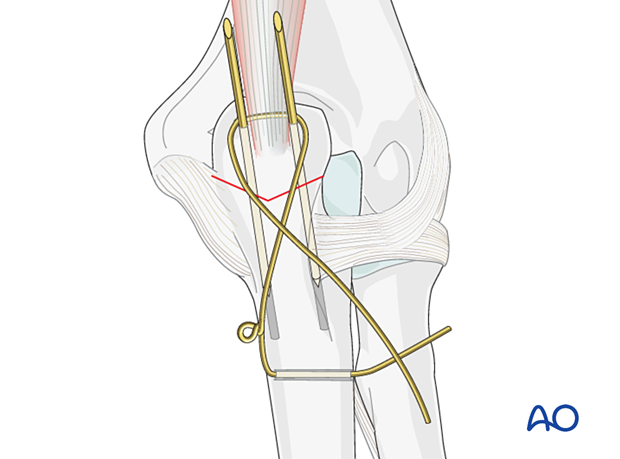
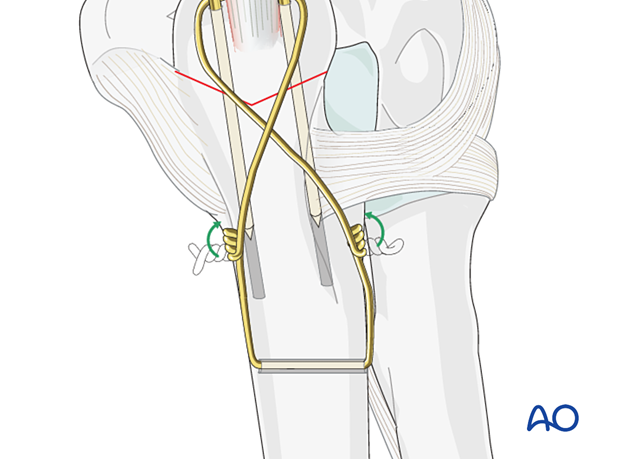
Pass the long segment of the wire (bearing the loop) in a figure-of-eight configuration beneath the triceps tendon around the protruding ends of the K-wires.
Unite the two wires with a little twist.
Placing the loops more proximal will allow a smaller incision when removing them after healing.
Tightening the wire
Loosely prepare the wire twist, ensuring that each end of the wire spirals equally – the twist should not comprise one spiral around a straight wire.
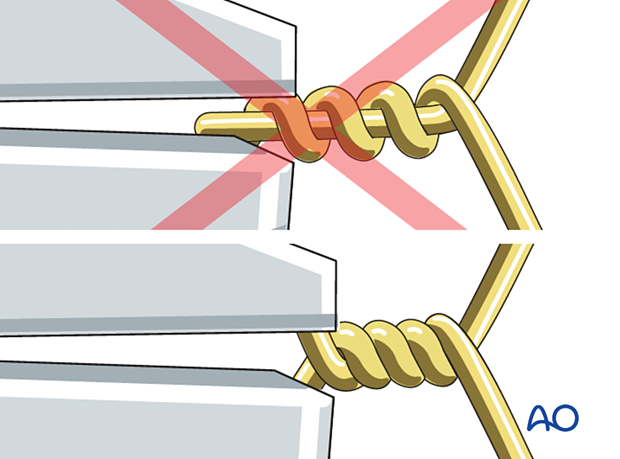
Cut the wire ends short.
The slack is then taken up by further twisting. Repeat this until the desired tension is achieved. Both loops must be tightened simultaneously and in the same direction to achieve equal tension on both arms of the wire.
By tightening the twist and the loop with two pliers simultaneously, the two fragments are drawn together such that the fracture is placed under compression.

Preventing later soft-tissue irritation
Trim the twisted wire and turn both ends towards the ulna/olecranon not to irritate the soft tissues later.
Sinking the K-wires
With the help of pliers, bending iron, and forceps, bend the proximal end of the K-wires 180°.
Cut the K-wires leaving a bend of about 5–6 mm. Make a small cut in the triceps to allow burial of the K-wires. Then drive the K-wires home, sinking their curved ends into the bone to prevent backing out and skin irritation. Closing the small cut in the triceps over the K-wires will help prevent backing out of the wires.

Checking results
Confirm stability of the fixation and range of motion, including supination/pronation. Check for K-wire impingement of the radioulnar joint. Final x-rays or image intensifier views should demonstrate good reduction and proper hardware position.


