Posterior paratricipital approach (Alonso-Llames) to the distal humerus
1. General considerations
The posterior paratricipital approach (Alonso-Llames) elevates the triceps off the posterior humerus but leaves the triceps insertion intact.
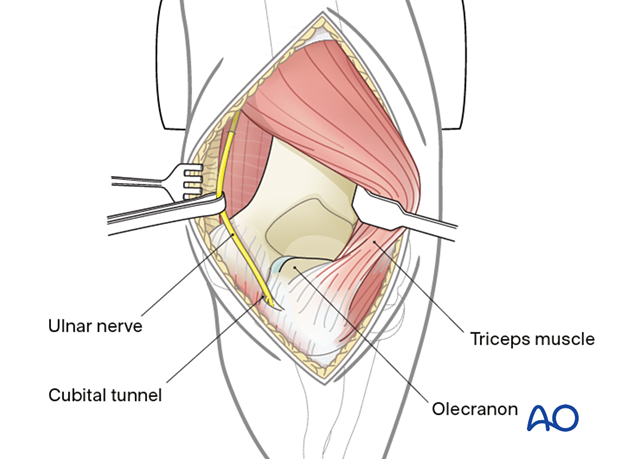
This approach can provide adequate exposure for reduction and fixation of extraarticular and simple intraarticular fractures of the distal humerus.
This exposure is very similar to the transolecranon approach but without the osteotomy. The triceps is elevated off the posterior humerus, but its insertion is not disturbed.
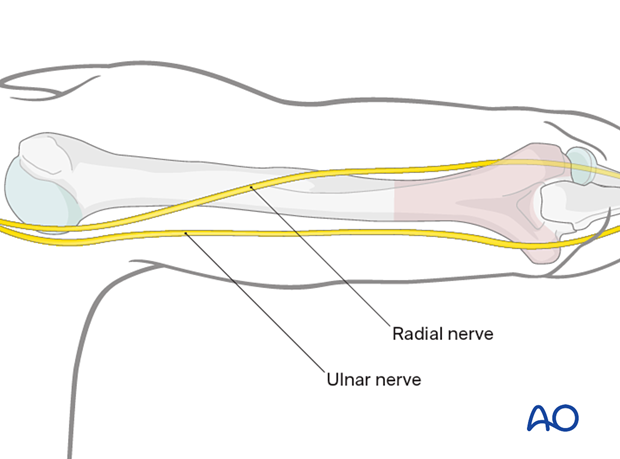
2. Skin incision
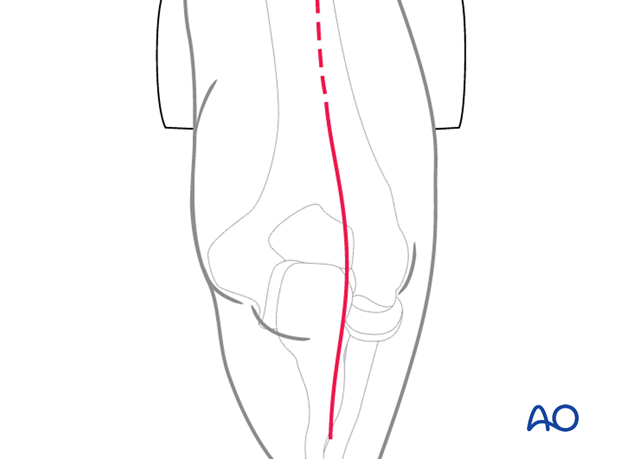
Make an incision centered on the junction of the middle and distal thirds of the humeral shaft. Avoid placing the incision over the tip of the olecranon. Some surgeons make a straight incision slightly medial or lateral, whereas others prefer a curved incision. The incision ends over the ulnar diaphysis.
Elevate full-thickness fasciocutaneous flaps to protect the cutaneous nerves.
3. Ulnar window
Identify the ulnar nerve proximally along the medial border of the triceps.
Superficially release the ulnar nerve through the cubital tunnel up until the first motor branch by incising the flexor-pronator aponeurosis as the nerve passes between the two heads of flexor carpi ulnaris.
Whenever possible, take care to preserve the perineural vessels.
The nerve may be transposed or left in situ according to the surgeon’s preference, but it should be tension free and not in contact with suture material or metalwork at the end of the procedure.
Take care to protect and be mindful of the nerve throughout the entire procedure.

4. Radial window
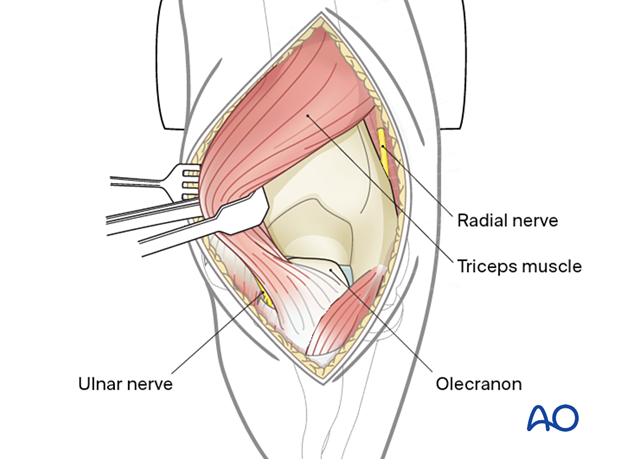
Split the triceps fascia and mobilize the muscle from the lateral intermuscular septum and humerus towards the ulnar side.
Distally, elevate the anconeus from the posterolateral distal humerus to allow direct visualization of the fracture.
This permits the whole triceps muscle to be moved towards either the lateral or medial side to access the humerus.
5. Maximizing joint exposure
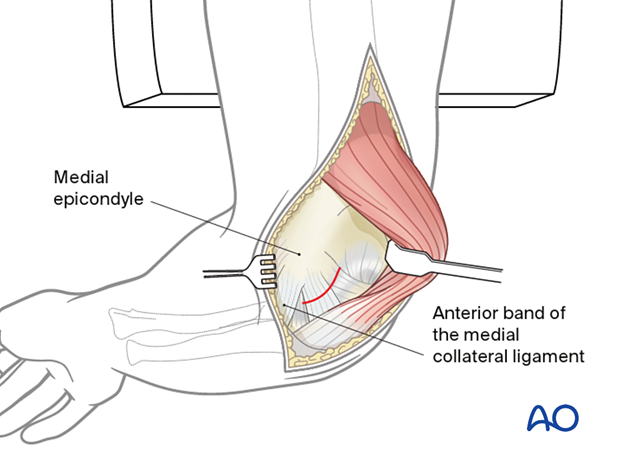
To maximize the exposure distally at the level of the joint, incise the posterior band of the medial collateral ligament on the medial aspect of the ulnohumeral joint. Take care not to release the anterior band of the medial collateral ligament.
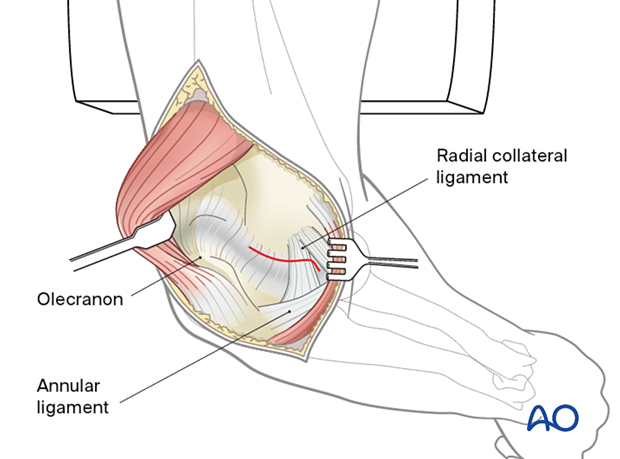
On the lateral side, incise the posterolateral capsule on the lateral side of the ulnohumeral joint. Take care not to release the lateral ulnar collateral ligament.
6. Wound closure
Close the wound in layers.
