Intraoperative imaging of the distal femur
1. Introduction
Fluoroscopic visualization of anatomical fracture reduction and correct implant placement for the distal femur can be significantly facilitated using the following views:
Standard views:
- AP view
- Lateral view
- Internal and external rollover view
- Notch view
The following represents ideal imaging with the patient placed in the supine position.
The relation between the distal femur and the image intensifier remains the same for patients placed in lateral decubitus. However, the orientation of the C-arm must be adjusted accordingly.
2. AP view of the distal femur
Positioning for optimal view
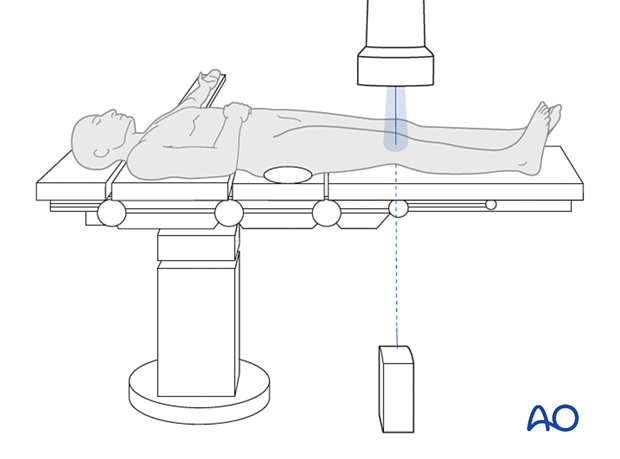
To obtain the optimal AP view of the distal femur:
- place the leg in full extension and neutral rotation.
- place the beam perpendicular to the axis of the femur.
AP images obtained with the knee in 30° flexion will not be very different from those recorded with the leg in full extension.
With the knee in 90° flexion, an AP view cannot be obtained.
Verification of optimal view
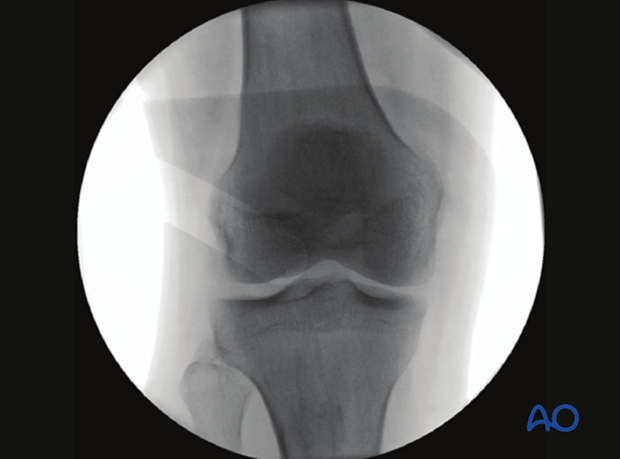
The optimal AP view of the distal femur is obtained when:
- the patella is centered over the femoral notch.
- there is 1/4 to 1/3 overlap of the fibular head and the lateral edge of the tibia (there may be individual anatomical variations).
- the distal femur is centered on the screen.
Anatomical landmarks and lines
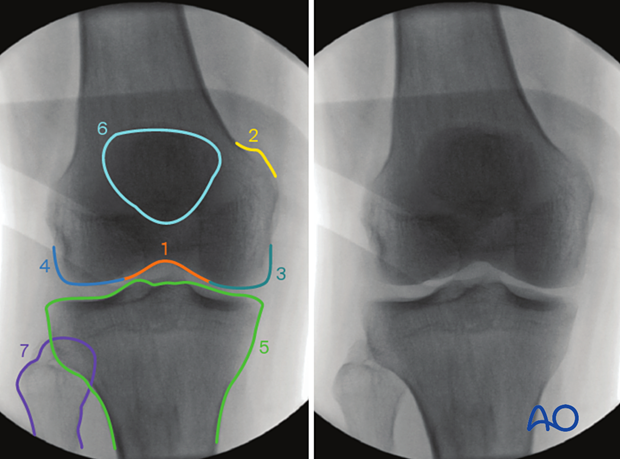
The following lines and landmarks can be observed in the AP view of the distal femur:
- The femoral notch
- Adductor tubercle
- Medial condyle
- Lateral condyle
- Proximal tibia
- Patella
- Fibular head
What can be observed?
The AP view of the distal femur is particularly useful to identify:
- excessive internal or external rotation of the articular block.
- varus/valgus deformity of the articular block.
- malreduction.
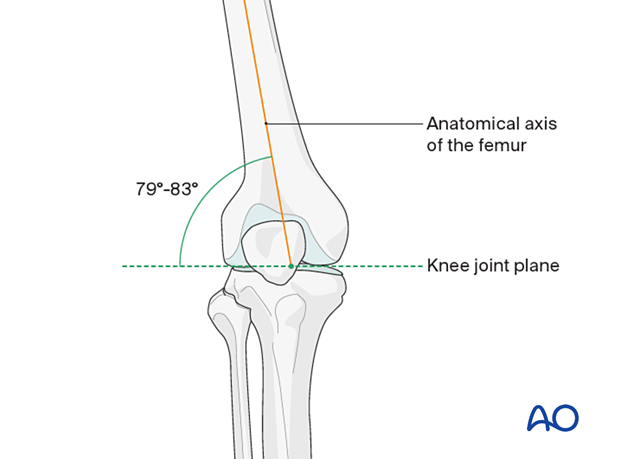
The correct angle between the distal femoral joint line and the femoral axis is 79-83°.
Images of the contralateral side may be beneficial as a reference.
Paradoxical notch view
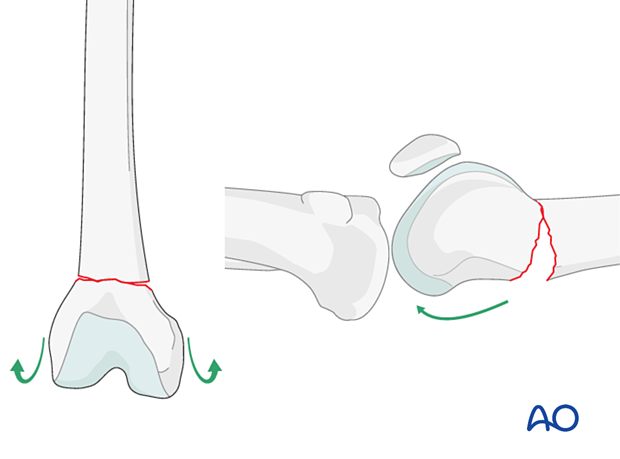
If the AP view of the distal femur yields an apparent notch view (increase height of the intercondylar notch), there may be a recurvatum deformity of the distal fragment
3. Lateral view of the distal femur
Positioning for optimal view
To obtain the optimal lateral view of the distal femur:
- flex the leg to elevate the knee.
- keep the leg in neutral rotation.
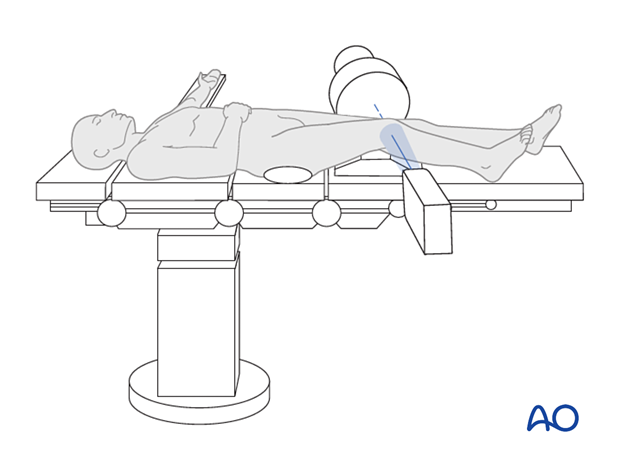
- place the beam parallel to the knee joint plane (this is around 79-83° to the anatomical axis of the femur).
Verification of optimal view
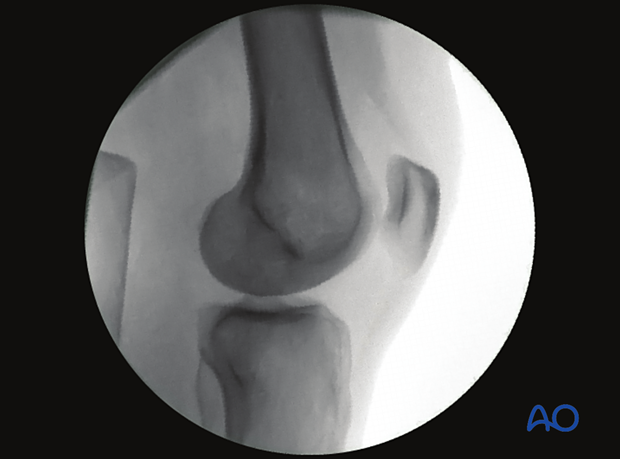
The optimal lateral view of the distal femur is obtained when:
- the femoral condyles are superimposed in the anterior, distal and posterior aspects.
- the femoral condyles are centered on the screen.
Anatomical landmarks and lines
In the lateral view of the distal femur, the following lines and landmarks are seen:
- Blumensaat's line
- Outline of the condyles
- Distal femoral shaft
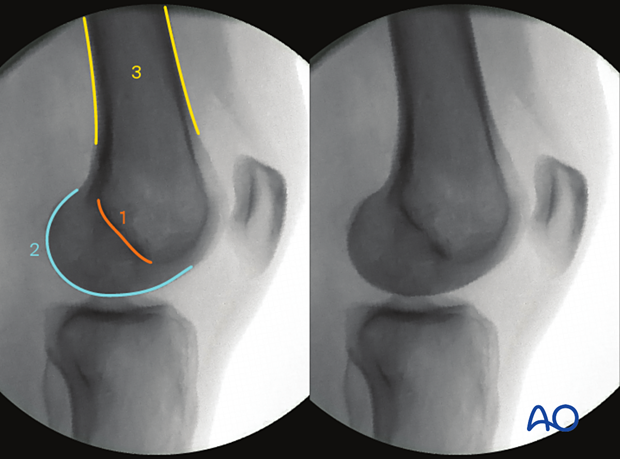
If the femur is rotated internally, you will see the lateral femoral condyle anterior to the medial condyle (and vice versa).
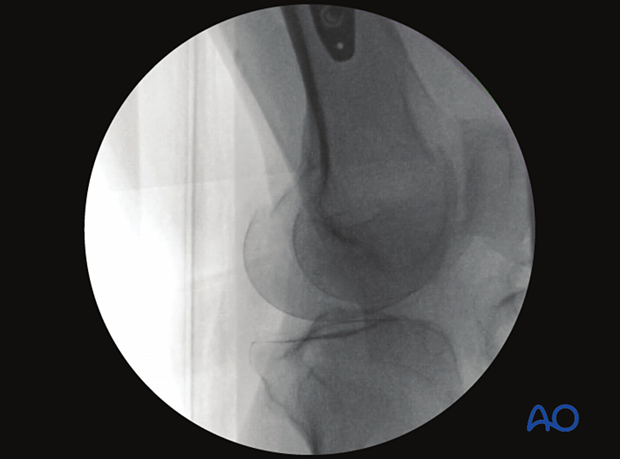
What can be observed
The lateral view of the distal femur is particularly useful to identify:
- malreduction of intraarticular fractures (eg Hoffa fractures) and extraarticular fractures.
- intraarticular screws.
- the correct position of lateral plates.
- recurvatum or antecurvatum of the articular block.
4. 25° External rollover view
Positioning for optimal view
To obtain the optimal external rollover view of the distal femur:
- start from the optimal AP view and rotate the C-arm externally until the optimal external rollover view is achieved (ca 25°).
- alternatively, rotate the femur 25° internally.
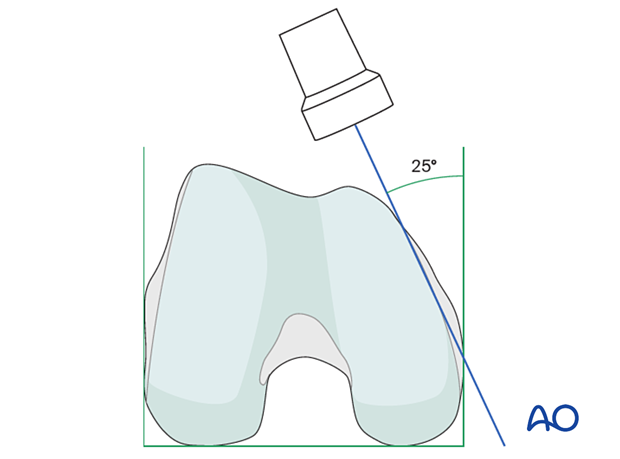
Verification of optimal view
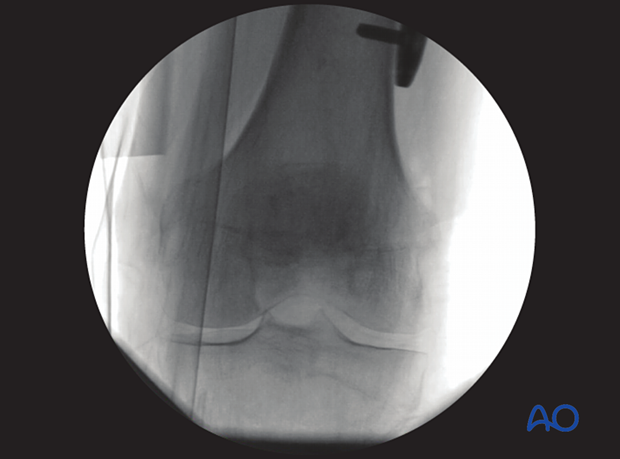
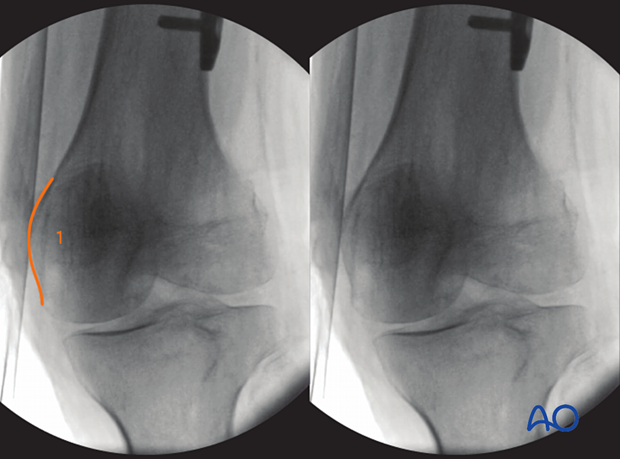
The optimal external rollover view is obtained when:
- the medial wall of the medial femoral condyle projects as one dense line.
- the distal femur is centered on the screen.
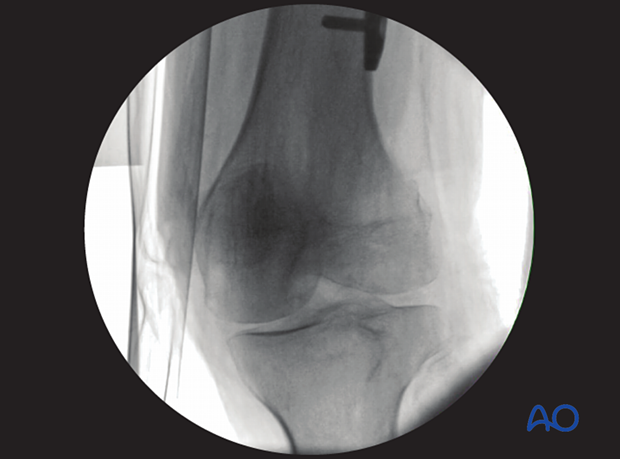
As reference, here the AP view of the same patient is given.
Anatomical landmarks and lines
The following lines and landmarks can be observed:
- The medial wall of the medial femoral condyle
What can be observed
The external rollover view is particularly useful to identify:
- medial screw/guidewire penetration.
- malreduction of a fracture projecting into the medial aspect of the distal femur.
5. 10° internal rollover view
Positioning for optimal view
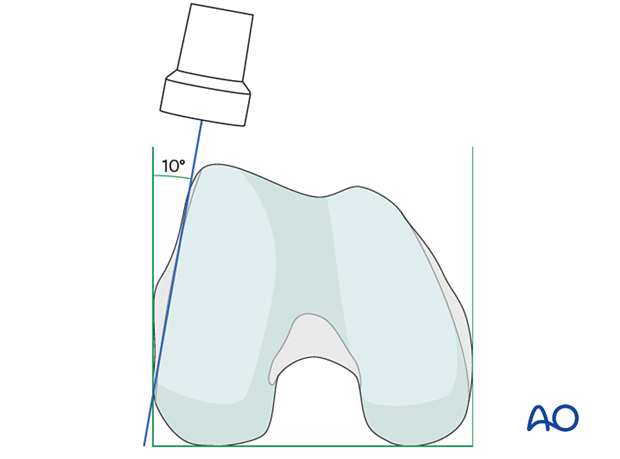
To obtain the optimal internal rollover view of the distal femur:
- start from the optimal AP view and rotate the C-arm internally until the optimal internal rollover view is achieved (ca 10°).
- alternatively, rotate the femur 10° externally.
Verification of optimal view
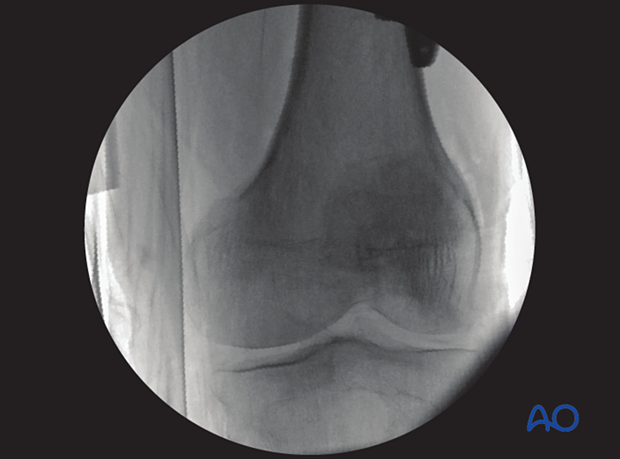
The optimal internal rollover view is obtained when:
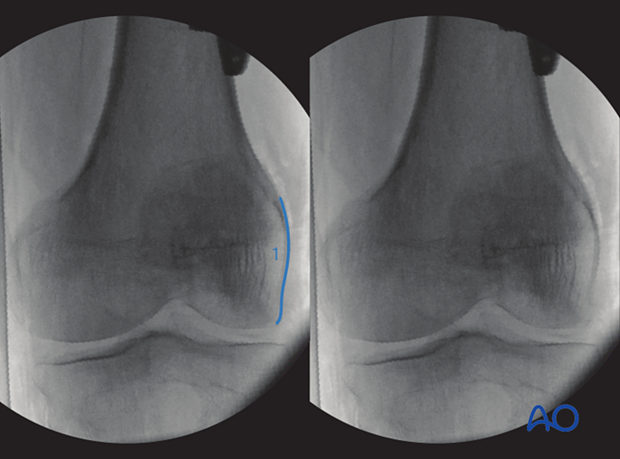
- the lateral wall of the femoral condyle projects as one dense line.
- the distal femur is centered on the screen.
Anatomical landmarks and lines
The following lines and landmarks can be observed:
- The lateral wall of the femoral condyle
What can be observed
The internal rollover view is particularly useful to identify:
- correct lateral plate placement (LISS, VA-LCP).
- malreduction of a fracture projecting into the lateral aspect of the distal femur.
6. Notch view
Positioning for optimal view
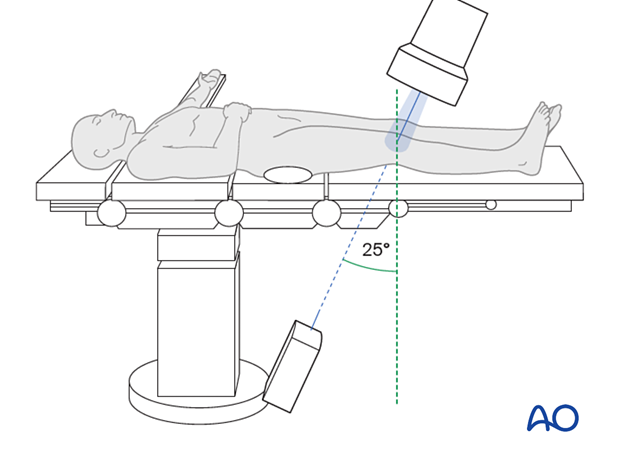
To obtain the optimal notch view of the distal femur, start from the optimal AP view, rotate the C-arm caudally until the optimal is obtained (ca 25°).
Verification of optimal view
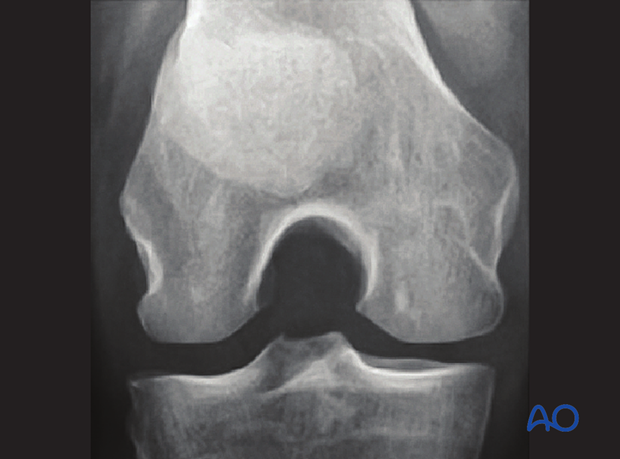
The optimal view is obtained when the:
- maximal height of the notch is reached.
- cortex of the notch projects as one dense line.
- beam is centered at the distal femur.
Anatomical lines and landmarks
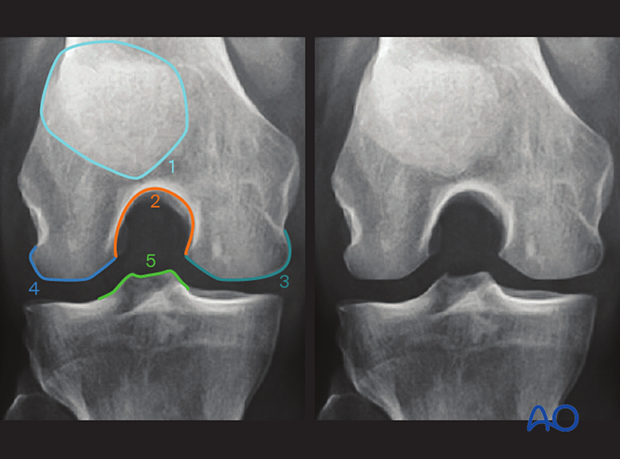
The following lines and landmarks can be observed:
- Patella
- Femoral notch
- Medial condyle
- Lateral condyle
- Medial and lateral tibial spine
What can be observed
This view is particularly useful to identify screws in the intercondylar notch.
