General stabilization principles and screw directions
1. Introduction
When using implants on the innominate bone, it is important to know the best starting points for obtaining optimal screw anchorage.
Slight differentiations in screw direction dramatically changes the depth of bony substance for screw penetration.
Basically one should try to obtain a maximum length for the screw in order to prevent screw loosening and fixation failure.
Some zones around the acetabulum are very risky for penetrating the hip joint. Therefore, if screws have to be placed in this region, it has to be proven that the screws do not perforate the joint.
2. Safe zones for screw placement
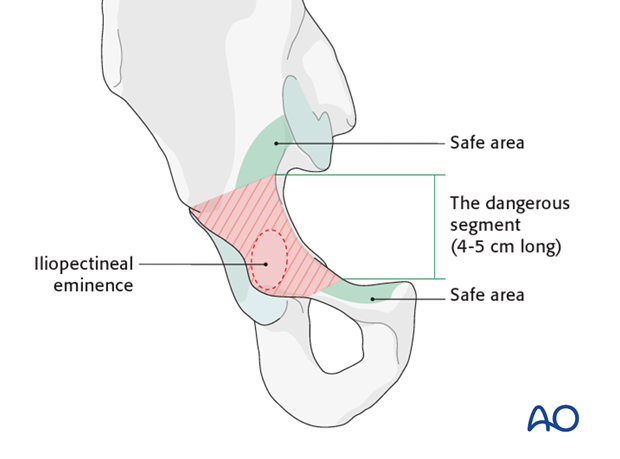
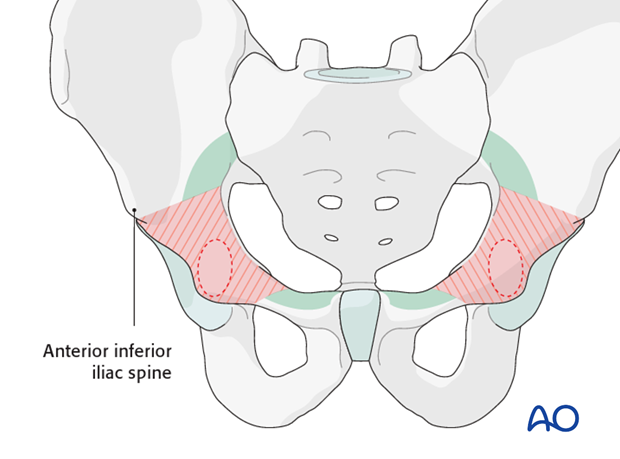
This drawing illustrates the regions for screw placement around the acetabulum using an anterior approach.
In green: regions in which screws can be inserted safely.
In red: area at risk of joint perforation when a screw is inserted.
3. Dangerous zone
The dangerous zone for screw placement through an anterior approach extends from the anterior border of the anterior inferior iliac spine to the anterior border of the iliopectineal eminence.
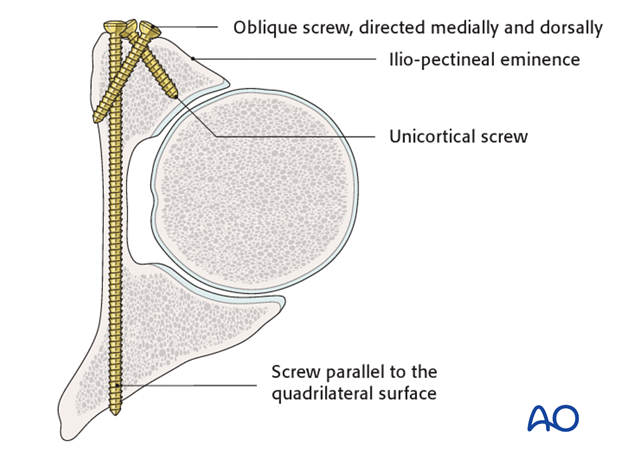
Screws placed in this region can easily violate the joint. Therefore, if they are required, screws must be placed perfectly parallel to the quadrilateral plate or be unicortical (see below).
4. Overview
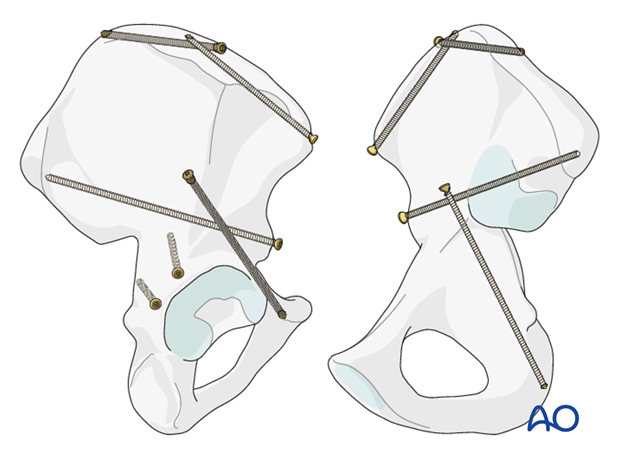
Several separate screws can be placed in the innominate bone for stabilization of specific fracture patterns of the acetabulum.
Normally, they are part of a larger construct which also involves plates and screws through the plate. Use a model to gain a clear understanding of the directions that can be used for standard screws around the acetabulum. This will make intraoperative orientation easier.
5. Posterior wall
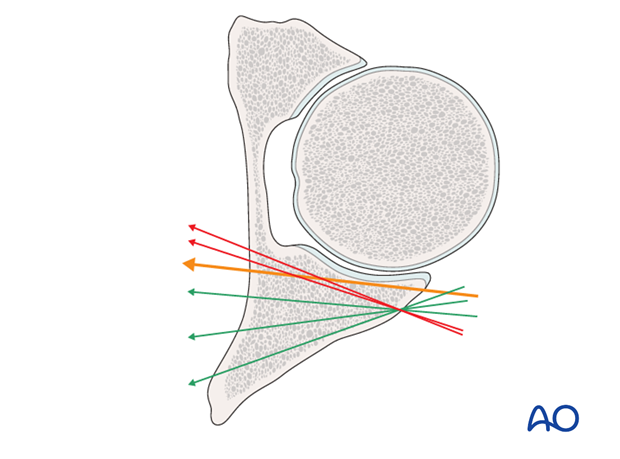
In the posterior wall, the screw direction is tangential or has a small angle to the surface of the posterior cortex. When drilling more perpendicular, there is a high risk of penetrating the joint.
In our illustration, the zones are outlined as follows:
- Green screw directions are acceptable.
- Red screws are dangerous.
Do not penetrate the orange line, which touches the articular surface of the posterior wall.
6. Anterior column
The insertion of a long screw into the anterior column from dorsal will only succeed if the right entry point is chosen. Typically, cannulated screws are used to allow the guide wire to be positioned first. The wire or drill bit starts above the anterior superior border of the acetabulum and aims towards the pubic tubercle. The screw may have a length of 70-100 mm.
A direct view into the slightly distracted hip joint helps to detect any joint penetration.
Palpation of the anterior superior border of the acetabulum through the soft tissue is helpful to control correct orientation of the drill bit. Perforation of the anterior column may damage the vessels.
Check under image intensification in two views: use a combination of the pelvic outlet and obturator view, and a combination of the pelvic inlet and ala view.
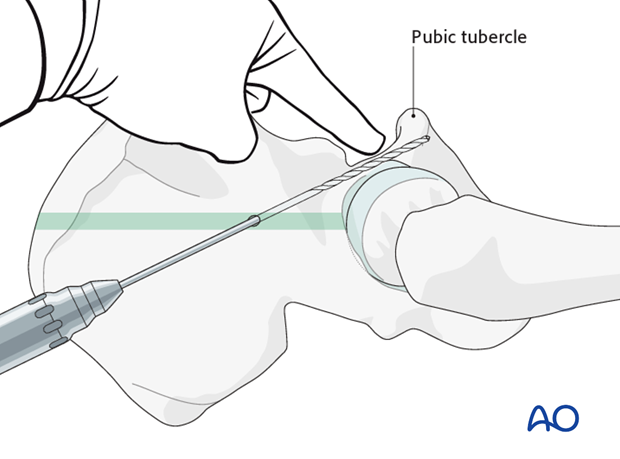
View from the inside of the pelvis
7. Posterior column
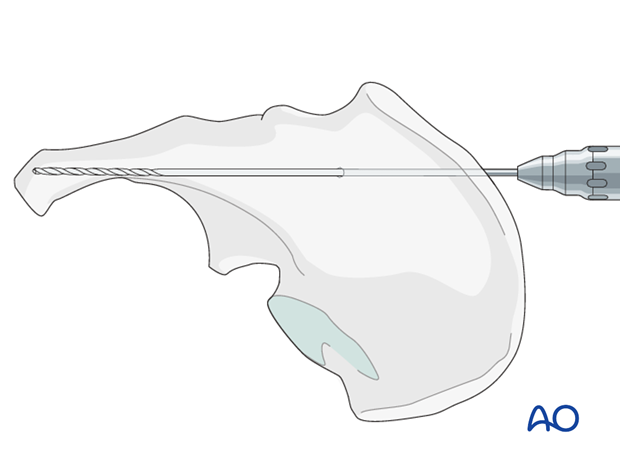
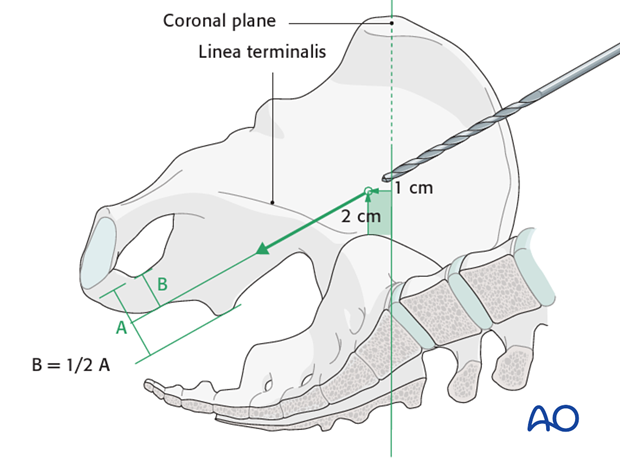
Insert a long screw into the posterior column through the first window of the ilioinguinal approach.
The entry portal should be located 2 cm lateral from the linea terminalis in the coronal plane of the anterior superior iliac spine. The guide wire or drill bit aims towards the sciatic buttress. The screw may have a length of about 70-100 mm.
Joint perforation, or the placement of a short screw which does not cross the fracture line, must be avoided.
8. Iliac crest
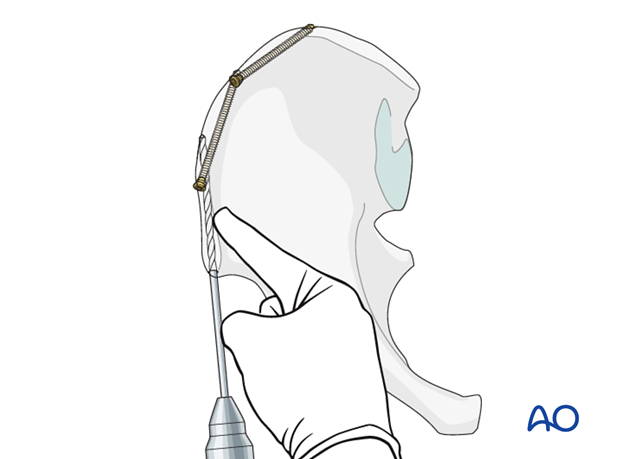
While inserting screws into the iliac crest, use your index finger, placing it on the inner border of the iliac crest for manual control of the correct drill direction.
Note
It is important to achieve anatomical reduction and fixation even in fracture lines far distal to the joint. Unreduced fractures at the iliac crest will produce steps in the joint. For this reason, in the technique described we advocate beginning the fixation at the level of the joint if possible.
9. Transverse section through the iliopectineal eminence
At the level of the iliopectineal eminence screws should either be very short and unicortical, inserted very close and strictly parallel to the quadrilateral surface, or directed medially and dorsally.
10. Quadrilateral plate
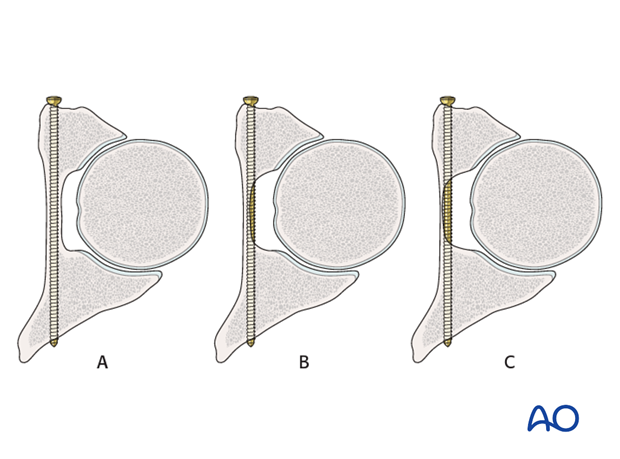
A screw inserted strictly parallel to the quadrilateral surface at the level of the cotyloid fossa may not be harmful.
The following three situations can occur:
- The screw is totally embedded in the quadrilateral plate (A).
- The screw has broken the floor of the fossa (B).
- The floor of the fossa is so thin that the screw is nearly totally exposed in the fossa (C), but it is still away from the head because of the two layers of cartilage of the socket and the femoral head.
