Buccal sulcus approach
1. Introduction
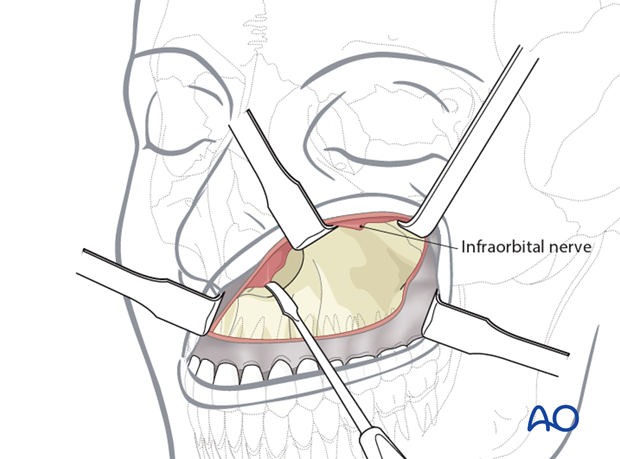
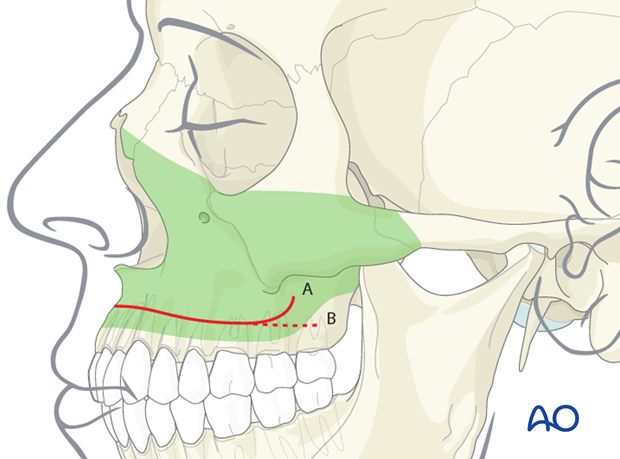
The skeleton of the lower midface is commonly exposed using a transoral approach in the maxillary vestibule. A horizontal incision (possibly with hockey stick endings) through the maxillary vestibular mucoperiosteum is made slightly above the mucogingival junction. The subsequent subperiosteal dissection can be advanced to access the entire anterolateral bony surfaces from the zygomaticotemporal suture over the facial antral wall to the borders of the piriform aperture and up to the infraorbital rim including the infraorbital nerve exit.
Access area
The anterolateral surfaces of the lower midface skeleton can be exposed via a unilateral or bilateral maxillary vestibular approach:
- Entire anterior face of the maxilla
- Zygomaticomaxillary buttress
- Infraorbital rim
- Zygomatic body, anterocaudal part of zygomatic arch
- Piriform aperture
- Anterior nasal spine and caudal nasal septum
Neither the posterior wall of the maxilla or the pterygomaxillary fissure and fossa can be directly visualized.
The length of the vestibular incision and extent of subperiosteal dissection are varied according to the area of surgical interest and the extent of the intervention. In case of a zygomaticomaxillary fracture, the incision is limited to one side.
2. General consideration
The maxillary vestibular approach is simple and safe, as long as the dissection proceeds strictly in the subperiosteal plane.
Though the overall morbidity is low, potential complications can occur from violating some anatomic structures:
- Infraorbital nerve
- Nasolabial musculature
- Buccal fat pad
- Pterygoid venous plexus
- Zygomaticofacial nerve
3. Vasoconstriction
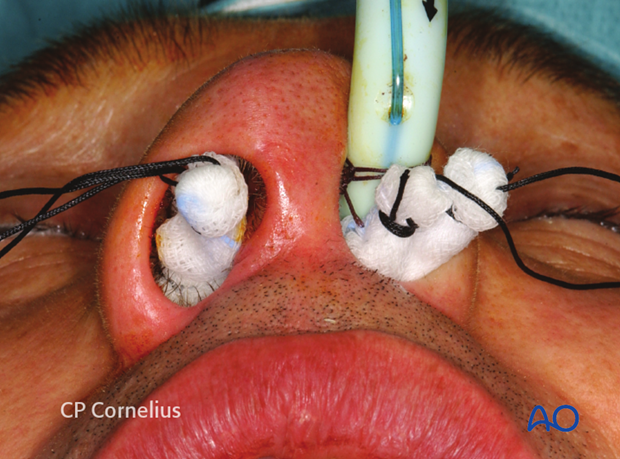
To achieve a good hemostatic effect, vasoconstrictive agents are applied at least 10 to 15 minutes before beginning surgery.
Nasal packs (eg, cotton pledgets or brain cotton pads) are soaked with a vasoconstrictor according to the surgeon’s preference and …
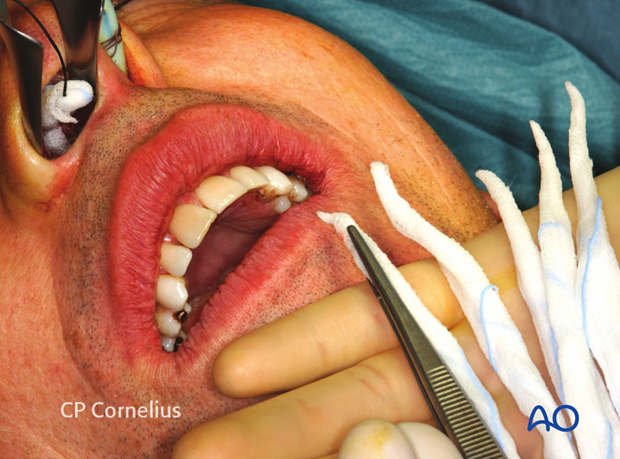
… inserted in an up to down sequence.
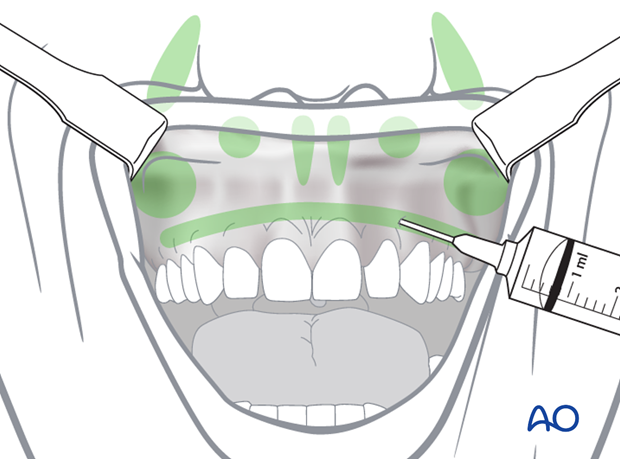
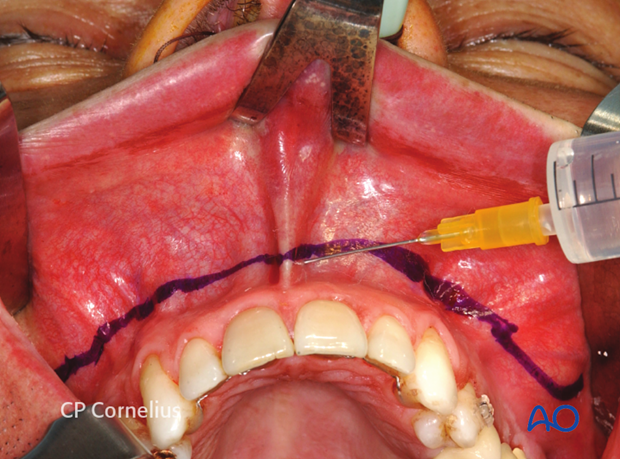
A line of a local anesthetic mixed with epinephrine (1:100.000 or 1:200.000) is injected submucosally above the mucogingival junction. Next, small amounts of the solution are injected beneath the alar bases and the nasolabial grooves to constrict the facial vessels. The anterior nasal spine and caudal septum junction, the infraorbital nerve exit and canine fossa, as well as the maxillary tuberosity and pterygopalatine fossa region are infiltrated with additional small quantities of the mixture.
This clinical photograph shows the injection of a local anesthetic.
4. Incision
The incision is made at least 3-5 mm above the mucogingival junction using a scalpel blade or an electrocautery needle.
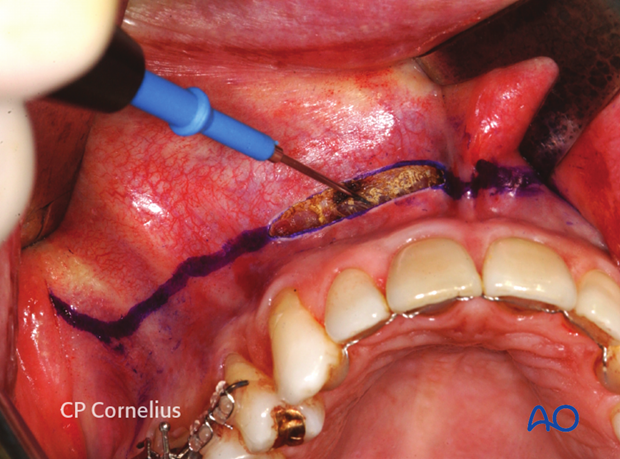
The incision is carried down through the mucosa, submucosa, underlying facial muscles and periosteum …

… onto the bare bony surface.

Edentulous patients
In edentulous patients make sure to use a crest of the ridge incision rather than a vestibular incision.
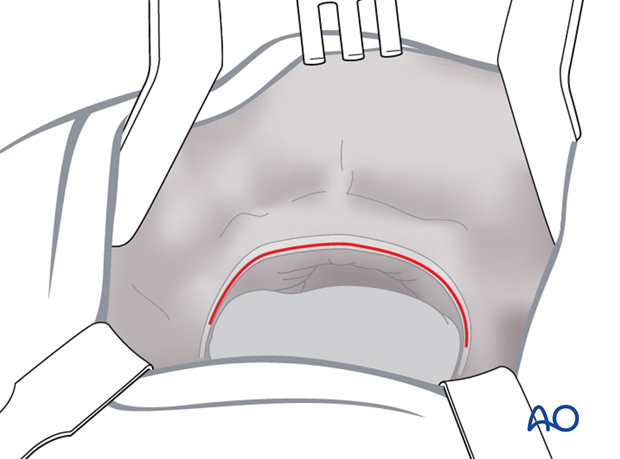
5. Vertical height of the incision line
The vertical height of the incision line leaves an inferior cuff of moveable mucosa and buccinator muscle on the alveolus that will facilitate closure. This tissue cuff will contract immediately after cutting. During wound closure, however, the tissue outstretches and can be easily grasped.
A bilateral horseshoe type incision allows access to the entire anterior surface of the lower midfacial skeleton.
A hockey stick shaped incision with a vertical vestibular extension at the dorsal ends (A) has the advantage of being easily extendible onto the zygomatic prominence, while the risk of uncontrolled tearing of the mucosa during retraction is reduced in contrast to a horizontal posterior cut (B).
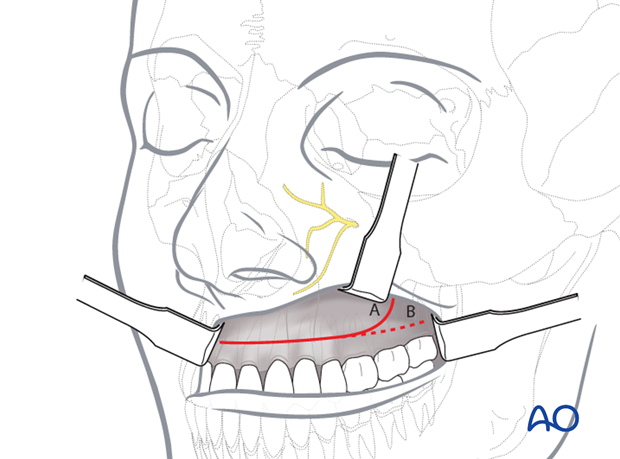
Pitfall: too high an incision
In the anterior region the incision line should not be placed too high in order not to lose the bone contact and to avoid entrance into a low piriform aperture.
Palpation of the piriform rim and anterior nasal spine ensures incision placement below these structures.
In the edentulous maxilla, where the alveolar crest and the nasal floor converge due to progressive bone atrophy, the incision should be placed along the base of the alveolar crest.
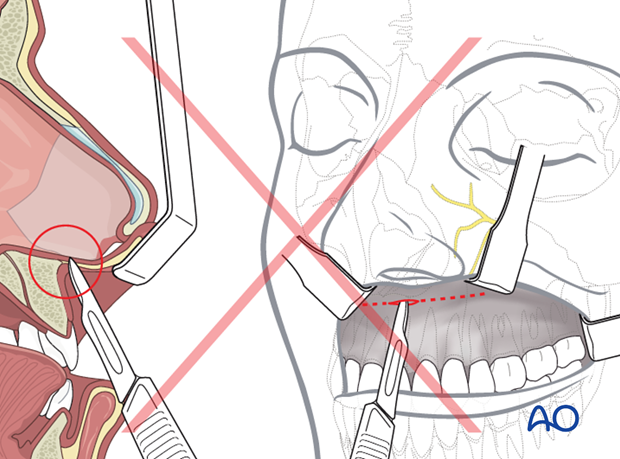
6. Subperiosteal dissection of anterior maxilla and zygoma
Sharp periosteal elevators are used to strip the soft tissues in the subperiosteal plane.
The periosteal dissection is performed in a systematic fashion:
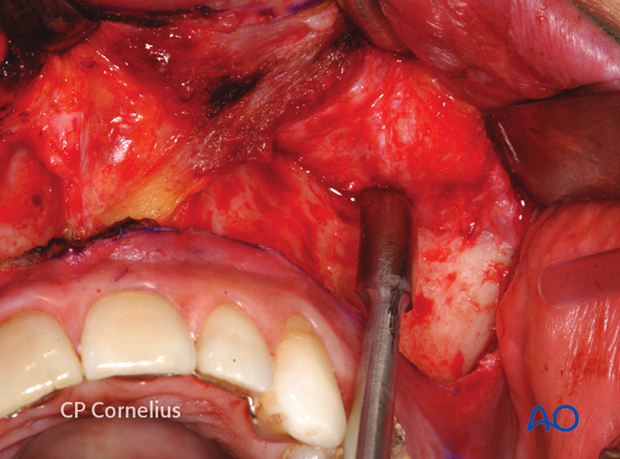
First the canine fossa is freed in an upward direction toward the location of the infraorbital foramen. The dissection may move on superiorly to the infraorbital rim.
Then the medial and lateral bony buttresses are addressed:
The nasolabial musculature along the piriform aperture is detached, followed by a dissection over the zygomaticomaxillary crest and the anterior surface of zygomatic body.
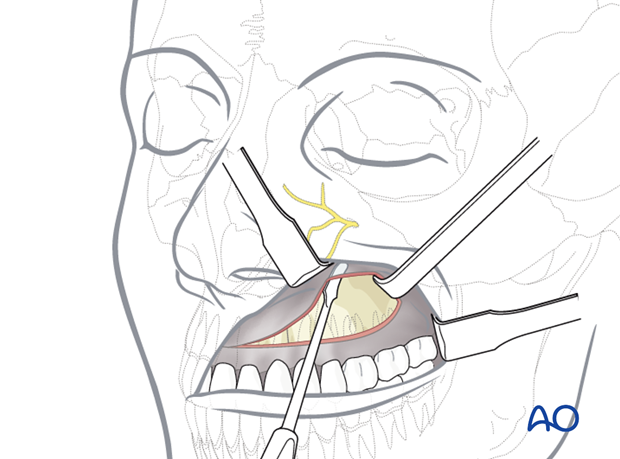
This clinical photograph shows the dissection.
A dissection extending onto the anterior zygomatic arch necessitates sharp transsection of the adjoining masseter muscle attachments.
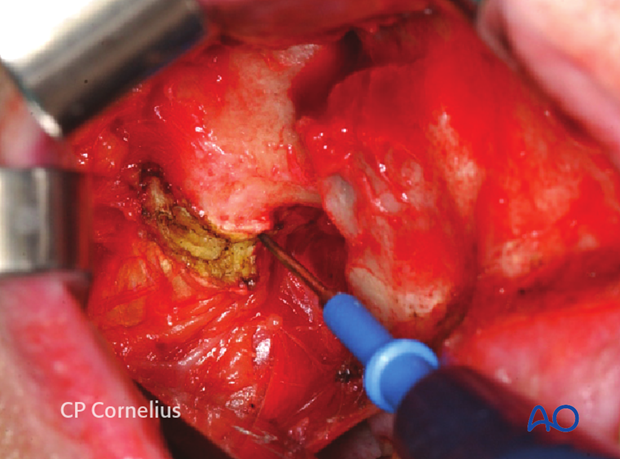
This clinical photograph shows the exposure gained.
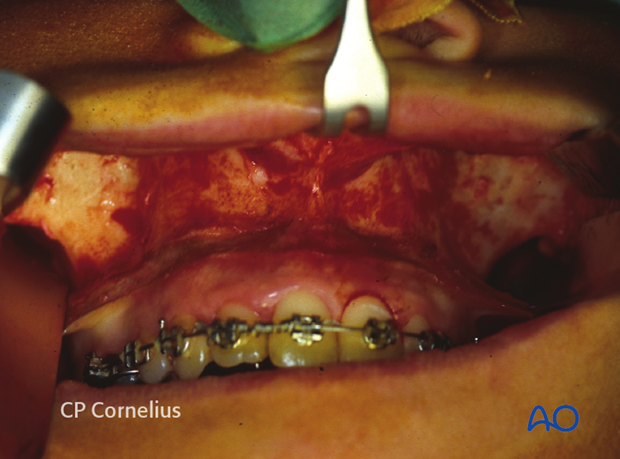
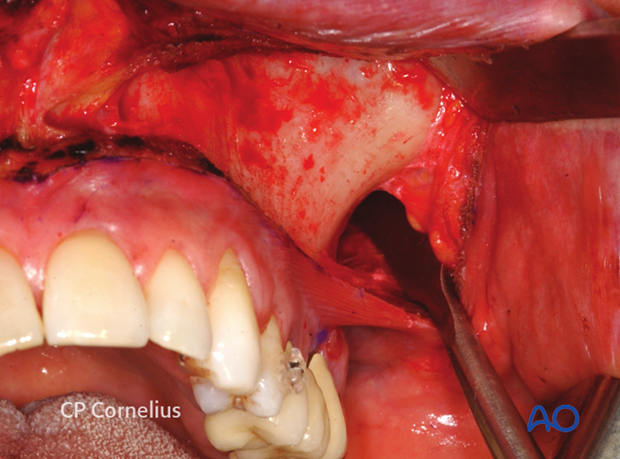
7. Subperiosteal dissection of the anterior midline and posterior (pterygopalatine fissure)
Finally the subperiosteal dissection moves behind the zygomaticomaxillary buttress into the region of the maxillary tuberosity and the pterygomaxillary fissure.
Since this part of the dissection is done without visual control, the tip of the periosteal elevator is always kept in intimate contact with the bony surface. A perforation of the periosteum and slippage into the soft tissues can either produce a herniation of the buccal fat pad obscuring the surgical field and/or heavy bleeding (profuse from the pterygoid vein plexus, or brisk from branches of the maxillary artery).
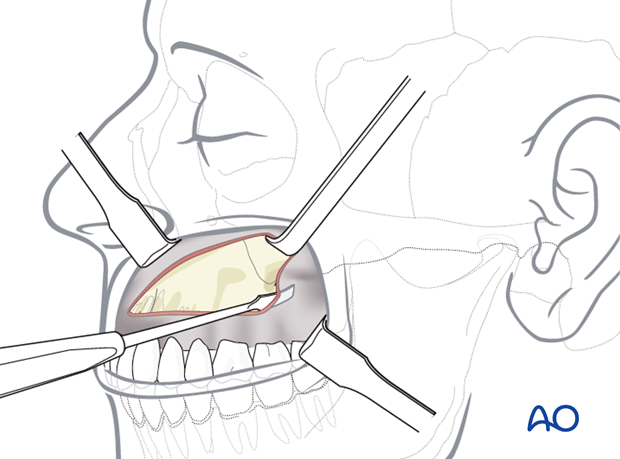
This clinical photograph shows the dissection.
8. Submucosal dissection of nasal cavity
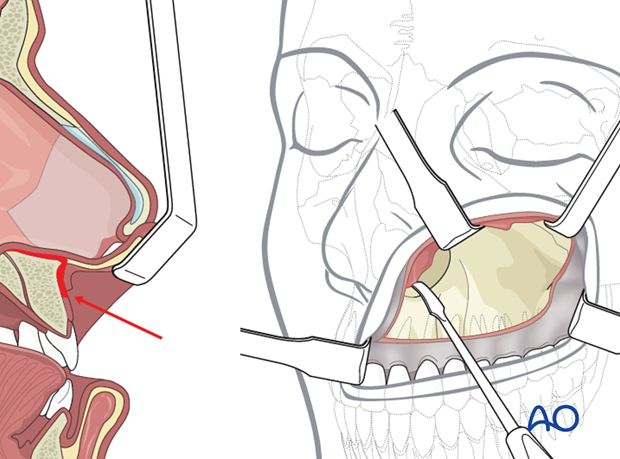
The nasal mucosa can be detached from the lateral wall, floor, or nasal septum with periosteal or Freer elevators, if necessary.
The anterior nasal spine and the lower border of the cartilaginous septum are addressed by soft-tissue retraction with a forked angle retractor and the perichondrium on top of the cartilaginous septal border is incised.
The attachments of the nasal mucosa are dissected subperiosteally and subperichondrally beginning with sharp instruments around the piriform border and the bony septal crest of the maxilla. As soon as the correct plane is reached, the dissection is continued bluntly. Following this method, the nasal mucosa can be stripped successively.
9. Closure
Prior to closing the mucosal incision of the maxillary vestibule, two strategies to compensate for contraction of the stripped nasolabial muscles are possible:
- Identification and resetting of the alar bases (cinching suture)
- V-Y Closure of the mucosa.
As a consequence of subperiosteal dissection, the insertions of the nasolabial muscles are stripped and the muscles will contract. This leads to inversion of the upper lip, flattening of the nose (decrease in tip projection), and flaring of the nasal alar bases.
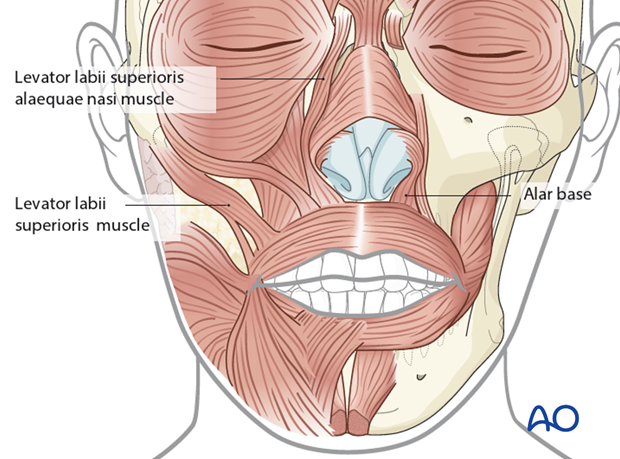
10. Identification and resetting of the alar bases (cinching sutures)
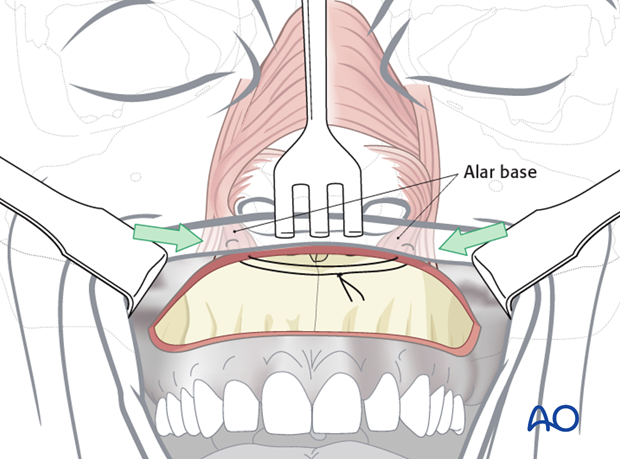
To control the width of the alar base, an alar cinch suture is used.

The muscles are exposed by grasping the alar facial groove between thumb and index finger. A suture is passed through the insertion area of the labial muscles. Then the suture is passed through the opposite side in order to create a loop.
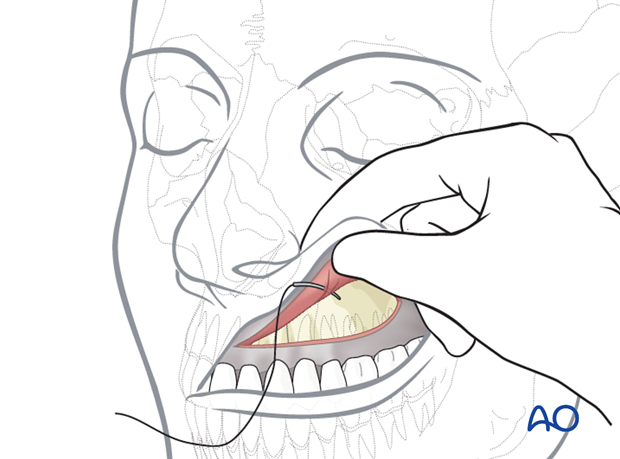
When the loop is tightened the alar bases are pulled medially. The effect is checked externally. The suture is tied only if the cinching effect is adequate; otherwise, the maneuver has to be repeated.
11. V-Y Closure of the mucosa
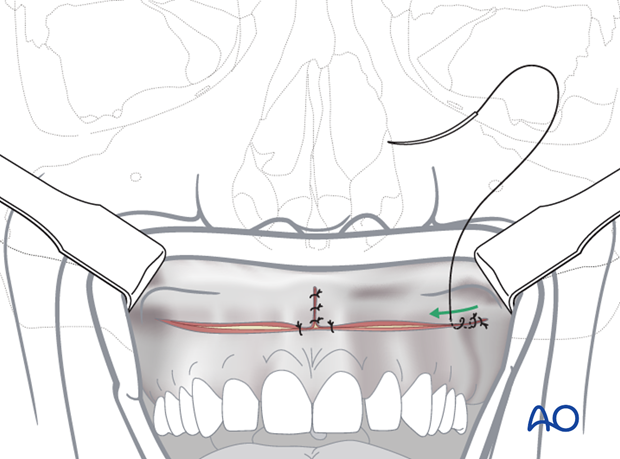
To counteract the lateral pull of the orbicularis oris muscle, the upper vestibular incision is closed in a V-Y advancement fashion. The vestibular mucosa is advanced with a skin hook in the midline to pull the soft-tissue envelope anteriorly. The edges of the incision fall together in the midline and are vertically sutured together over a distance of up to 1 cm. This creates a pout in the midline of the upper lip, creates volume, and everts the vermillion.
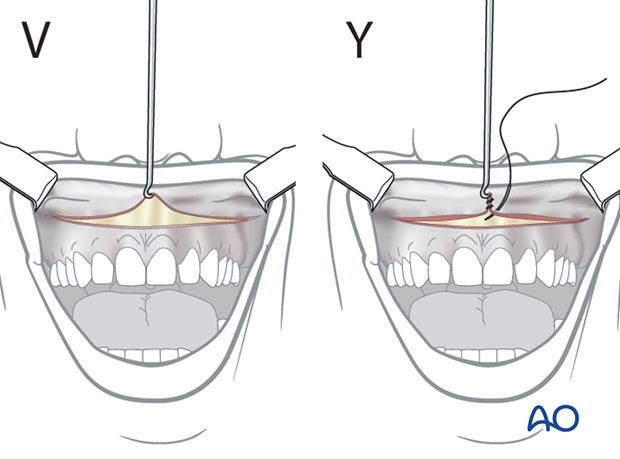
When the anterior V-Y closure of the mucosa is completed, sutures are placed to realign the lip to the center of the maxilla. In the illustration, one suture on each side of the V-Y closure is shown.
While closing the horizontal incision, an advancement of the upper edge of the vestibular mucosa should be made. Beginning posteriorly, sutures are placed through mucosa, submucosa, musculature, and periosteum in a staggered fashion bringing the upper vestibular mucosa in an anterior position along a rotational arch.
